Lisa Curran Flexible Learning Unit Staff College Teaching & Learning
DIGITAL STORYTELLING PHOTO STORY 3 While you are waiting for this Webinar to begin please make sure your audio is working. Go to the Tools menu, select Audio and then Audio setup wizard and work through the prompts. Lisa Curran Flexible Learning Unit Staff College Teaching & Learning

Lisa Curran Flexible Learning Unit Staff College Teaching & Learning
E N D
Presentation Transcript
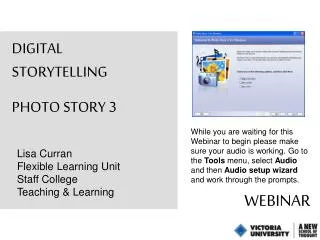
DIGITALSTORYTELLING PHOTO STORY 3 While you are waiting for this Webinar to begin please make sure your audio is working. Go to the Tools menu, select Audio and then Audio setup wizard and work through the prompts. Lisa CurranFlexible Learning UnitStaff CollegeTeaching & Learning WEBINAR
Today’s agenda • What is digital story telling? • Free tools for creating digital story telling • Tools for storyboarding and assessing digital stories • Examples of digital story telling • Using PhotoStory 3 to create a digital story • More examples • Resources
What is Digital Story Telling? • Digital Storytelling is a fantastic way to engage students. There are many different definitions of "digital storytelling," but in general, all of them revolve around the idea of combining the longstanding art of telling stories with any of a variety of available multimedia tools, including graphics, audio, video animation, and Web publishing.
Tools for storyboarding and assessing digital stories Storyboarding • Storyboard templates in Word and PDF, developed by Jason Ohler • Digital Storytelling Cookbook, from the Center for Digital Storytelling Assessing • Digital Storytelling Rubric, by Stacy Behmer, Iowa State University • Researching and Evaluating Digital Storytelling as a Deep Learning Tool, by Helen C. Barrett • Rubrics for Digital Storytelling Class, by Meg Ormiston
Let’s look at 2 different examples of digital stories • Traditionally digital stories have been used to capture the lives, emotions, experiences and the ‘journeys’ or transformations of everyday people. • Being Australian Being Me is an example of telling a story with narration and pics. • Digital story telling can also be used to demonstrate a technical skill. • Pop Rivet is an example of demonstrating a technical skill.
Using PhotoStory 3 to create a digital story – Step 1 • Photo Story 3 is freeware from Microsoft which runs only on Windows XP computers. By adding titles, one’s own narration and background music, it is possible to create digital stories quickly and easily. • Download the software from Microsoft at: • http://www.microsoft.com/windowsxp/using/digitalphotography/photostory/default.mspx
Using PhotoStory 3 to create a digital story – Step 2 • Have your photos and script ready! Poem • Envy • is a scavenging hyena, • slinking, tail between his legs • on the dry grassy savanna, • jealous of the lion's power. • Jealousy is a creeping snailleaving a slimy trail • as he slidesthrough the undergrowth of your mind • without a leg to stand on
Using PhotoStory 3 to create a digital story – Step 3 Open Photo Story • Click Start, point to All Programs, and then click Photo Story 3 for Windows. • On the Welcome page, click Begin a new story, and then click Next. • This step also allows you to edit a previously made story or play a story.
Using PhotoStory 3 to create a digital story – Step 4 Import and arrange your pictures • Things you can do: import images, remove black borders, rotate images, simple photo editing. To add pictures to your photo story • Click Import Pictures. • In the File Browser dialog box, browse to the folder where your pictures are located. • Add the pictures. • To add more than one picture at a time, press and hold the CTRL key and click on the pictures you want to add, and then click OK. All of your pictures should now be present in the timeline. • To reorder you images, click and drag a picture in the timeline to change the sequence. • NOTE: you can always add more images by repeating step 2 above. • OPTIONAL: You may wish to remove the black borders of your images. Click Remove Black Borders. Click Yes to All. Click OK.
Using PhotoStory 3 to create a digital story – Step 4 Rotate and Crop, Auto Fix and Add Effect • Add Effect tab: None, Black and White, Chalk and Charcoal, Colored Pencil, Diffuse Glow, Negative, Outline Black, Outline Grey, Sepia, Washout, and Water Color. • When you are finished making changes to your pictures, click Save Project and navigate to your drive and create a folder “photostory.” Select that folder then type the file name. • Click Next to continue.
Using PhotoStory 3 to create a digital story – Step 5 Add a title/text to your pictures • Click the first picture, and then type text in the text box to the right of the picture. • Click the Select Font button. • In the Font dialog box, select a Font, Font style, and Size, and then click OK. • Click an align button to move the title up and down on the page. Repeat steps 1 and 2 to add text to the other pictures. • When you are finished adding text to your pictures, click Save Project. Then click Next.
Using PhotoStory 3 to create a digital story – Step 5 Narration & customising motion Things you can do: • add narration to each individual slide, • customize motion by adding transitions, pans and zooms, • set the amount of time for each image, • preview your movie.
Using PhotoStory 3 to create a digital story – Step 5 • Set up: To record sound, insert your microphone into the appropriate port in your computer. Configure the microphone and sound level by running the Sound Hardware Test Wizard.
Using PhotoStory 3 to create a digital story – Step 5 • Select the image you want to record sound on. • Click the Record Narration button to start recording narration. The red dot in the record button will flash indicating recording is taking place. A timer is provided to help you keep track of your narration length. • When you have finished narrating the picture, click the Stop Recording button. • Test your voice-over by selecting the Preview button. • Repeat steps 1 thru 4 for each picture for which you want to add narration.
Using PhotoStory 3 to create a digital story – Step 5 Customize motion • Click on the image in the timeline you wish to work with. • Click on Customize Motion button directly below the picture. • The program defaults to the motion and duration tab. This allows you to determine the pans and zooms. • Click the Specify start and end position of motion. The images in the Start position and the End position will have handles appear. Use the handles to position the images for the desired effect. In the example above, when this image appears in the movie, it begins as a large image and zooms inward upon completion of the image in the movie. Additional options: • Set start position to be the same as end position of the previous picture. This will allow for smooth transitions between the images. Set end position to be the same as the start position. Use this effect to have no change throughout the time the image is displayed in the digital story. Number of seconds to display the picture: overrides the automatic feature above, allows for more specific user control of image display. • Preview the effect. • Save the effect. NOTE: this is a save function for this image effect and it does not save the project. • Use the arrows to go to the next image and repeat the process.
Using PhotoStory 3 to create a digital story – Step 5 Transitions: • NOTE 1: Cross dissolve is the default. • Click the Transition tab across the top. • The program displays the previous picture and the current picture with the effect between it. • Use the scroll on the right side of the window to select the transition and preview. Use the arrows below the time display to migrate from picture to picture. • Click Save (again, saves the transition effect to the slide and not the file itself) and then Close if you are done. • Repeat as necessary.
Using PhotoStory 3 to create a digital story – Step 6 Add background music To create music for your story • Click the first picture in the timeline, and then click Create Music. • In the Create Music dialog box, select a Genre, Style, Band, Mood, Tempo and Intensity. • Click Play to hear what the music will sound like. • When the music has finished playing, click OK to close the Create Music dialog box. • Click the first picture in the timeline, and click Preview, to see how well your music fits the story. • Click Save Project, then click Next, to move on to the final steps.
Using PhotoStory 3 to create a digital story – Step 7 Save your story • Formats for saving your story include playback on your computer, sending the story in an e-mail message, and saving the story for playing on portable devices such as Portable Media Center's, Pocket PCs and Smartphones. • Click Browse to navigate tofolder and name your story. • Click Save, and then click Next. • Click View your story. • Note: You may wish to render the movie as a 320x240 file if your intent is to post the movies online or send through email.
More examples of digital stories • Center for Digital Storytelling - Stories - Education • Bridges to Understanding - Gallery • Stories for Change • Streetside's - Tech Tales Digital Stories • Adobe Youth Voices - Youth Work Gallery
Resources • Digital Storytelling Toolkit • Creating the Connections – a digital stories resource kit for adult literacy teachers • Resources for creating digital stories • Digital Storytelling Internet Resources • Web 2.0 Tools