Shadow Making
Shadow masking is a technique used in photography and filmmaking to create dramatic lighting effects. By blocking light with objects or materials, photographers can control the shape and intensity of shadows, adding depth and mood to their images. It's a versatile tool often used to highlight specific elements or create a sense of mystery or suspense.

Shadow Making
E N D
Presentation Transcript
Shadow Making & Photo Editing Services | Photo Retouch PH How to make shadow puppets This fun STEM resource focuses on making shadow puppets while nurturing an understanding of the relationship between light and shadow. With shadow puppets, kids learn while they play, exploring stories, characters, and even science in an engaging and interactive way. Shadow puppetry holds a special kind of magic for children. The simple act of casting shadows transforms into an exciting world of storytelling and imagination, as well as offering Shadow Making educational benefits by helping stimulate creativity and serving as a playful introduction to the concepts of light and shadow. We've created this shadow puppet experiment to support the teaching of key topics within design and technology (D&T) and science as part of the primary national curriculum at key stage 2 (KS2). This resource focuses on making shadow puppets and developing supporting knowledge about the relationship between light and shadow. This could be used as a one-off activity in D&T or science or linked with the IET primary activity ‘How does the light from a torch change with distance.
Activity Making shadow puppets Shadow Puppets: A Fun and Creative Activity Introduction Shadow puppets are a simple yet delightful form of storytelling that has been used for centuries. They involve creating figures from cardboard or paper and casting their shadows onto a screen. This activity is not only fun but also encourages creativity, imagination, and storytelling skills. Materials Needed Cardboard or thick paper: For making the puppets Scissors: To cut out the shapes Glue or tape: To secure the puppets Strong light source: A flashlight or a lamp will work White sheet or wall: To serve as a screen Markers or crayons: To decorate the puppets (optional) Steps Involved Choose Your Shadow Making Characters: Decide what characters you want to create. This could be animals, people, or even imaginary creatures. Draw the Shapes: On a piece of cardboard or thick paper, draw the outlines of your characters. Keep in mind that the shapes will be projected as shadows, so simplicity is often best. Cut out the Shapes: Carefully cut out the shapes you've drawn. You can use scissors or a craft knife. Add Details (Optional): If you want to add more detail to your puppets, you can use markers or crayons to color them in. Create a Stage: Find a suitable space to set up your shadow puppet theater. A room with a blank wall or a large sheet hung up will work well. Set Up the Lighting: Place your light source behind the screen. This will ensure that the shadows are cast onto the screen. Start Performing: Hold your puppets between the light source and the screen. Move them around to create different shapes and shadows. Use your voice to narrate the story.
Here are the steps to make a shadow puppet theatre at home Creating a Shadow Puppet Theater at Home Introduction A shadow puppet theater is a fun and creative project that can be enjoyed by people of all ages. It's a great way to spark imagination, storytelling skills, and artistic expression. With a few simple materials, you can create your own magical world where shadows come to life. Materials needed a cardboard box: A large cardboard box will serve as the base of your theater. A strong light source: A flashlight or a small lamp will work. White sheet or thin cloth: This will be your screen. Scissors or craft knife: For cutting the cardboard. Tape or glue: To secure the parts together. Markers or paint: To decorate your theater. Cardboard or thick paper: To make your puppets. Toothpicks or skewers: To attach the puppets to sticks. Instructions Prepare the Box: Cut a rectangular hole in the front of the cardboard box. This will be the Shadow Making stage for your puppets. Make sure the hole is large enough for your puppets to fit through. Create the Screen: Attach the white sheet or thin cloth to the back of the box, behind the hole. Make sure it is taut and doesn't have any wrinkles. Set Up the Lighting: Place the light source behind the box, shining through the hole. This will cast the shadows of your puppets onto the screen. Make the Puppets: Draw or trace your desired puppet shapes onto cardboard or thick paper. Cut out the shapes and attach them to toothpicks or skewers. These sticks will be used to manipulate the puppets. Decorate Your Theater: Use markers or paint to decorate your theater. You can add curtains, scenery, or anything else that suits your imagination. Start the Show: Turn off the lights and shine the light source through the hole. Place your puppets behind the hole and manipulate them to create shadows on the screen. Tell stories, act out scenes, or create your own puppet shows.
For this DIY shadow puppet theatre you will need Creating a DIY Shadow Puppet Theater Introduction A shadow puppet theater is a simple yet captivating way to entertain children and adults alike. By casting shadows onto a screen, you can create magical stories and bring characters to life. This guide will walk you through the steps of creating your own DIY shadow puppet theater, using materials that are readily available. Materials Needed Cardboard box: A large cardboard box will serve as the base of your theater. Cutting tools: A utility knife or scissors. Step- by-Step Instructions Prepare the Box: Choose a cardboard box that is large enough to accommodate your puppets and audience. Cut a rectangular opening at the top of the box to create a viewing window. Make sure the opening is large enough for you to manipulate the puppets. Create the Screen: Attach the white sheet or fabric to the inside of the box, directly behind the Shadow Making viewing window. This will serve as your screen. Ensure the fabric is taut and free of wrinkles. Build the Puppet Stage: Cut a rectangular piece of cardboard that is slightly smaller than the viewing window. Place the cardboard piece inside the box, below the screen, and secure it with tape or glue. This will be the stage for your puppets. Make the Puppets: Draw and cut out shapes from paper or cardboard to create your puppets. You can use simple shapes like circles, squares, and triangles, or more detailed designs. Attach wooden sticks or skewers to the back of the puppets using tape or glue. These will help you manipulate the puppets. Set Up the Lighting: Place the flashlight or projector behind the box, facing the screen. Adjust the light source to ensure it illuminates the screen evenly. Perform Your Show: Stand behind the box and manipulate the puppets from below. Use your imagination to create stories and bring your characters to life.
For shadow puppets you will need A World of Shadows: The Art of Shadow Puppets Shadow puppetry, an ancient art form, has captivated audiences for centuries. It involves the manipulation of figures behind a screen, casting shadows that come to life through the magic of light. This captivating spectacle has been a source of entertainment, storytelling, and cultural expression in various parts of the world. A Brief History of Shadow Puppets the origins of shadow puppetry can be traced back to ancient India, where it was known as "Chaka Noatak," meaning "play of shadows." The technique later spread to other parts of Asia, including China, Indonesia, and Turkey, where it evolved into distinct regional styles. In China, shadow puppetry became a highly refined art form, with intricate puppets made from leather and intricate storytelling techniques. The Magic of Light and Shadow the essence of Shadow Making puppetry lies in the interplay of light and shadow. A strong light source is positioned behind a screen, casting the shadows of the puppets onto its surface. The puppeteer, skilled in manipulating the figures, brings them to life through their movements, gestures, and expressions. The audience is transported to a world of imagination, where the shadows become characters in a captivating story. Materials and Techniques Creating shadow puppets requires a few basic materials: Cardboard: The primary material for constructing the puppets. Craft knife or scissors: To cut out the shapes. Skewers or sticks: To attach the puppets to. Strong light source: A lamp or projector. Screen: A thin sheet or fabric. The process of making shadow puppets involves: Designing the characters: Sketch out the desired shapes and forms.
Creating a Drop Shadow They simulate the effect of light casting a shadow on an object, making it appear to stand out from the background. Understanding Drop Shadows Before diving into the creation process, it's essential to understand the key components of a drop shadow: Offset: This determines the distance between the object and its shadow. Opacity: Controls the transparency of the shadow. A higher opacity creates a more pronounced shadow. Blur: Adds a soft or fuzzy effect to the shadow's edges. Color: The color of the shadow, typically darker than the object itself. Angle: The direction of the shadow, usually downward to simulate sunlight. Creating a Drop Shadow in Common Design Software while the specific steps may vary slightly between different software, the general process is similar. Here's a breakdown for popular design tools: Adobe Photoshop Select the Shadow Making object: Use selection tools like the Lasso, Magic Wand, or Pen to isolate the object you want to add a drop shadow to. Layer Styles: Right- click on the layer and choose "Layer Styles" or go to "Layer" > "Layer Style" > "Drop Shadow." Adjust settings: Customize the offset, opacity, blur, color, and angle to achieve the desired effect. Preview: Experiment with different settings to find the best combination for your design. Adobe Illustrator Create a path: Draw the shape or object you want to add a drop shadow to using the Pen, Pencil, or other drawing tools. Expand: If necessary, expand the object to convert it into a compound path. Effect: Go to "Effect" > "Stylize" > "Drop Shadow." Adjust settings: Customize the drop shadow parameters as needed. Canvas Upload image: Import the image you want to work with. Elements: Click on the "Elements" tab and search for "drop shadow." Apply: Drag and drop the drop shadow element onto your image and adjust its size, position, and opacity.
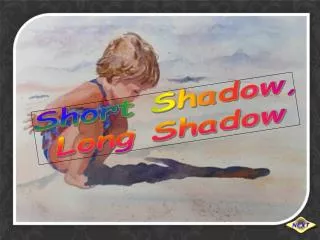
Examples of Making Shadows They're not just byproducts of light; they're artistic elements that can add depth, drama, and even a touch of magic to our surroundings. Let's explore some creative ways to make shadows: 1. Natural Shadows: Sunlight and Objects: The simplest way to create shadows is to place an object in the path of sunlight. The shape of the object will determine the shape of the shadow. Experiment with different objects and angles to create interesting and varied shadows. Clouds and Trees: Clouds can cast dramatic shadows on the ground, especially during a partly cloudy day. Trees also create intricate shadows that can change throughout the day. 2. Artificial Shadows: Flashlights: Flashlights can be used to create shadows indoors or outdoors. Experiment with different Shadow Making angles and distances to create various effects. Projectors: Projectors can be used to create large-scale shadows. Try projecting images of people, animals, or objects onto walls or screens. Shadows in Photography: Photographers often use shadows to add depth and interest to their images. Try experimenting with different lighting setups and angles to create dramatic shadows. 3. Creative Shadow Play: Hand Shadows: Create simple shapes or animals by moving your hands in front of a light source. Shadow Puppets: Cut out shapes from cardboard or paper and move them in front of a light source to create shadow puppets. Shadow Theater: Set up a screen and a light source behind it. Use objects or people to create shadows on the screen. 4. Shadows in Art and Design: Drawing and Painting: Shadows can add depth and realism to drawings and paintings. Practice drawing shadows from different angles and light sources. Sculpture: Sculptors often use shadows to create interesting and dramatic effects. Experiment with different shapes and materials to create unique shadows.
Website: https://retouchph.com/ Email: info@retouchph.com Price List: https://retouchph.com/pricing Phone: +8801723283638 Company Address: Majhira, Shajahanpur, Bogura-5801, Bangladesh.


![Field Notes on Making Wajangs [Shadow Puppets]](https://cdn3.slideserve.com/5496507/field-notes-on-making-wajangs-shadow-puppets-dt.jpg)