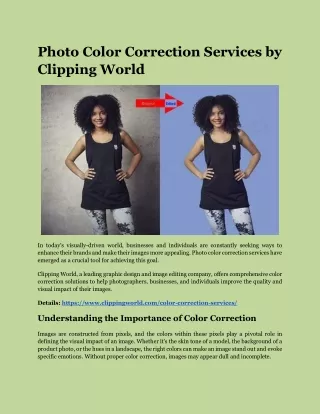
Color Correction
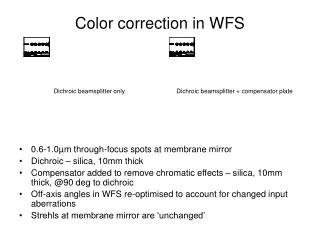
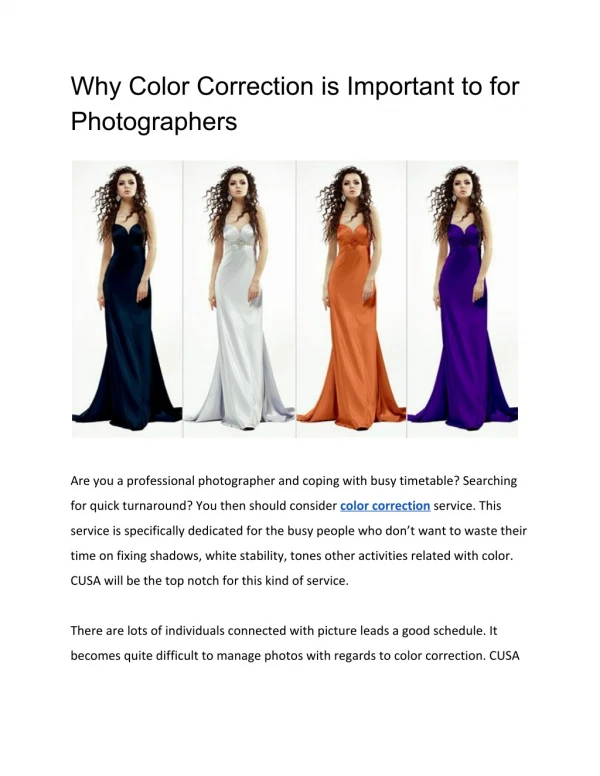
Color correction is the process of adjusting the color balance and saturation in an image or video to achieve a desired aesthetic or ensure accuracy. It involves making adjustments to hues, brightness, contrast, and saturation to correct color casts, enhance details, and create a visually appealing result.

Color Correction
E N D
Presentation Transcript
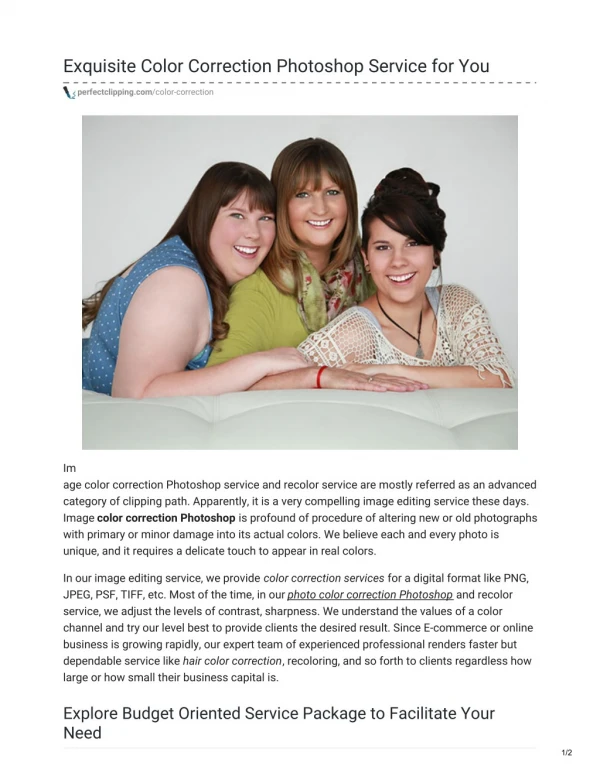
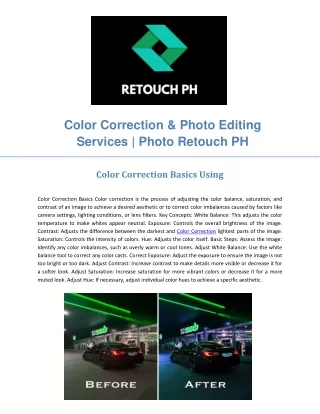
Color Correction & Photo Editing Services | Photo Retouch PH Color Correction Basics Using Color Correction Basics Color correction is the process of adjusting the color balance, saturation, and contrast of an image to achieve a desired aesthetic or to correct color imbalances caused by factors like camera settings, lighting conditions, or lens filters. Key Concepts: White Balance: This adjusts the color temperature to make whites appear neutral. Exposure: Controls the overall brightness of the image. Contrast: Adjusts the difference between the darkest and Color Correction lightest parts of the image. Saturation: Controls the intensity of colors. Hue: Adjusts the color itself. Basic Steps: Assess the Image: Identify any color imbalances, such as overly warm or cool tones. Adjust White Balance: Use the white balance tool to correct any color casts. Correct Exposure: Adjust the exposure to ensure the image is not too bright or too dark. Adjust Contrast: Increase contrast to make details more visible or decrease it for a softer look. Adjust Saturation: Increase saturation for more vibrant colors or decrease it for a more muted look. Adjust Hue: If necessary, adjust individual color hues to achieve a specific aesthetic.
Color Correcting Step-by-Step Color Correcting Step-by-Step Color correction is a crucial step in post-production, ensuring that your images look natural, balanced, and visually appealing. Here's a step-by-step guide to help you achieve professional-looking results: 1. Assess the Overall Color Balance: White Balance: Ensure the image is neither too warm (orange/yellow) nor too cool (blue). Adjust the white balance slider or use a white balance tool to correct any color casts. Exposure: Check if the image is overexposed (too bright) or underexposed (too dark). Adjust the exposure slider to balance the overall brightness. Contrast: Ensure there's enough contrast between the highlights and shadows. Adjust the contrast slider to enhance the image's depth. 2. Correct Specific Color Channels: Hue: Adjust the hue of individual color channels to ensure they are accurate and natural. For example, if the skin tones appear too reddish, you can shift the red channel towards the orange or yellow side. Saturation: Adjust the saturation to control the intensity of colors. If the colors are too vibrant, you can reduce the saturation. Luminosity: Adjust the luminosity of individual color channels to control Color Correction their brightness. For example, if the blue sky is too bright, you can reduce its luminosity. 3. Address Color Casts: Color Grading: Use color grading tools to apply a specific color look or mood to the image. This can be achieved by adjusting the color wheels or using LUTs (Look Up Tables). Color Filters: Apply color filters to correct specific color casts. For example, a blue filter can be used to remove a warm color cast. 4. Fine-Tune Details: Clarity: Adjust the clarity slider to enhance the image's sharpness and detail. Vibrancy: Adjust the vibrancy to selectively boost the saturation of the less saturated colors, preserving the skin tones. Noise Reduction: If the image contains noise (grainy texture), apply noise reduction to smooth it out. 5. Check for Color Fringing: Color Fringing: This occurs when colors bleed into each other, creating halos around edges. Use de-fringing tools to correct this issue. 6. Compare and Refine: Before and After: Compare the original image with the edited one to assess the changes. Refine: Make adjustments as needed to achieve the desired color balance and overall look. Remember, color correction is a subjective process, and the best results will depend on your personal preferences and the specific requirements of your project.
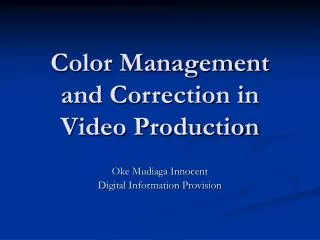
Fast Color Corrector Fast Color Corrector: A Quick Guide Fast Color Corrector is a powerful tool designed to streamline the color grading process in video production. It offers a user-friendly interface and a range of features that allow for efficient and effective color adjustments. Key Features Intuitive Interface: The software's layout is designed to be intuitive, making it easy for both beginners and experienced colorists to navigate. Presets and LUTs: Fast Color Corrector comes with a library of pre-designed color presets and LUTs (Look Up Tables), allowing you to quickly apply specific color looks to your footage. Primary Color Correction: This feature enables you to adjust the basic color parameters of your footage, such as white balance, exposure, contrast, and saturation. Secondary Color Correction: For more targeted adjustments, Fast Color Corrector offers tools like color wheels and curves, allowing you to refine specific color ranges within your footage. Grading Effects the Color Correction software includes various grading effects that can be applied to create unique and artistic looks, such as vintage film, black and white, and color grading styles inspired by different cinematographers. Batch processing For those working with large volumes of footage, Fast Color Corrector offers batch processing capabilities, allowing you to apply the same color adjustments to multiple clips at once. Workflow Import Footage: Load your video clips into Fast Color Corrector. Primary Adjustments: Start by making basic adjustments to the overall color balance and exposure. Secondary Adjustments: Use color wheels and curves to refine specific color ranges. Apply Effects: Experiment with different grading effects to achieve the desired look. Fine-Tune: Make any final adjustments to ensure the color grading is consistent throughout your footage. Export: Once you're satisfied with the results, export your color-graded footage. Fast Color Corrector is a versatile tool that can be used for a wide range of video projects, from simple color corrections to more complex artistic grading. Its user-friendly interface and powerful features make it a valuable asset for video editors and colorists alike.
Secondary Color Correction Secondary Color Correction: Enhancing Your Images Secondary color correction is a crucial step in the post-production process, allowing photographers and editors to refine the overall color palette of an image. Unlike primary color correction, which focuses on adjusting white balance and exposure, secondary color correction involves manipulating the hue, saturation, and luminance of specific color ranges within an image. Hue, Saturation, and Luminance: Hue: This refers to the color itself, such as red, blue, or green. By adjusting the hue, you can shift a color towards or away from its complementary color. For example, you might make a blue sky slightly more purple or a green lawn more yellow. Saturation: This determines the intensity or purity of a color. Increasing saturation makes a color more vibrant and vivid, while decreasing it can create a more muted or Color Correction pastel appearance. Luminance: This is the brightness or darkness of a color. By adjusting luminance, you can lighten or darken specific color ranges within an image. Common Secondary Color Correction Techniques: Color Grading: This involves applying a consistent color treatment to an entire image or specific areas. It can be used to create a particular mood or aesthetic, such as a cool, desiderated look or a warm, vibrant one. Color Balancing: This technique is used to correct color imbalances that may occur due to various factors, such as lighting conditions or camera settings. For example, if an image appears too blue, you can balance it by adding more red and yellow. Color Selection and Masking: This involves targeting specific color ranges within an image and applying adjustments to them. For instance, you might want to desiderate the skin tones while leaving the background colors vibrant. Color Grading Curves: These are graphical tools that allow you to control the relationship between the input and output colors in an image. By adjusting the curve, you can create subtle or dramatic color shifts.
Three-Way Color Corrector Three-Way Color Corrector: A Versatile Tool for Color Grading a three-way color corrector is a valuable tool in the arsenal of any colorist, offering precise control over the hue, saturation, and luminance of individual color channels. This device is particularly useful for color grading, as it allows for fine-tuning the overall color balance and aesthetic of a video or image. Key Features and Benefits: Individual Channel Control: The three-way color corrector provides independent control over the red, green, and blue channels. This enables colorists to target specific color ranges and make adjustments without affecting other parts of the image. Hue, Saturation, and Luminance Adjustments: Each channel can be manipulated to adjust the hue (color), saturation (intensity), and luminance (brightness). This level of control allows for a wide range of color corrections, from Color Correction subtle tweaks to dramatic transformations. Flexibility and Precision: Three-way color correctors are designed to be highly flexible and precise, making them suitable for a variety of color grading tasks. Whether you're working on a feature film, a commercial, or a personal project, this tool can help you achieve the desired color aesthetic. Integration with Other Equipment: Many three-way color correctors can be integrated with other video equipment, such as cameras, monitors, and editing systems. This makes them a versatile and convenient addition to any production workflow. Common Applications: Color Grading: The most common application of a three-way color corrector is color grading. This involves adjusting the overall color balance of a video or image to create a specific mood or atmosphere. Color Correction: Color correctors can also be used to fix color imbalances caused by camera settings, lighting conditions, or other factors. Creative Effects: By manipulating the hue, saturation, and luminance of individual channels, colorists can create a variety of creative effects, such as color grading for specific genres or styles. In conclusion, a three-way color corrector is a powerful tool that offers precise control over the color balance of video and images.
Loma and RGB Curve Loma and RGB Curve: A Powerful Combination for Color Correction Loma and RGB Curve are two essential tools in the digital image editing arsenal, particularly when it comes to color correction. While they might seem similar at first glance, each offers unique capabilities to enhance the visual appeal of your images. Loma is a color correction tool that primarily focuses on adjusting the overall color balance of an image. It allows you to shift the hues towards warmer or cooler tones, increase or decrease saturation, and even adjust the luminance. This tool is particularly useful for correcting color casts caused by various factors, such as different lighting conditions or Color Correction camera settings. RGB Curve is a more granular tool that provides control over the individual red, green, and blue channels of an image. By adjusting the curve for each channel, you can fine-tune the color balance and contrast in specific areas. This is especially helpful for tasks like correcting skin tones, enhancing shadows, or creating dramatic effects. Combining Loma and RGB Curve often yields superior results compared to using either tool alone. For instance, you might use Loma to establish a general color balance and then employ RGB Curve to make subtle adjustments to specific areas. This approach allows you to achieve a more nuanced and precise color correction. Here's a common workflow: Assess the image: Determine the overall color issues. Is the image too warm or too cool? Are the colors muted or overly saturated? Use Loma: Adjust the overall color balance to correct any major issues. Refine with RGB Curve: Fine-tune specific areas using the RGB Curve tool. For example, if the skin tones are too red, you can adjust the red curve to reduce the red intensity. Evaluate and adjust: Continuously evaluate the image and make further adjustments as needed.
The Lambert Color Panel The Lambert Color Panel is a revolutionary tool designed to enhance the accuracy and efficiency of color matching in various industries, including printing, textiles, and automotive. This innovative device offers a wide range of features and benefits that make it an indispensable asset for professionals seeking to achieve precise color consistency. One of the key advantages of the Lambert Color Panel is its ability to provide highly accurate color measurements. Equipped with advanced sensors and cutting-edge technology, this panel can detect even the slightest variations in hue, saturation, and brightness. This precision allows users to confidently identify and correct color discrepancies, ensuring that their final products meet the highest standards of quality. Furthermore, the Lambert Color Panel is incredibly user- friendly. Its intuitive interface and simple Color Correction operation make it accessible to professionals of all skill levels. The panel features a large, easy-to-read display that clearly presents color measurements and other relevant data. Additionally, its compact design allows for easy portability, making it ideal for use in various settings, from the production floor to the design studio. Another significant benefit of the Lambert Color Panel is its versatility. This device can be used to measure a wide range of materials, including paper, fabric, plastic, and metal. Its adaptability ensures that it can be seamlessly integrated into diverse workflows, meeting the specific needs of different industries. In conclusion, the Lambert Color Panel is a powerful tool that has the potential to revolutionize the way color matching is done. Its accuracy, user-friendliness, versatility, and durability make it an invaluable asset for professionals seeking to achieve precise color consistency. By incorporating this innovative device into their workflows, businesses can improve their efficiency, reduce waste, and deliver products that exceed customer expectations.
Website: https://retouchph.com/ Email: info@retouchph.com Price List: https://retouchph.com/pricing Phone: +8801723283638 Company Address: Majhira, Shajahanpur, Bogura-5801, Bangladesh.