Download
1 / 2
20 likes | 34 Views
Nowadays a networking field has become more secured so you have to turn your Cisco router Wifi protected setup with our simple steps. And it gives different options.

E N D
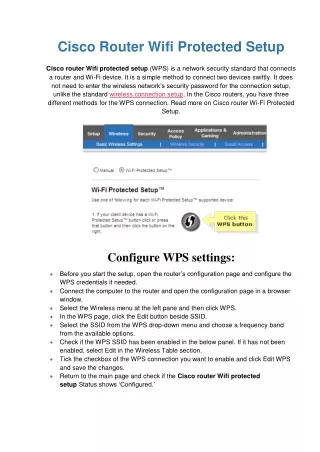
Cisco Router Wifi Protected Setup Cisco router Wifi protected setup (WPS) is a network security standard that connects a router and Wi-Fi device. It is a simple method to connect two devices swiftly. It does not need to enter the wireless network’s security password for the connection setup, unlike the standard wireless connection setup. In the Cisco routers, you have three different methods for the WPS connection. Read more on Cisco router Wi-Fi Protected Setup. Configure WPS settings: Before you start the setup, open the router’s configuration page and configure the WPS credentials if needed. Connect the computer to the router and open the configuration page in a browser window. Select the Wireless menu at the left pane and then click WPS. In the WPS page, click the Edit button beside SSID. Select the SSID from the WPS drop-down menu and choose a frequency band from the available options. Check if the WPS SSID has been enabled in the below panel. If it has not been enabled, select Edit in the Wireless Table section. Tick the checkbox of the WPS connection you want to enable and click Edit WPS and save the changes. Return to the main page and check if the Cisco router Wifi protected setupStatus shows ‘Configured.’
Method-1: Use the WPS button of the client device Find the WPS push button on the client device that you are connecting to the router. Open the WPS configuration page on the web utility of the router. Now, press the WPS button on the client device and then immediately click the WPS button on the router’s web page. Instead of using the WPS button on the web page, you can press the WPS push button on the router’s panel as well. Read more...