Text on a CCR Matrix using the SuperStar Sequence Editor
Text on a CCR Matrix using the SuperStar Sequence Editor. Brian Bruderer. What we will learn. Colors Fonts Direction of movement Rotation Masks. Horizontal Layout. Tools / Layout… will launch the Layout dialog box Select Horizontal, click on OK. The Text Dialog Box.

Text on a CCR Matrix using the SuperStar Sequence Editor
E N D
Presentation Transcript
Text on a CCR Matrix using the SuperStar Sequence Editor Brian Bruderer
What we will learn • Colors • Fonts • Direction of movement • Rotation • Masks
Horizontal Layout • Tools / Layout… will launch the Layout dialog box • Select Horizontal, click on OK
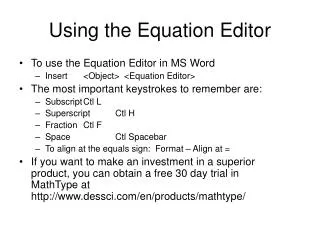
The Text Dialog Box • Tools / Text… will launch the Text Setup dialog box
Merry • Type Merry into the Text field in the Text Dialog box
Text Preview • Move focus out of the text field and a preview of the text will appear on the pixel grid
Text Color • Text color can be set from the color controls or by typing in values into the Red, Green, and Blue text fields in the Text Dialog Box
Text Font • There are 5 system fonts and 5 custom fonts. We will only deal with the system fonts in this presentation. • Default font is “8-8x8 Thin – System”. • Select “10-12x12 Thin – System” to see that font. • The first number in the name is the pixel height of a capital letter. The second and third numbers are the character cell width and height. In this font there are two pixels reserved for the lower case descenders. The bottom tail of a ‘y’ is an example of a lower case descender. So that is why the height of the character cell is 12 and the height of a capital letter is 10.
Small Text Fonts • Note that in the smaller fonts, the cell height is the same as the capital letter height. This is because there are not enough pixels to reserve room for lower case descenders. In those fonts the tail of a ‘y’ does not go below the base line. • As mentioned, the second number is the font character cell width. Realize this is an average width and the width of individual characters can be different. • Select each font and you can see what they look like
Create a Text Object • Click on the Add button in the Text Dialog Box • Play it and the text should move from right to left. It moves rather fast, to slow it down set the time scale at 1.00 – 3.00 • Click on the Modify button in the Text Dialog Box • Play it and you can see it moves slower
Text Movement and Rotation • Try some of the other Direction settings and the Rotation settings. Click on Modify and Play each setting.
Text Masks • Advanced users will want to use the power of Text Masks • A Positive Text Mask is visible when played by itself. You can place effects in the background. You can also place effects in the foreground but it is not useful • A Negative Text Mask is not visible by itself. Other effects are played through the background or foreground of the mask. Negative Text Masks are the most powerful.
Negative Text Mask • Select Neg Text Mask. It will recommend that you have the text color set to white, answer Yes • Change font to 10-12x12 Bold - System • If the text is not centered, click on the Centr button to center the text. Note that a Text Mask cannot have a direction because they cannot move. • Click on Modify • The text object will now appear as a line with brackets at the end. The brackets indicate that effects are to be contained within the brackets. They are not to overlap the ends of the brackets.
Apply an Effect to the Background • Play the Negative mask and nothing will happen. • Tools / Scene… • Click on the Add button in the Scene Setup dialog box
Background vs. Foreground • Play it and you will see the scene in the background • Tools / Text… to launch the Text Dialog box • Note the diagram in the lower right • Effects above the mask are applied to background • Effects below the mask are applied to foreground
Move Effect to Foreground • Select the Scene and use the button to move it to the other side of the Text mask. • Click on Play and the scene gets applied to the Text foreground.
Venetian Blind Effect • Create another scene object with the Start Color to black and the End Color to purple. The screen should look like:
Coolness • Play it and you see a venetian blind effect as the two scenes each get applied. Coolness. • There is no limit to the number of effects that can get applied to the background and foreground. It works with Scenes and Morphs and other Text, but not with Images. • Lets try one using Morphs
Jaws • Select the Text Mask • Type the word Jaws into the Text field • Click on Modify • Select the top Scene, click on Delete • Select the bottom Scene, click on Delete • Tools / Morphs… • Set the Start and End color blue • Also set the Trailing Ramp blue • Click on Add
Jaws 2 • Make the morph go from top to bottom by doing: • Add the morph to the Background side of the mask
Exercise • Add a morph to the foreground side of the Jaws mask so that it goes from bottom to top. Make the color be a different shade of blue. • Play what you have built
Pacman vs. Jaws Text Effects • In the “Pacman vs. Jaws” Sequence there are several text effects. • We will step through them