1 / 10

Projector Screen Installation 5 Key Steps for Clearer Presentations

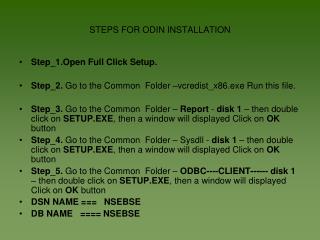
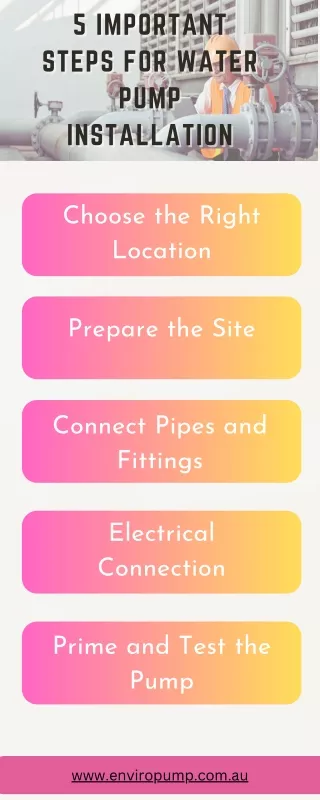
Learn the 5 essential steps of projector screen installation to achieve sharper visuals, smoother presentations, and professional results. Perfect for corporate, education, healthcare, and worship environments seeking reliable AV solutions.<br>Visit : https://fesolutionstx.com/ <br>

Download Presentation

Projector Screen Installation 5 Key Steps for Clearer Presentations

An Image/Link below is provided (as is) to download presentation Download Policy: Content on the Website is provided to you AS IS for your information and personal use and may not be sold / licensed / shared on other websites without getting consent from its author. Content is provided to you AS IS for your information and personal use only. Download presentation by click this link. While downloading, if for some reason you are not able to download a presentation, the publisher may have deleted the file from their server. During download, if you can't get a presentation, the file might be deleted by the publisher.

E N D

Presentation Transcript


  1. Projector Screen Installation: 5 Key Steps for Clearer Presentations Transform your presentations with proper screen installation. This guide provides essential steps for facility managers, AV technicians, and IT staff to ensure crystal-clear visuals in corporate, education, healthcare, and worship environments.

  2. Why Proper Installation Matters The Impact of Poor Installation • Washed-out images reduce presentation effectiveness • Wrinkled screens distract audiences • Poor positioning creates viewing blind spots • Inadequate calibration causes color distortion Professional installation increases presentation clarity by up to 40% and extends screen lifespan significantly.

  3. Your 5-Step Installation Roadmap 01 02 03 Planning & Assessment Positioning & Placement Installation Process Evaluate space requirements and technical specifications Determine optimal screen location and viewing angles Mount hardware and deploy screen with precision 04 05 Calibration & Testing Ongoing Maintenance Fine-tune display settings for perfect image quality Establish routine care for long-term performance

  4. Step 1: Planning & Assessment Room Analysis Measure ceiling height, wall dimensions, and identify structural elements like HVAC vents or light fixtures that could interfere with installation. Audience Considerations Calculate seating capacity and furthest viewing distance to determine optimal screen size. Standard formula: screen width = viewing distance ÷ 6. Technical Requirements Verify projector specifications, throw distance, and resolution compatibility. Check power outlet locations and cable routing paths.

  5. Step 2: Positioning & Placement Optimal Placement Guidelines Height Positioning Bottom edge should be 40-48 inches from floor for seated viewing comfort Viewing Angles Maximum 30-degree angle from center seats to screen edges Distance Formula Minimum viewing distance = 2x screen width for optimal clarity

  6. Step 3: Installation Process Secure Mounting Install brackets into ceiling joists or use appropriate wall anchors. Verify weight capacity exceeds screen specifications by 50%. Level Installation Use professional level to ensure perfect horizontal alignment. Even small deviations create noticeable image distortion. Power & Controls Connect motorized screens to power source and integrate with room control systems for seamless operation.

  7. Step 4: Calibration & Testing Color Accuracy Image Alignment Use test patterns to calibrate brightness, contrast, and color temperature. Standard office environments require 30-50 foot-lamberts brightness. Adjust projector position to eliminate keystoning. Image should fill screen completely without overspill or black borders. Focus Optimization Fine-tune lens focus across entire screen surface. Text should be sharp from all viewing positions in the room.

  8. Step 5: Ongoing Maintenance Maintenance Schedule Monthly 1 Clean screen surface with microfiber cloth and approved cleaning solution Quarterly 2 Inspect mounting hardware, test motorized functions, check cable connections Annually 3 Professional calibration check, deep cleaning, and performance optimization

  9. Common Installation Mistakes to Avoid Inadequate Structural Support Poor Ambient Light Control Failing to locate ceiling joists or using insufficient wall anchors leads to sagging screens and potential safety hazards. Ignoring natural light sources and room lighting creates washed-out images that strain viewer eyes and reduce engagement. Incorrect Screen Material Selection Skipping Professional Calibration Choosing wrong gain factor for your projector brightness results in hotspots, poor contrast, or viewing angle limitations. Relying on default projector settings instead of room-specific calibration reduces image quality and color accuracy significantly.

  10. Ready to Transform Your Presentations? Professional projector screen installation transforms ordinary presentations into engaging visual experiences that captivate audiences and enhance communication effectiveness. Next Steps For professional installation services and expert consultation, visit fesolutionstx.com • Assess your current installation needs • Consult with AV professionals for complex setups • Schedule regular maintenance to preserve performance • Train staff on proper operation procedures

More Related