Download
1 / 6
0 likes | 15 Views
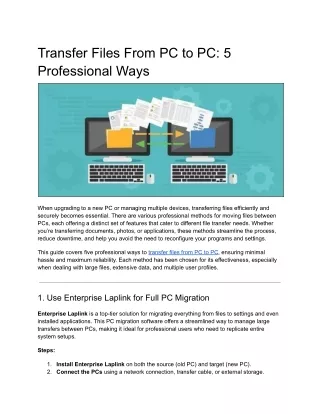
When upgrading to a new PC or managing multiple devices, transferring files efficiently and securely becomes essential. There are various professional methods for moving files between PCs, each offering a distinct set of features that cater to different file transfer needs. Whether youu2019re transferring documents, photos, or applications, these methods streamline the process, reduce downtime, and help you avoid the need to reconfigure your programs and settings.<br>

E N D
Transfer Files From PC to PC: 5 Professional Ways When upgrading to a new PC or managing multiple devices, transferring files efficiently and securely becomes essential. There are various professional methods for moving files between PCs, each offering a distinct set of features that cater to different file transfer needs. Whether you’re transferring documents, photos, or applications, these methods streamline the process, reduce downtime, and help you avoid the need to reconfigure your programs and settings. This guide covers five professional ways to transfer files from PC to PC, ensuring minimal hassle and maximum reliability. Each method has been chosen for its effectiveness, especially when dealing with large files, extensive data, and multiple user profiles. 1. Use Enterprise Laplink for Full PC Migration Enterprise Laplink is a top-tier solution for migrating everything from files to settings and even installed applications. This PC migration software offers a streamlined way to manage large transfers between PCs, making it ideal for professional users who need to replicate entire system setups. Steps: 1. Install Enterprise Laplink on both the source (old PC) and target (new PC). 2. Connect the PCs using a network connection, transfer cable, or external storage.
3. Select Files and Programs: Enterprise Laplink lets you choose specific files, user profiles, and installed programs to transfer, saving time and avoiding redundant data. 4. Initiate Transfer: Start the transfer, and the software will handle everything from file copying to program reinstallation on the new PC. Advantages: ● ● ● Quick and straightforward for full system transfers. Transfers applications and configurations without reinstalling. Saves valuable time for users who need a fully configured system immediately. Limitations: ● ● Requires a software license to access full features. Dependent on the speed of the connection between PCs. Best For: Professionals and organizations looking to replicate a system with minimal setup time. 2. Cloud Storage Services for Remote Transfers Cloud storage services, such as Google Drive, OneDrive, and Dropbox, are excellent for managing file transfers when PCs aren’t in close physical proximity. These services allow you to upload files from one device and download them on another, providing a safe and reliable way to handle large data transfers. Steps: 1. Set Up a Cloud Storage Account: Log into your chosen cloud storage service on the source PC. 2. Upload Files: Organize the files you want to transfer and upload them to the cloud storage. This keeps them safely stored and accessible. 3. Access Cloud Storage on the New PC: On your new PC, log in to the same cloud account. 4. Download Files: Download the uploaded files to your new PC and save them in the desired location. Advantages: ● ● ● Offers remote access to files, ideal for users working from multiple locations. Provides a backup option in case of unexpected data loss. Allows you to share files with team members securely. Limitations:
● ● Transfer speed depends on your internet connection. Limited by the storage space available in your cloud account. Best For: Professionals with high-speed internet and remote access requirements. 3. Transfer Files Over a Local Area Network (LAN) For users with both PCs on the same network, file sharing over a Local Area Network (LAN) offers an effective and secure option. This method requires only a stable Wi-Fi or Ethernet connection, making it simple for office setups or home networks. Windows and macOS support file sharing via LAN, allowing users to transfer data without external devices or internet dependency. Steps: 1. Connect Both PCs to the Same Network: Ensure both computers are on the same Wi-Fi or Ethernet network. 2. Enable File Sharing on the Source PC: In Windows, navigate to Settings > Network & Internet > Status and turn on Network Discovery and File Sharing. 3. Share Specific Files or Folders: Right-click on the files or folders you want to transfer, select Properties > Sharing, and share them on the network. 4. Access Files on the Target PC: On the new PC, open File Explorer, click on Network, and locate the source PC’s shared folder. 5. Copy Files to Local Storage: Select the shared files and copy them to your new PC. Advantages: ● ● ● Doesn’t require any additional software or storage devices. Fast transfer speeds over Ethernet, especially for large files. Ideal for in-house transfers without an internet connection. Limitations: ● ● Both PCs must remain on the same network. Requires some setup to enable file-sharing permissions. Best For: Teams or individuals transferring files within an office or home setting. 4. USB Transfer Cable for Direct PC-to-PC Transfers
Using a USB transfer cable is another professional method to transfer files, especially when working with large amounts of data. These cables often come with proprietary software that supports the transfer process, allowing you to manage files directly between PCs. This method bypasses the need for intermediate storage and simplifies large data transfers between closely located devices. Steps: 1. Connect the USB Transfer Cable: Plug the cable into the USB ports of both PCs. 2. Install Required Software: Most transfer cables come with software designed to facilitate the transfer. Follow the prompts to install it on both devices. 3. Select Files for Transfer: Use the transfer software to select the files, folders, and user profiles to move to the new PC. 4. Initiate Transfer: Start the file transfer and monitor its progress. The transfer speed will depend on the USB standard (USB 3.0 is much faster than USB 2.0). Advantages: ● ● ● Faster transfer speeds compared to other methods, especially for USB 3.0. Doesn’t rely on internet or local network connectivity. Enables direct access between devices without third-party storage. Limitations: ● ● Requires a compatible USB transfer cable. Limited to short-distance transfers due to physical constraints. Best For: Users needing fast, direct transfers for large files, especially when internet or network options aren’t available. 5. Use External Drives for Offline Transfers External storage devices such as USB drives, external hard drives, and SSDs provide a professional and versatile solution for offline data transfer. These drives are compatible with any computer, making it easy to copy files from one PC and paste them onto another. This method doesn’t depend on connectivity and provides a physical backup of your files. Steps: 1. Connect External Storage to the Source PC: Insert your external storage device (such as a USB flash drive or SSD) into the old PC. 2. Copy Files to External Storage: Open File Explorer, select the files or folders you want to transfer, and drag them onto the external drive.
3. Safely Eject the Drive: Once the data is copied, right-click on the external drive and choose Eject before disconnecting it. 4. Connect the Drive to the New PC: Plug the external storage into the new PC. 5. Transfer Files to the New PC: Open the external drive in File Explorer and move the files to their final location on the new PC. Advantages: ● ● ● Offers a physical backup of files during transfer. Suitable for large data transfers without network dependencies. Simple, straightforward, and works on any system. Limitations: ● ● Limited by the storage capacity of the external drive. The transfer speed depends on the type of storage device (SSDs are generally faster than HDDs). Best For: Professionals needing offline file transfers or those looking for a portable backup solution. Bonus Tips for File Transfer When transferring files between PCs, certain practices can optimize the process: ● Organize Files Before Transferring: Sorting files by category or folder type saves time during the transfer and helps keep the new PC organized. Back Up Important Data: Before starting the transfer, back up essential files, especially when dealing with sensitive or critical information. Optimize Transfer Speed: When using network-based methods, transfer during off-peak hours or use Ethernet for faster speeds. ● ● Which Transfer Method Is Right for You? Selecting the best file transfer method depends on factors such as file size, transfer distance, internet availability, and security requirements. Here’s a summary to help make the choice easier: ● ● ● ● Enterprise Laplink is best for full-system transfers with programs and settings intact. Cloud Storage Services are ideal for remote access and data backup. LAN Transfer suits in-house or same-network environments for quick file sharing. USB Transfer Cable is excellent for fast, direct file transfers without internet dependency.
● External Storage provides a portable and reliable offline transfer option. By choosing the method that aligns with your needs, you can efficiently move files between PCs without hassle, ensuring your data is available when and where you need it. Conclusion Professional file transfer methods make it simple to migrate data between PCs, whether upgrading to a new device or setting up multiple systems. From Enterprise Laplink and cloud storage services to USB cables and external drives, these five options cater to different scenarios, offering security, speed, and ease. Each method outlined in this guide enables you to transfer files without technical hurdles, so you can get your new setup running smoothly and efficiently.


![Easy 5 Ways to Transfer Files from iPad to PC [Can't Miss]](https://cdn4.slideserve.com/8406961/best-5-ways-on-how-transfer-files-from-ipad-to-pc-dt.jpg)