Download
1 / 6
60 likes | 83 Views
If you would like to cut MP3 songs on your Mac for various reasons, you could refer to this article. It is going to discuss how to trim MP3 on Mac with the help of 3 professional and powerful audio trimmers - Joyoshare Media Cutter, iTunes, and QuickTime Player - with far greater ease.

E N D
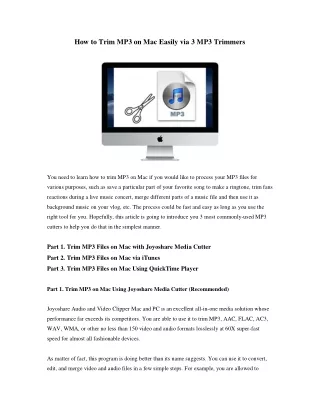
How to Trim MP3 on Mac Easily via 3 MP3 Trimmers You need to learn how to trim MP3 on Mac if you would like to process your MP3 files for various purposes, such as save a particular part of your favorite song to make a ringtone, trim fans reactions during a live music concert, merge different parts of a music file and then use it as background music on your vlog, etc. The process could be fast and easy as long as you use the right tool for you. Hopefully, this article is going to introduce you 3 most commonly-used MP3 cutters to help you do that in the simplest manner. Part 1. Trim MP3 Files on Mac with Joyoshare Media Cutter Part 2. Trim MP3 Files on Mac via iTunes Part 3. Trim MP3 Files on Mac Using QuickTime Player Part 1. Trim MP3 on Mac Using Joyoshare Media Cutter (Recommended) Joyoshare Audio and Video Clipper Mac and PC is an excellent all-in-one media solution whose performance far exceeds its competitors. You are able to use it to trim MP3, AAC, FLAC, AC3, WAV, WMA, or other no less than 150 video and audio formats losslessly at 60X super-fast speed for almost all fashionable devices. As matter of fact, this program is doing better than its name suggests. You can use it to convert, edit, and merge video and audio files in a few simple steps. For example, you are allowed to
merge audio clips from the same source into a brand-new file easily, convert audio from one format to another, adjust video/audio codec, channel, sample rate, etc. In brief, its unique design and powerful features will enable you to trim any audio file precisely and easily. Key features: Pre-hear MP3 in real-time Trim MP3 on Mac and Windows Losslessly Trim, cut, and convert MP3 at 60X fast speed Cut video for Mac and Windows Support MP3, AAC, FLAC, and other 150+ digital formats Merge several MP3 clips from the same source into a whole Step 1: Launch and Run Joyoshare Media Cutter Download the right version of Joyoshare Media Cutter on your computer. Run it after a successful installation. To load your MP3 files, you need to press the Open button at the lower- left corner of the main interface, or simply drag and drop your files into the loading area.
Step 2: Adjust Cutting Section of MP3 You are able to use the trimming marker to decide which part of your MP3 files you want, or you can use the temporal interval and enter the specific start time and end time manually so that you could trim your MP3 more precisely. Note: if you would like to cut the same MP3 song into several different clips and then merge them into a new and complete file, you can press the “+” button to start a new cutting track and the “Merge Segments” button after that to combine them. Step 3: Choose Output Format Next, hit on the “Format” button. If you only need to cut the length of your MP3 files, you are able to choose the high-speed mode to trim MP3 losslessly. However, if you would like to customize your MP3, such as adjust audio codec, bitrate, etc. you are supposed to choose the encoding mode.
Step 4: Begin to Trim MP3 on Mac In the final step, you are free to press the “Start” button to begin to trim your MP3 file on Mac. After a short while, you are allowed to click the “Open The Output Folder” to check your target MP3 audios.
Part 2. How to Trim an MP3 on Mac with iTunes Every Mac user has iTunes. As a multi-tasker, iTunes is a media player as well as an MP3 trimmer, which will only take you a few minutes to trim MP3 on Mac efficiently by managing the save start time and end time of your MP3 files. The steps are as follows. Step 1: Open iTunes on your Mac; Step 2: Go to the “File” option at the menu and select “Add File to Library…” to load your MP3 file; Step 3: Find the “Music” option under Library and click on it, and then you will see a list of your songs; Step 4: Right-click on one your wanted MP3 files and select “Song info”, and then a new window will pop up; Step 5: Go to the “Options” tab, and now you are able to trim your audio file by adjusting its start time and the end time; Step 6: Finally, press the “OK” button to confirm.
Part 3. How to Trim MP3 Files on Mac via QuickTime Player QuickTime Player is capable of handling a series of digital formats, which may be pre-installed in every Mac computer. Using this program to trim MP3 files is easy as well. Step 1: Right-click your target MP3 file and select “Open with…” to open it with your QuickTime Player; Step 2: Go to the “Edit” option at the menu and then click “Trim” (or press Command + T) to enable the trim function; Step 3: Move the yellow brackets to decide the part of the MP3 file you desire; Step 4: Press the yellow “Trim” button at the upper-right corner to trim your MP3 file; Step 5: Now you can go to the “File” option at the menu and choose “Save As/Export” to save your audio into M4R or other formats you like.