Download

1 / 13
0 likes | 8 Views
Reclassify transactions in QuickBooks Online is a simple process that helps ensure your financial records are accurate. To reclassify transactions, go to the "Accounting" menu and select Chart of Accounts. From there, choose the account you want to reclassify and click on Go to Register. Select the transaction you need to modify, and then click Edit to update the account, category, or class. After making the necessary changes, save the transaction. This feature is handy for correcting errors or reorganizing financial data, helping maintain clean, organized books for better reporting and analys

E N D
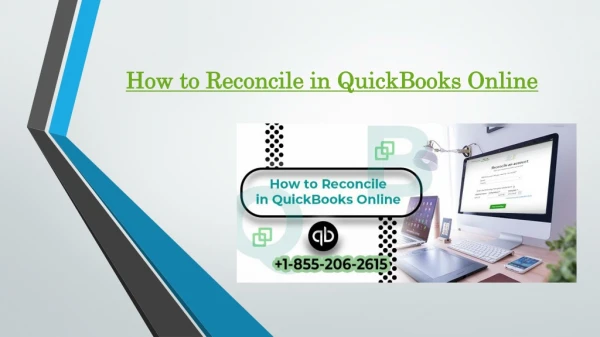
Reclassify transactions in QuickBooks Online Contact us:+1-844-881-9274 quickbooktoolhub.com/reclassify-transactions-in-quickbooks-online/
Topic to be covered ● ● ● ● ● ● ● ● ● ● What Are Reclassify Transactions In Quickbooks Online? When Should You Reclassify Transactions? Access The Reclassify Transactions Tool: Criteria For Reclassify Transactions Tips For Successful Reclassification Transactions In Quickbooks Online Detailed Steps For Reclassify Transactions In Quickbooks Online Filter And Find Transactions Select Transactions And Reclassify: Important Notes Transactions And Reclassify Conclusion 2 quickbooktoolhub.com/reclassify-transactions-in-quickbooks-online/
What Are Reclassify Transactions In Quickbooks Online? Reclassify transactions in QuickBooks Online allows users to change the account, category, oR class assigned to a transaction after it’s been recorded. This feature is useful for correcting mistakes, adjusting entries, or assigning transactions to the appropriate accounts for accurate financial reporting. QuickBooks Online enables easy reclassification of multiple transactions at once, saving time. The process helps ensure that financial data remains organized, accurate, and aligned with business requirements, making tax preparation and financial analysis more straightforward. 3 quickbooktoolhub.com/reclassify-transactions-in-quickbooks-online/
When Should You Reclassify Transactions? You Should Reclassify Transactions In Quickbooks Online When You Notice Errors Or Misclassifications, Such As Using The Wrong Account, Category, Or Class. This Can Happen Due To Manual Entry Mistakes Or Changes In Business Operations. Reclassifying Is Also Necessary When Transactions Need To Be Assigned To The Correct Period For Accurate Financial Reporting, Tax Filings, Or Management Review. It's Important To Reclassify Transactions To Maintain Accurate Financial Records, Ensure Compliance, And Improve Decision-Making Based On Precise Data. 4 quickbooktoolhub.com/reclassify-transactions-in-quickbooks-online/
Access the Reclassify Transactions Tool To access the Reclassify Transactions tool in QuickBooks Online, go to the Gear icon in the top-right corner and select Tools. From the dropdown menu, choose Reclassify Transactions under the Batch Actions section. This tool allows you to search for specific transactions by date, account, or other criteria. You can then select multiple transactions to reclassify in bulk, making it easier to correct errors or update records efficiently. The tool is available for QuickBooks Online Accountant users. 5 quickbooktoolhub.com/reclassify-transactions-in-quickbooks-online/
Criteria for Reclassify Transactions When reclassify transactions in QuickBooks Online, you can filter by various criteria to ensure accurate updates. Common criteria include the transaction date, account, category, customer/vendor, and class. You can also filter by amount or specific bank account. These filters help you find and select the right transactions for reclassification. By narrowing down your search, you can efficiently apply changes, ensuring that only the relevant transactions are updated without affecting others inadvertently. 6 quickbooktoolhub.com/reclassify-transactions-in-quickbooks-online/
Tips for Successful Reclassification For successful reclassification in QuickBooks Online, start by double checking transaction details to ensure accurate adjustments. Use filters to narrow your search, minimizing errors when selecting transactions. Always review the impact on financial reports before making bulk changes. If you're unsure, consider reclassifying a small batch first to confirm accuracy. Keep a backup or create a copy of your data to avoid irreversible mistakes. Lastly, regularly review your accounts to ensure transactions are classified correctly and prevent future errors. 7 quickbooktoolhub.com/reclassify-transactions-in-quickbooks-online/
Detailed Steps for Reclassify To reclassify transactions in QuickBooks Online, follow these steps: First, click the Gear icon and select Reclassify Transactions under Tools. Then, filter transactions using criteria like account, date, or category. Once you've selected the transactions, click Change account or Change category to update the classification. For bulk changes, select multiple transactions and apply the adjustments. Finally, review the changes and click Apply to confirm. Always double-check that the updates align with your financial records before finalizing. 8 quickbooktoolhub.com/reclassify-transactions-in-quickbooks-online/
Filter and Find Reclassify Transactions To filter and find transactions for reclassification in QuickBooks Online, go to the Reclassify Transactions tool under the Gear icon. Use the filter options to narrow down your search by criteria such as account, date range, category, class, or amount. You can also search by customer/vendor or transaction type. These filters help you find specific transactions quickly, ensuring that only the relevant ones are selected for reclassification. This process streamlines making accurate updates to your records. 9 quickbooktoolhub.com/reclassify-transactions-in-quickbooks-online/
Select Transactions and Reclassify To select and reclassify transactions in QuickBooks Online, first access the Reclassify Transactions tool under the Gear icon. Apply filters like account, date, or category to find the transactions you need to update. Once you've located the transactions, check the box next to each one you want to reclassify. Then, click Change account or Change category to select the correct classification. After reviewing your selections, click Apply to complete the reclassification, ensuring accurate financial records. 10 quickbooktoolhub.com/reclassify-transactions-in-quickbooks-online/
Important Notes Transactions and Reclassify When reclassifying transactions in QuickBooks Online, it's important to review the changes carefully before applying them. Ensure that you're selecting the correct account, category, or class for each transaction to maintain accurate records. Reclassifying multiple transactions at once can save time, but mistakes can impact financial reports. Always double-check filters and selected transactions. If unsure, consider reclassifying a small batch first. Also, keep a backup of your data to prevent irreversible errors and ensure you can recover previous entries if necessary. 11 quickbooktoolhub.com/reclassify-transactions-in-quickbooks-online/
Conclusion The Reclassify Transactions tool in QuickBooks Online is an essential feature for maintaining accurate financial records. It allows users to quickly correct misclassifications, ensuring that transactions are assigned to the correct accounts, categories, and classes. This tool saves time by enabling bulk reclassification and offers filters to easily locate specific transactions. However, it’s crucial to review changes carefully before applying them to avoid errors that could affect financial reports. By using this tool, businesses can keep their accounts organized, ensure accurate reporting, and improve overall financial management, making it a valuable tool for QuickBooks Online users. quickbooktoolhub.com/reclassify-transactions-in-quickbooks-online/ 12 12
Thank you Contact us:+1-844-881-9274 quickbooktoolhub.com/ 13