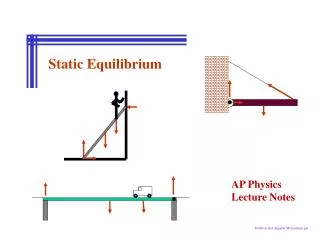
Static Balance
Educational Gymnastics. Static Balance. Created by Dr. Ken Bell & The Boise State University PE Majors Enrolled in Educational Gymnastics. Educational Gymnastics.


Static Balance
E N D
Presentation Transcript
Educational Gymnastics Static Balance Created by Dr. Ken Bell & The Boise State University PE Majors Enrolled in Educational Gymnastics
Educational Gymnastics Educational gymnastics is comprised of 3 components: traveling, rotation and static balance. These slides will only focus on static balance and the key principles that will help you to teach this component to your students. A variety of sample photos have been provided for students to replicate, or as ideas to stimulate your students to create additional balances. This slideshow is intended to be user friendly, therefore any picture has been used to teach you (the teacher) a concept by adding arrows, lines or text, that same picture is also provided without this information so you can quickly and easily print them off for your students to use as examples. Rotation Traveling Static Balance
Purposes of this slideshow: • There are four primary purposes of this slideshow: • To be used as a resource for physical education teachers who want to learn more about the static balance component of educational gymnastics. • To provide a variety of static balance ideas that students in physical education classes can safely attempt. • To stimulate ideas for students to create their own static balances. The possibilities are endless once students learn the basic principles and skills. • To save teachers time by providing a variety of pictures to use as they teach static balance in education gymnastics. Images like these are hard to find on the internet.
Principles of Balance To help students perform static balances, we must focus on the basic principles, which are moments of stillness and control. To accomplish this feat, a student must understand and be able to: tighten the muscles in their bodies, including their core muscles. You cannot balance a limp noodle no matter how hard you try! focus their eyes on a spot to maintain balance. widen their base of support to make a balance more stable and easier to maintain. locate their center of gravity. lower their center of gravity to create stability and maintain a balance. hold a balance position for at least 5 seconds without any movement.
Static Balance Concepts Symmetrical vs. non-symmetrical Inverted vs. upright balance Counter-balance vs. counter-tension Straight lines, pointed toes, and fingers together for aesthetic appeal. Without aesthetic appeal, even an awesome balance just does not look good. Leg positions: straight, split, straddle, stag and abstract The following slides will clearly demonstrate these concepts.
Symmetrical vs. Non-symmetrical A B Example A is a non-symmetrical balance. The line illustrates that both sides of the person are not the same. Example B is a symmetrical balance. The line illustrates that both sides are the same.
Inverted vs. Upright Balance: Hips are above the level of the head Example A is a classic inverted balance. B is an example of an upright balance. A B
Inverted Balance: The only criterion for an inverted balance is that the hips are above the level of the head. This opens up possibilities for all students to perform a variety of inverted balances. The line shows the hips are above the level of the head in all of these balances.
Before moving on to counter-balance and counter-tension it is important to have a basic understanding of center of gravity. Center of gravity is usually located where a person’s body weight is concentrated (typically from the thighs to mid-torso). If the center of gravity stays over the base of support during a balance, it is possible to hold this balance. In this sequence of pictures, the blue line represents the approximate location of her center of gravity. Notice as she shifts her weight to one leg that her center of gravity moves over that foot. Once her center of gravity moves outside of her base of support, she topples over.
Counter-balance allows a person to maintain a balance even when their center of gravity moves outside of their base of support. In these pictures support is provided by an object or wall. The blue line represents center of gravity and the red star is the base of support. These people would topple over if counter-balance was not provided by the wall or object, as their center of gravity is outside of their base of support.
Counter-Balance can be attained by using another person. This picture shows how two people lean or push into each other to create a counter-balance. Again, you can see that the center of gravity is outside of each person’s base of support, therefore without each other they would both lose balance and topple over.
1 More Examples of 2-Person Counter-Balances 2 3 In pictures 1 and 2, both people are using each other to counter-balance. In picture 3, only person A needs their partner to counter-balance. A B
Counter-tension also allows someone to maintain a balance when their center of gravity moves outside of their base of support. Counter-tension is attained through a pulling action. A person can maintain balance by either pulling on an object or a person, as illustrated below.
More Examples of Counter-tension Interlocked wrists provides a firm, comfortable grip when performing counter-tension balances
Aesthetic Appeal: Does it look good? A B Picture A has nice aesthetic appeal, whereas picture B does not. In picture A, toes are pointed, legs and arms are straight, there is good symmetry, angles look similar and nice straight lines are formed by the gymnasts. Picture B, hmmm? Not so much!
Aesthetic Appeal: Does it look good? A Straight B Stag C Abstract D Split E Straddle Pictured above are the various leg positions that students may use to give their balances variety and aesthetic appeal. As you can see, very simple balances can have a very nice look when the toes are pointed.
The following slides contain all of the pictures used up to this point (and many more), without the lines, stars, etc. so that you may quickly and easily use them as examples for your students. They may also be used for assessment purposes, as students can be asked to identify the various balance concepts demonstrated in the pictures. They start with one person balances and progress to small group balances. Included are counter-balances, counter-tensions and balances that incorporate both in the same balance. We hope you find them useful in your teaching, and that they help your students to create many other balances as these were meant to stimulate your students’ imaginations. Thanks to my amazing students at Boise State for taking the time to help me create these photos for you.
We would like to make a quick safety note for all balances requiring two or more people. The most stable and safe support points are over joints such as the hips and shoulders as illustrated below. Note how the weight is on the hips with the feet pointed out so that no pressure is applied to the lower back or spine. We also advise avoiding pressure or weight on fleshy parts of the body such as the belly of a muscle or the abdomen. It is also very uncomfortable for the supporting person.