Download
1 / 4
0 likes | 13 Views
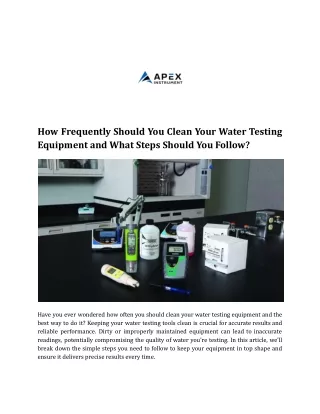
Have you ever wondered how often you should clean your water testing equipment and the best way to do it? Keeping your water testing tools clean is crucial for accurate results and reliable performance. Dirty or improperly maintained equipment can lead to inaccurate readings, potentially compromising the quality of water you're testing. In this article, we'll break down the simple steps you need to follow to keep your equipment in top shape and ensure it delivers precise results every time.<br>

E N D
How Frequently Should You Clean Your Water Testing Equipment and What Steps Should You Follow? Have you ever wondered how often you should clean your water testing equipment and the best way to do it? Keeping your water testing tools clean is crucial for accurate results and reliable performance. Dirty or improperly maintained equipment can lead to inaccurate readings, potentially compromising the quality of water you're testing. In this article, we'll break down the simple steps you need to follow to keep your equipment in top shape and ensure it delivers precise results every time.
Why Clean Your Water Testing Equipment? Water testing equipment is designed to measure various parameters of water quality, such as pH, turbidity, and contaminants. Over time, residues from previous tests, dust, and other contaminants can accumulate on the equipment. This build-up can interfere with measurements and lead to incorrect results. Regular cleaning helps maintain the accuracy of your equipment, prolongs its lifespan, and ensures the reliability of your testing procedures. How Often Should You Clean Your Equipment? The frequency of cleaning your water testing equipment largely depends on how often you use it and the type of tests you're conducting. Here’s a general guideline: 1. After Each Use: For most equipment, especially those that come into direct contact with water samples, a quick rinse with distilled water after each use is a good practice. This prevents residue build-up and ensures that any contaminants from one sample don’t affect the next. 2. Weekly or Biweekly: If you use the equipment frequently or for different types of tests, a more thorough cleaning is recommended weekly or biweekly. This involves using cleaning solutions and brushes to remove any stubborn residues. 3. Monthly or As Needed: For more sensitive or specialized equipment, such as electrodes or sensors, a monthly deep cleaning might be necessary. Always refer to the manufacturer's guidelines for specific recommendations. Steps to Clean Your Water Testing Equipment 1. Read the Manufacturer’s Instructions Before you start cleaning, always check the manufacturer’s instructions for your specific equipment. Different tools may have unique cleaning requirements or restrictions, and following these guidelines is crucial for proper maintenance. 2. Prepare Cleaning Solutions For most cleaning tasks, you’ll need a mild detergent or cleaning solution. Distilled water is also essential for rinsing. Avoid harsh chemicals or abrasive materials, as they can damage sensitive parts of the equipment. 3. Disassemble the Equipment
Carefully disassemble your equipment according to the manufacturer’s instructions. This usually involves removing parts like probes, sensors, or cups. Be gentle to avoid damaging any components. 4. Clean the Parts ● Probes and Sensors: Gently brush or wipe the probes and sensors with a soft cloth or brush dipped in a mild cleaning solution. Avoid scrubbing too hard, as this can damage the sensitive parts. ● Cups and Containers: Clean these with a soft sponge or cloth and a mild detergent. Rinse thoroughly with distilled water to remove any soap residue. ● Cables and Connectors: Wipe down cables and connectors with a dry cloth. Ensure that they are completely dry before reassembling to prevent any moisture-related issues. 5. Rinse Thoroughly After cleaning, rinse all parts thoroughly with distilled water to remove any remaining cleaning solution or residues. Proper rinsing is crucial to prevent contamination of future water samples. 6. Dry Completely Allow all parts to air dry completely before reassembling the equipment. Alternatively, you can use a clean, dry cloth to gently pat the parts dry. Ensure that no moisture remains, as this can cause damage or affect the performance of the equipment. 7. Reassemble and Test Once everything is dry, carefully reassemble your equipment. Check for any loose or damaged parts and make sure everything is properly aligned. Before using the equipment for actual testing, perform a quick calibration or check to ensure that it’s functioning correctly. Maintaining clean water testing equipment is essential for obtaining accurate and reliable results. By following these simple cleaning steps and adhering to a regular maintenance schedule, you can ensure that your equipment remains in excellent condition. Always refer to the manufacturer’s guidelines for specific care instructions and adjust your cleaning routine based on how frequently you use your equipment. With proper care, your water testing tools will serve you well, providing precise measurements and contributing to the overall quality of your water testing process.
Business Name:APEX INSTRUMENT Contact Person Name:Murtaza Shakir Designation: CEO Website URL: https://www.apexinstrument.me/ Business Email: sales@apex-instrument.com Full Business Address:warehouse 2, Ras Al Khor Industrial Area 2 Area:Ras Al Khor City: Dubai State/Province:Dubai Zipcode:187081 Country:UAE Phone Number (Including Country Code): Mobile Number/WhatsApp (Including Country Code):971526191767 97142243449