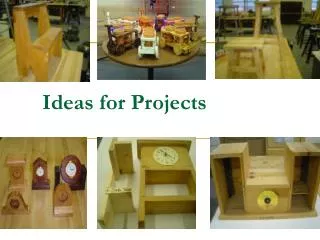
Basic Box Making - woodworking projects ideas
This is the step by step guide on how to make basic box.<br><br>The box seen here is built with quilted maple sides and a spalted maple<br>lift lid. While making this box, you can choose your degree of involveu0002ment with handtools: The joints can be cut primarily with the tableu0002saw then simply cleaned up with a chisel, or you can go to the other extreme and cut the joints entirely<br>by hand using a Japanese dozuki saw or backsaw. Either technique or a combination thereof can be used to build an attractive box and record your emergence as a true craftsman

Basic Box Making - woodworking projects ideas
E N D
Presentation Transcript
W ENJOY THIS SELECTION FROM Basic Box Making taunton’s Basic Box Making D o u g S t o w e To purchase Basic Box Making, make your selection now: • traditional version • ebook version BUY NOW! BUY NOW!
A Lap-Cornered Box T he box seen here is built with quilted maple sides and a spalted maple lift lid. While making this box, you can choose your degree of involve- ment with handtools: The joints can be cut primarily with the table- saw then simply cleaned up with a chisel, or you can go to the other extreme and cut the joints entirely by hand using a Japanese dozuki saw or backsaw. Either technique or a combination thereof can be used to build an attractive box and record your emergence as a true craftsman. I particularly like boxes where the joinery is exposed so that you can tell exactly how the design is held together. With this design, even a quick glance at a distance allows the viewer to say, “I get it. . . . I see how that works. ” With this basic design, you can choose from an infinite range of variables to express your own creativity (see “Design Options” on p. 94). 80 Get Free Woodworking Plans -----> https://www.woodworkingprojectsideas.com
A lap-cornered box 91⁄4 in. 51⁄2 in. Cutting the exposed join- ery on this lap-cornered design is a good way to hone and showcase your handtool skills. The box seen here features quilted maple sides and a spalted maple top. 5⁄8 in. 31⁄2 in. 51⁄2 in. 1⁄2 in. Simple design options 91⁄4 in. Roman ogee Bevel cut 3⁄8 in. Roundover Chamfer materials Quantity Part actual size construction notes 2 Front and back 3⁄8 in. × 31⁄2 in. x 51⁄16 in.* Quilted maple 2 Ends 3⁄8 in. × 31⁄2 in. x 813⁄16 in.* Quilted maple 1 Bottom 5⁄8 in. × 51⁄2 in. × 91⁄4 in. Quilted maple 1 Lid 3⁄4 in. × 51⁄2 in. × 91⁄4 in. Spalted maple *Size includes 1/32-in. cleanup allowance at each end. 1 Pull 27⁄8-in. forged iron Available from Horton Brasses, Inc. (stock number HF-20) www.hortonbrasses.com 800-754-9127 A Lap-Cornered Box 81 Get Free Woodworking Plans -----> https://www.woodworkingprojectsideas.com
Begin with book-matched stock 1. Resaw 1-in.-thick stock right down the middle so that the stock is divided into two pieces of equal thickness. Perfectly matching grain at the cor- ners of a box can make the difference between a box that appears thoughtlessly put together and one that someone might consider art. There are two ways to get grain to match almost perfectly at the corners of a box. The first and most common method, which I’ve used earlier in this book, is to simply cut each piece in sequence from one long piece of stock. This technique gives you three perfectly matching corners and one that is often mismatched (where one end of the board meets the other). Resawing and book-matching the parts, as shown in the drawing on the facing page, is an even better way to make sure that the grain flows perfectly around the corners of a box. Unlike the method using one long piece of wood, using book- matched stock creates a near perfect match at all four corners. Once you understand the process, it’s pretty straightforward. 2. Plane each piece of resawn material to the finished thickness of the box sides. 3. Joint the edges of each piece and rip them to the final width at the tablesaw. 4. Stack the stock back in its original order and cut a section from one end long enough to form the front (or back) and one end. work smart To maintain a close match between book-matched halves, do most of your thicknessing of stock from the face that will become the interior of the box. a Mark the stock Mark the two book- matched pieces of stock to denote front, back, left, and right. In addition, use an arrow to indicate the top edge of each part. 82 A Lap-Cornered Box Get Free Woodworking Plans -----> https://www.woodworkingprojectsideas.com
Two kinds of book-matching are useful in boxmaking Resawing stock offers the opportunity to obtain two types of book-match, each useful in making boxes. A standard match is easier to understand. Looking at it from the end of the stock, you can see where it gets its name. The wood opens like a book. The end-to-end match allows for continuous grain around the corners of a box. It’s much easier to understand when you try it yourself. Saw cut Resawn stock Standard book-match aligns side to side and is used when book-matching panels. Stock opens on resaw line. End grain End-to-end book-matching sides for boxes Standard match Side D Side D Side A Side B Side C Side A Side B Side C Stock opens on resaw line. These ends also match. These ends match. A Lap-Cornered Box 83 Get Free Woodworking Plans -----> https://www.woodworkingprojectsideas.com
cut the front, back, and sides Use the sled on the tablesaw to cut the box ends to length. A stop block clamped to the fence guaran- tees that both pieces are the same length. Adjust the stop block to cut the front and back to exact length. b 5. Mark each piece before the individual sides are cut (photo a , on p. 82). Unlike the corner match- ing in earlier projects, the book-matched stock allows all four corners to match, as you can see by examining the grain of the finished box on p. 80. I mark each piece with an arrow pointing toward the top of the box. After they’re cut, I number each piece in sequence around the perimeter of the box. 6. Use a sled on the tablesaw to cut the box ends to exact length. Use a stop block to control the length of the cut (photo b ). 7. Change the location of the stop block to cut the front and back of the box to length. Mark and cut the lap-corner joints work smart When laying out joinery on two mating parts, use a pencil to mark out the first parts. Once the first parts are cut, mark the mating parts directly off the already- cut parts. When mark- ing the mating parts, using a knife provides greater accuracy. laP corners are relatively easy to cut and assemble. With a good fit, they will hold together with only a bit of glue. If the fit is a bit loose, the joints can be strengthened by adding interlock- ing dowels to reinforce the glue. Also, if done well, the finished box can be assembled without the use of clamps, as the friction of a good fit will hold the corners as the glue dries. Most important, cutting lap 84 A Lap-Cornered Box Get Free Woodworking Plans -----> https://www.woodworkingprojectsideas.com
a b Lay out the Lap corners Use a square and pencil to mark the fingers on the sides and ends of the front and back. Marking and cutting both front and back at the same time will be faster and more accurate and allow for a better fit of the box sides. Mark out the thickness Use a marking gauge to mark the thickness of the stock on the end of each piece. The marking-gauge line helps whether you cut the joinery by hand or on the tablesaw. 1. Set the marking gauge slightly wider (about 1⁄32 in.) than the exact thickness of the stock you’re using for the box sides. This extra space allows a bit of overlap in the joints, which can be easily sanded flush after the box is assembled. Pull the marking gauge along both ends of each piece (photo a ). corners is a good stepping-stone to marking and cut- ting dovetails, as it involves many of the same steps. Lap corners can be cut by hand, machine, or using a combination of the two methods. For more on mak- ing these cuts at the tablesaw, see “Lap-Corner Joints at the Tablesaw” on pp. 88–89. To mark out the stock for lap corners, you’ll need a marking gauge, a square, and a pencil and marking knife. 2. Measure and mark the locations of the half laps on the front and back of the box (photo b ). You’ll mark only the front and back at this point, then mark the sides off the already cut front and back later. The exact spacing of this joint isn’t impor- tant as long as all the corners match. On my box, I located the laps by measuring up 1 in. from each edge. By cutting only the front and back at this point, you avoid some confusion, but you may also find it useful to mark an “X” on the portion of the stock to be removed. Use a square to mark cut lines on the ends of the stock, then extend the pencil marks down the face side of each piece until they intersect the lines formed by the marking gauge. c 3. Use a dozuki saw or dovetail saw to cut the lines in the front and back. The first cuts can be made on two pieces at a time, speeding up and simplifying the process (photo c ). Be sure to carefully align cut two at a tiMe Beginning with two resawn pieces of stock, lay one on top of the other and cut two pieces of equal length. From one length you’ll cut the front and one side; from the other you’ll cut the back and one side. A Lap-Cornered Box 85 Get Free Woodworking Plans -----> https://www.woodworkingprojectsideas.com
the parts in the vise, and take care to follow the marked lines. Pay extra attention to see that the saw is held square to the stock. 4. Remove the waste between cuts. This can be done on the bandsaw, using a coping saw by hand, or with a scrollsaw, as shown in photo d at left. Make a sweeping cut into the joint from one direction and then from the other direction. The object is to leave all the cuts just shy of the marking-gauge line, and then clean up the cuts with a chisel. d cut the fingers Use a dovetail saw or Japanese dozuki saw to cut down to the marking-gauge line scribed on the ends of the front and back. work smart When chopping with a chisel, place a piece of scrap plywood on your workbench to avoid making cuts in the benchtop. e chiseL to the Line Use a wide chisel to finish the cut. Fitting it in the marking-gauge line is more a matter of feel than of eyesight, so it is important that the marking- gauge line be well inscribed. f Mark the Mating parts Use a knife to mark the fingers on the mating parts. Using a knife is more accurate than a pencil line, but it will be harder to see. Plan to use bright lighting from the side during the cut to increase visibility of the cut line. 86 A Lap-Cornered Box Get Free Woodworking Plans -----> https://www.woodworkingprojectsideas.com
g saw just shy of the Line Saw down to the marking-gauge line on each piece. To ensure a better fit, cut the sides one at a time. Cut just shy of your mark, leaving about 1⁄16 in. to be removed with a chisel. 5. Use a chisel to finish the cut. Rest the chisel in the marking-gauge line and give it a few taps with a mallet to begin the cut. Chisel to half depth from one side of the stock, then flip the stock over and cut from the opposite side. To ease assembly, I angle the chisel slightly in toward the stock so that it is slightly undercut (photo e ). Check the squareness of your cuts using a combination or engineer’s square. For the best results, hold the knife flat to the edges of the joint (photo f ). 7. Saw along the knife marks and then rotate the stock in the vise and cut slightly shy of the marking-gauge lines. In cutting the matching parts, it is best to mark and cut them one at a time. If the cut of the first parts are even the slightest amount out of square, the exact fit will be compromised (photo g ). 6. Mark the box ends directly from the joints cut in the front and back using a marking knife. Clamp the parts tightly together so they don’t shift as you apply pressure with the knife. In this application, a marking knife is much more accurate than a pencil. 8. Remove the waste as you did on the front and back in step 4. Then use the marking-gauge lines to guide the chisel as you clean up the cuts (photo h ). h chiseL out the waste Chisel in from each side of the stock, trimming exactly on the marking-gauge line. Trying to remove too much waste at a time leads to a poor fit. Chisel to half-depth on one face, then flip the stock and finish the cut from the other side. A Lap-Cornered Box 87
Lap-cornerjointsatthetabLesaw Lap corners can be cut accurately and efficiently using a sled on the tablesaw. There is almost always an advantage to using machine tools, and in this case the advantages are obvious. As a production technique, simple setups can result in efficient manufacturing with close tolerances. In cutting this joint, it makes no difference whether you cut the male or female portion first. The secret to a good fit is in careful placement of the stop block. cut to the Marking-gauge Line To cut the lap- corner joints on the tablesaw, use a sled or miter gauge outfitted with a stop block to control the position of the cut. Set the blade to cut along the marking-gauge line and raise the blade to the height you prefer for the lap corners. a b 1. Use a marking gauge to lay out the thickness of the mating stock on the end of each piece. (This step is no different than when cutting by hand.) 2. Adjust the stop block so that the saw cuts exactly on the marking-gauge line, then raise the blade to the desired height. In this case, the exact height is not critical, but it does determine the width of the male portion of the joint. Make this cut on each corner of the front and back parts (photo a ). 3. Adjust the stop block and lower the height of the blade so that the cut will intersect the cut you just made at 90 degrees. To avoid trapping waste between the blade and stop block, set the stop block so that you cut on the outside of the male part of the joint (photo b ). cut the finger Set the height of the blade to the thickness of the sides and reset the stop block to locate the fingers of the joint. If your finger is centered on the stock, you’ll cut one side of the stock, then simply flip the stock to cut the other. 88 A Lap-Cornered Box Get Free Woodworking Plans -----> https://www.woodworkingprojectsideas.com
c d cut the front and back Adjust the stop block to cut the lap joint on the front and back pieces. This cut will require careful mea- suring for a perfect fit. MuLtipLe passes reMove the waste Make a series of cuts to remove the waste between the outside cuts. Cutting to within 1⁄16 in. of the marking-gauge line will work well if you don’t mind a bit of chisel work to finish the fit. 4. With the stock held upright in the sled, make the cut on each side of the joint first (photo c ). Then remove the waste material between the cuts, changing the position of the stock on the sled in small increments (photo d ). I prefer to cut about 1⁄16 in. lower than the marking-gauge line, leaving a small amount of stock to be cleaned up with a chisel. Chiseling, rather than sawing, to final depth helps prevent tearout on the back side of the cut. e 5. The final fitting of the joint requires a minimal amount of handwork with a chisel. Place the chisel in the marking-gauge line and cut to half depth on one side of the stock. Then flip the stock over to complete the cut (photo e ). cLean up the cut As in cutting this joint by hand, set a wide chisel in the marking-gauge line to clean up the cut. Cut in first from the inside face of the stock, then flip the stock over and cut from the other side. A Lap-Cornered Box 89 Get Free Woodworking Plans -----> https://www.woodworkingprojectsideas.com
Assemble the sides for this box, you’ll Want to assemble the sides of the box before you begin cutting the lid and base to size. Working in this order, you can accurately size them for a perfect fit. If you have done a good job in fitting the lap corners, this box can be assembled without clamps—the friction of the fit will hold the parts in position as the glue sets. A looser fit can be assembled using tape, then rein- forced using dowels. female parts of the sides, back, and front join. I use a squeeze glue dispenser and then spread the glue evenly on the mating surfaces with my finger or a stick. Pay attention to the markings on the box sides to make certain that you assemble all the parts in the correct order and with the correct sides facing out. 3. If the joints fit snug, no clamps will be required. If they are just a bit loose, use clear tape to hold the parts in position as the glue sets. Even a poorly fit- ted joint will hold together long enough with glue and tape for you to install dowels to strengthen the joints. 1. Sand the interior surfaces of the box sides to 240 grit. Sanding can be done by hand or machine. Either way, it’s much easier to sand the interior of the box prior to assembly. 2. Assemble the box parts by applying a small amount of glue to the surfaces where the male and 4. Check the box for square by measuring corner to corner and adjust it if necessary before the glue sets. Make the lid and base Whether you cut the joints by hand or machine, the steps for making the lid and base are the same. You’ll use a router table with a fence and a straight-cut router bit. I prefer a rather wide bit to make the cut, as it cuts more efficiently. As an alternative, this cut can be made using a dado blade on the tablesaw. The finished lid and base are each made in the same manner. a rabbet the base and Lid Fitting the base and lid can be done on the router table using a wide straight- cut router bit and a fence to control the position of the cut. Rout the end grain first so that any tearout on the sides will be removed in subsequent cuts. 90 A Lap-Cornered Box Get Free Woodworking Plans -----> https://www.woodworkingprojectsideas.com
b finish the rabbet Finish the rabbet on both the top and bottom by routing the sides. As an alternative, this cut can be made using a dado blade on the tablesaw. Cut in small increments to achieve a perfect fit. 1. Cut the top and bottom to length and width at the tablesaw. In this step, you can follow the cutting list or modify the proportions, increasing or decreasing the amount the lid or base extends beyond the sides of the box. 4. Adjust the fence in steps until the base and lid fit within the perimeter of the box sides. An exact fit in length is acceptable. Across the width of the box, allow a small amount of expansion space. In the event that the box is exposed to extreme humidity, this small space will keep expansion of the lid or base from pushing the joints apart (photo b ). 2. With a straight-cut router bit mounted in the router table, raise the bit to cut 1⁄8 in. high and set the fence so that the router bit is partially buried. The amount of the bit exposed depends on the diameter of the bit you choose. Rout across the end grain first. Any tearout that results where the bit exits the wood will be removed in the next step (photo a ). Rather than rout to the finished size based on measurements, I gradually work my way to a perfect fit. work smart When routing multiple edges of a board, always rout the end grain first. Routing the long grain on the sides will remove any tearout cre- ated from the end grain cuts. 3. Rout the side grain after the end grain. It may help to hold the stock slightly away from the fence for an initial pass. Then finish the cut with the stock held tightly against the fence. A Lap-Cornered Box 91 Get Free Woodworking Plans -----> https://www.woodworkingprojectsideas.com
Shape the lid and base making any box offers many creative options for the box maker. In this case, the simple choice of router bits or methods used in shaping the lid and base can lend unique character to your box. You may want to make more than one of these boxes to gain firsthand knowledge of what works for you and what does not. I follow a few simple guide- lines that you are welcome to follow or ignore. If I’m chamfering the edges of a box, I generally use flat surfaces elsewhere to convey a sense of consistency in the design. When using roundover bits or roman ogees, I attempt to use curved edges elsewhere in the piece, to convey the same sense of planned con- sistency. Following these rules helps create an inte- grated box design. 1. Use your choice of router bit in the router table to rout the top edges of the lid and the base. I par- tially bury the bit in the router fence to provide greater control and safety during the cut. rout the edges Router-bit profiles can be used to rout the edges of the lid and base, or the lid can be shaped using other techniques. At right, a combination of roman ogee and roundover is used, and at left, there is a table- sawn bevel on the lid and a routed chamfer on the base. 2. Change to a small roundover or chamfering bit to rout the underside of the lid and base. Finish the box i Prefer to add the base to the box after the sides are sanded and all surfaces, includ- ing those on the lid, have been finished with Danish oil. Prefinishing allows all surfaces to be well sanded and prevents oil finish from accumulating in cor- ners, where it is difficult to rub out. As a final creative touch, add hardware of your choice. Look beyond the conventional range of box hardware for some interesting and distinctive results. work smart Unusual material makes unusual boxes. If you want to make your boxes unique and express your own personality, don’t hesitate to experi- ment with odd or interesting woods. Successful designs grow from trial, error, and experimentation. 92 A Lap-Cornered Box Get Free Woodworking Plans -----> https://www.woodworkingprojectsideas.com
attach the puLL Choose an interesting pull and use screws to attach it to the lid. At left is a solid brass traditional drawer pull used in an unconventional manner. At right is a hand-forged steel pull. 1. Sand the outside surfaces of the box, starting with the stationary belt sander and finishing with the orbital sander with 320 grit paper. If you prefer, the sanding can be done by hand. hours before recoating. The object of rubbing out the finish is not to completely dry the surface of the wood, but to wipe away wet spots and distribute the finish in a uniform sheen. 2. Sand the lid and base with the orbital sander, then pay special attention to the edges and routed surfaces with a little hand-sanding. 4. Use clear construction adhesive to attach the base to the sides of the box. An alternate approach would be to use wood glue, but this would require masking off the joining surfaces prior to finishing. 3. Apply two coats of Danish oil. Rub out the fin- ish just before it begins to get sticky, then wait 24 5. Install your choice of hardware. A Lap-Cornered Box 93 Get Free Woodworking Plans -----> https://www.woodworkingprojectsideas.com
design options Building this box from rough woods can add a rustic charm to a refined design concept. the Walnut box beloWis aPerfect example of this effect. The contrast between the coarse texture of the weathered wood against the refined joints and the smooth, highly polished texture of the base and lid creates a lasting impression. To make the rustic walnut box, pass rough, weathered walnut through the planer with the textured side turned away from the knives. Thickness the wood as you would any other lumber, but refrain from planing the most interesting side of the wood. Cut the lap joints by hand or at the tablesaw, then use walnut dowels to secure the joint. a inlaying the lid Inlaying various materi- als—wood or otherwise—into the lid of the box is another interesting way to personalize the design. In the box at left above I inlaid landscaping stones into the lid of a basswood box. But there is no rea- son to limit yourself to stones—almost any small object could be inlaid into the lid. When making a box with this design, the lid must be assembled from two pieces of wood rather than routed to fit. While you are at it, it is easy to make the base using the same assembly technique. 1. Cut two pieces of wood to the dimensions of the inside of the box and two larger pieces to form the outside layers of the base and lid. Lay out the stones Making a lid with inlaid stones requires careful placement of the rocks and then tracing their position onto the lid. Once their positions are clearly marked, draw a meandering line between them. 94 A Lap-Cornered Box Get Free Woodworking Plans -----> https://www.woodworkingprojectsideas.com
b 2. Mark a meandering but pleasing line on the top of the lid panel. Lay your stones in place on the line in an arrangement that suits your tastes, then trace their outlines in pencil (photo a ). 3. Use a scrollsaw to cut along the meandering line and then cut away the space within the out- lines marked for the stones (photo b ). 4. Check the fit of the stones and then gently round the freshly sawn edges of the lid. A round- edged sanding block works great for rounding the edges (photo c ). reMove stock to fit the stones Use a scrollsaw or coping saw to remove the area to be occupied by the individual stones. c 5. Apply regular woodworking glue to the inner parts of the lid and base. Clamp the outer piece of the base to the inner piece of the base. Then position the two scrollsawn pieces of the top on the inner piece of the top and clamp everything in place (photo d ). 6. Before the glue sets, check the fit of the rocks in the lid and make adjustments as necessary (photo e ). test the fit Reassemble the top panel tempo- rarily and check the fit of the stones. d e cLaMp everything in pLace Use spring clamps to hold the parts of the box lid together while the glue sets. gLue up the Lid Cover the inner portion of the box lid with glue. This piece should be fitted to the inside dimensions of the box prior to gluing to the top panels. A Lap-Cornered Box 95 Get Free Woodworking Plans -----> https://www.woodworkingprojectsideas.com