Download
1 / 35
560 likes | 1.89k Views
The Bitewing Technique. Reference reading: Chapter 19. Objectives for Bitewings:. Show interproximal caries Show pulp changes Show overhangs Display improperly fitting crowns Shows recurrent caries beneath restorations Show resorption of alveolar bone. Alveolar Bone. Contact Areas.

E N D
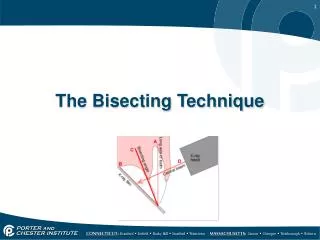
The Bitewing Technique Reference reading: Chapter 19
Objectives for Bitewings: • Show interproximal caries • Show pulp changes • Show overhangs • Display improperly fitting crowns • Shows recurrent caries beneath restorations • Show resorption of alveolar bone
The Bitewing Technique • Is a method used to examine the inter-proximal surfaces of the teeth (where the explorer doesn’t reach). • Considered a method of preventive dentistry. • Is a radiographic exam that is used the most frequently in conjunction with dental exams and cleanings.
How it works: • X-ray beams pass through teeth at a 90 degree angle, which creates a more accurate image of structures. • The use of paralleling technique creates the illusion of open contacts, giving the appearance that there are spaces between the teeth. • Appears radiolucent (BLACK) • Show the crowns of both upper and lower teeth, as well as the supporting alveolar bone, on a single film.
Principles of Bite-wing Technique: • The film is placed in the mouth parallel to the crowns of both the upper and the lower teeth • The film is stabilized when the patient bites on the bite-wing tab or film holding device. • The central ray of the x-ray beam is directed through the contacts of the teeth, using vertical angulation of +10 degrees
The Bite-wing Tab • The Bite-wing tab: this is a sticky tab that is placed on the tube side of the film packet. • The patient bites directly on the tab, and therefore establishes a better image because the teeth are fully closed, and there is no bite-block interference.
Film Holding Devices - Rinn • Rinn XCP Bitewing instrument: • Just like the Rinn for periapical films, the Rinn bite-wing holder will position the film, stabilize it, and align the PID for a good diagnostic film.
Bite-Wing Radiograph Views • Premolar view: • angle the PID at +10 degrees vertically; • horizontally aim toward center of film, between the premolars and the occlusal plane • Center tab on 2nd premolar • Molar view: • angle the PID at +10 degrees vertically, • horizontally aim at contacts of 1st and 2nd molars • Center tab on 2nd molar
Four sizes of film are used for BWX • Size 0 = pediatric patient with primary dentition • Size 1 = children with mixed dentition • Size 2 = teens and adult patients • Size 3 = horizontal bitewings only; • not recommended due to overlapped contact results
Vertical Bite-wings • Can be used to examine the level of supporting bone in the mouth. • The bite-wing is placed in a vertical, up and down, direction. • Mainly used for periodontal patients.
Modified CMRS using Vertical Bite-wings • A total of 7 projections are used to cover all areas.
The importance of angulation: • The whole purpose of the bitewing examination is to see the interproximal areas of the teeth. • If horizontal angulation is incorrect, the contacts will be overlapped, and produce a film of poor diagnostic quality. To avoid overlap, direct the CR through the interproximal areas of the teeth. • If the vertical angulation is incorrect, the image will be distorted, and also of poor diagnostic quality
Modifications to the BW Technique • Edentulous Areas • A cotton roll must be placed in the area of the missing teeth to support the bite-wing tab. • Failure to support the BW tab results in a tipped occlusal plane on the radiograph. • Bony Growths (tori) • Mandibulartori may cause a problem in film placement. • The film must be placed between the tori and the tongue, not on the tori.
Helpful Hints • BEFORE PLACING FILM IN PATIENT’S MOUTH: • Set exposure factors • (kVp, mA, exposure time) • Ask patient to remove all intraoral objects and eyeglasses • Check the oral anatomy • Tori? Shallow or narrow palate? • Limited opening? • Attempt to retract cheeks and tongue to gauge difficulty during film placement.