Download
1 / 54
540 likes | 722 Views
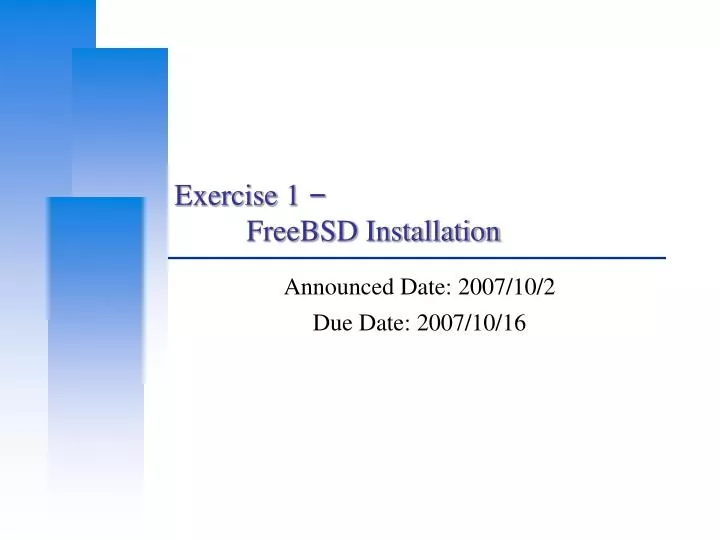
Exercise 1 – FreeBSD Installation. Announced Date: 2007/10/2 Due Date: 2007/10/16. Outline. FreeBSD version Installing FreeBSD Update source and make world Rebuild kernel. FreeBSD branches. Two parallel development branches: -STABLE

E N D
Exercise 1 – FreeBSD Installation Announced Date: 2007/10/2 Due Date: 2007/10/16
Outline • FreeBSD version • Installing FreeBSD • Update source and make world • Rebuild kernel
FreeBSD branches • Two parallel development branches: • -STABLE • Receive only well-tested bug fixes and other small incremental enhancement • Latest Release version: • 5.5 May, 2006 • 6.2 Jan, 2007 • -CURRENT • Latest working sources for FreeBSD • Latest Release version: • 7.0-CURRENT
FreeBSD version • A.B.C – Type • A: major version Number • B: minor version Number • C: slight patch version number • Type: version type • SNAP • ALPHA、BETA、GAMMA • RELEASE • RELENG • STABLE • CURRENT Alpha Beta Gamma Snapshot Release Releng Stable
FreeBSD view of Disk (1) • What is the meaning of ad0s1e • Disk name • IDE: ad • SCSI: da • Slice is equal to the partition of common use • Primary partition: s1 ~ s4 • Extended partition: s5 ~ sn • Label in each slice • a: root partition • b: swap • c: entire disk • d: entire partition • efgh: /usr, /home, …
FreeBSD view of Disk (2) • An Example
Installing FreeBSD • Steps • Knowing your hardware • Obtaining installation file • Booting from CD • sysinstall main menu • Custom Installation Options • Partition • Label • Distribution • Media • Commit • Post Installation
Installing FreeBSD – 1. knowing your hardware • CPU • 32bit or 64bit • Intel、AMD or other brand • Pentium-II, Pentium4, Xeon, XP1700+, Optron, C3 • RAM • Size • HD • Size, amount, SCSI or IDE • VGA • Brand, ram size • Sound • Brand • Network Interface Card • Brand • IP、Netmask、default gateway、Hostname、DNS • Other Special device
Installing FreeBSD – 2. Obtaining installation file • FreeBSD installation CD • ftp://freebsd.csie.nctu.edu.tw/pub/ISO-IMAGES-i386/6.2/6.2-RELEASE-i386-bootonly.iso • ftp://freebsd.csie.nctu.edu.tw/pub/ISO-IMAGES-i386/6.2/6.2-RELEASE-i386-disc1.iso • Burn! • Boot Floppy Image • ftp://freebsd.csie.nctu.edu.tw/pub/releases/i386/6.2-RELEASE/floppies/boot.flp • ftp://freebsd.csie.nctu.edu.tw/pub/tools/fdimage.exe • C:\fdimage.exe boot.flp a:\
You can press “Scroll Lock” key to see probe results. sysinstall Main Menu Contry Selection “Taiwan” Console Keymap “USA ISO” Choose “Custom” Installing FreeBSD – 4. sysinstall Main Menu
5 major steps Partition your disk Label your disk Choose what to install Choose how to install Commit Installing FreeBSD – 5. Custom Installation Options
Installing FreeBSD – 5. Custom Installation – partition (1) • Create slice and choose boot manager • Press “C” to create a new slice or press “A” to use entire disk • Press “S” to toggle ad0s1 as bootable (we will put / on this slice) • Press “Q” to next step (Select Boot Manager)
Installing FreeBSD – 5. Custom Installation – partition (2) • Select “Standard” for ad0 • BootMgr Multiple OS • Standard Single OS • None Other BM • After press OK, it will back to Custom Installation Options menu
Installing FreeBSD – 5. Custom Installation – partition (3) • If you have more than one disk… • You can choose whether to partition it. • Install “BootMgr” for first disk and “none” for rest ones
Installing FreeBSD – 5. Custom Installation – Label (1) • Disklabel Editor • Move blue bar to select slice • Press “C” to create disk label • swap , / ( and /home, /var, …) • Specify size • Choose type (either swap or FS) • Specify mount point • Press “S” to toggle SoftUpdates (async written to disk) • Press “Q” to next step (back to custom installation options menu)
Installing FreeBSD – 6. Custom Installation – Label (2) • Create label in ad0 and specify size
Installing FreeBSD – 6. Custom Installation – Label (3) • Complete disklabel
Installing FreeBSD – 6. Custom Installation – distri. (1) • Choose Distributions Menu • Choose “Custom”
Installing FreeBSD – 6. Custom Installation – distri. (2) • Select • base ; binary • kernels(all) ; Generic kernel and SMP kernel • Man ; Manual • src ; FreeBSD Source Code • ports ; FreeBSD Software Collection • local ; local additions • After Selection • Press “OK” and it will return to “Choose Distributions menu” • Press “OK” again to back to “Custom Installation Options menu” • Select “Media”
Installing FreeBSD – 6. Custom Installation – Media (1) • Choose CD/DVD if you have 6.2 Release CD • Choose FTP if your NIC is detected • Choose FTP Passive if you in private network
Installing FreeBSD – 6. Custom Installation – Media (2) • Install through FTP • Specify ftp server and path
Installing FreeBSD – 6. Custom Installation – Media (3) • Select NIC • IPv6 and DHCP
Installing FreeBSD – 6. Custom Installation – Media (4) • Specify your IP information • Press “OK” to next step
Installing FreeBSD – 6. Custom Installation – Commit • Start to format disk、make file system and install software • You can press “Alt + F2” to see the install detail
Installing FreeBSD – 7. Post Installation (2) • Root Password • Time Zone Asia Taiwan • Mouse enable • Networking sshd • Packages (optional) • editors/vim-lite
FreeBSD source • Maintained in a CVS repository in California • Two softwares to get the latest FreeBSD source • CVSup • CSup – A rewrite of the CVSup file updating client in C • We can use CSup keep our FreeBSD source up-to-date with any FreeBSD mirror sites • Install CSup • Edit CSup supfile • Update source using CSup • Up-to-date your system • Build world & kernel using the updated source. • Install softwares. • Upgrade softwares.
FreeBSD source CSup Installation • Install via pkg_add • Package is pre-compiled application • % pkg_add ftp://freebsd.csie.nctu.edu.tw/pub/releases/i386/6.2-RELEASE/packages/editors/vim-lite-7.0.94.tbz • pkg_add package-name • pkg_delete package-name • pkg_info package-name • All installed package is stored in /var/db/pkg • The csup binary is in /usr/bin/csup • You can use “whereis” command to find something
FreeBSD source CSup Configuration file (1) • Example csup supfile • /usr/share/examples/cvsup/standard-supfile • /usr/share/examples/cvsup/ports-supfile • Create your own supfile • Edit /usr/local/etc/cvsup-src • Edit /usr/local/etc/cvsup-ports
FreeBSD source CSup Configuration file (2) • /usr/local/etc/cvsup-src *default host=freebsd.csie.nctu.edu.tw Where to get source *default base=/usr Where to put status file *default prefix=/usr Where to put source *default delete use-rel-suffix Allow cvs to delete *default compress Compress before transmit *default release=cvs tag=RELENG_6_2 src-all
FreeBSD source CSup Configuration file (3) • CVS tags • Branch Tags • . (FreeBSD-CURRENT line) • RELENG_6 (FreeBSD 6-STABLE line) • RELENG_5 (FreeBSD 5-STABLE line) • Release Tags • RELENG_6_2 (FreeBSD 6.2-RELEASE) • RELENG_5_5 (FreeBSD 5.5-RELEASE) • To refer to a specific point in time • RELENG_6_2_0_RELEASE • RELENG_5_5_0_RELEASE http://www.freebsd.org/doc/en_US.ISO8859-1/books/handbook/cvs-tags.html
FreeBSD source CSup Configuration file (4) • /usr/local/etc/cvsup-ports *default host=freebsd.csie.nctu.edu.tw *default base=/usr *default prefix=/usr *default delete use-rel-suffix *default compress *default release=cvs tag=. ports-all
FreeBSD source CSup Configuration file (5) • you can put them all together in /usr/local/etc/cvsup-all *default host=freebsd.csie.nctu.edu.tw *default base=/usr *default prefix=/usr *default delete use-rel-suffix *default compress *default release=cvs tag=RELENG_6_2 src-all ports-all tag=.
FreeBSD source Update source using CSup • Update both src and ports • % /usr/bin/csup -L 1 /usr/local/etc/cvsup-all > /var/log/csup.log The “–L 1” tells cvsup to print out the details of all the file updates it is doing. from 0 (silent) to 2
Rebuilding world & kernel • The canonical way to update system • make buildworld • make buildkernel • make installkernel • reboot and boot in single user mode • mergemaster -p • make installworld • mergemaster (or mergemaster -U) • reboot
Rebuilding world & kernel – Prepare make.conf • Example make.conf • /usr/share/examples/etc/make.conf 5.x ~ 6.x • Everything add in make.conf is used every time you run make • KERNCONF=CHBSD • CPUTYPE?=pentium4 man make.conf has detail descriptions of it Available CPUTYPE: See /usr/share/mk/bsd.cpu.mk
Rebuilding world & kernel – make buildworld • Build FreeBSD entire system • % cd /usr/src • % make buildworld >& /var/log/world.log & make –j n buildworld Spawn multiple (n) processes to do make. The compiling processes of make world is I/O bound.
Rebuilding world & kernel – make buildkernel (1) • Why rebuild kernel? • Faster boot time. • Probe only necessary device • Lower memory usage • Smaller kernel image • Additional hardware support.
Rebuilding world & kernel – make buildkernel (2) • Edit kernel config file • cd /usr/src/sys/i386/conf • GENERIC may not have all for your system • LINT has every options %use “make LINT” to generte the LINT file • cp GENERIC “YOUR-NAME” • We often use hostname to be “YOUR-NAME” • edit config file • Depend on your system • Be attention to related options • Following the explanation of http://www.freebsd.org/doc/en_US.ISO8859-1/books/handbook/kernelconfig-config.html
Rebuilding world & kernel – make buildkernel (3) • Build kernel • % cd /usr/src • % make KERNCONF=CHBSD buildkernel If the KERNCONF=“YOUR-NAME”has been set in your make.conf You can use “make buildkernel” instead
Rebuilding world & kernel – make installkernel • Install kernel • % cd /usr/src • % make KERNCONF=CHBSD installkernel make buildkernel && make installkernel = make buildkernel installkernel = make kernel
Rebuilding world & kernel – reboot into single user mode • Boot in single user mode • Press “4” Or • % shutdown now • For a running system, this will drop it to single user mode
Rebuilding world – make installworld • mergemaster -p • -p Pre-buildworld mode. Compares only files known to be essential to the success of {build|install}world, including /etc/make.conf. • Install the built world • % make installworld
Rebuilding world – mergemaster • mergemaster [ -U ] • Synchronize /usr/src/etc with /etc • Choose “i” for most case, such as • /etc/defaults/rc.conf, … • Press “enter” for certain file, such as • master.passwd, hosts, csh.* • -UAttempt to auto upgrade files that have not been user modified.
Reboot • Reboot and enjoy it • % reboot
If Something Goes Wrong … (1) • Possible errors in building new kernel • Configuration file • % cd /usr/src/sys/i386/conf/ • % config CHBSD • make fail • Install fail • Kernel does not boot • Boot with old kernel, recompile kernel • Kernel works, but ps does not work • Build world
If Something Goes Wrong … (2) • Boot with old kernel • In 5.x ~ • Press “6” • Type “boot /boot/kernel.old/kernel” • In 4.x • Hit any key other than “enter” when counting down • Type “unload” • Type “load /kernel.old” • Type “boot”