Download
1 / 19

E N D
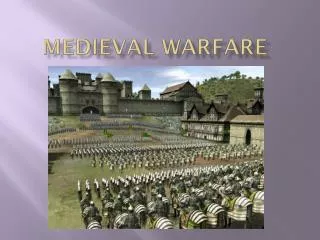
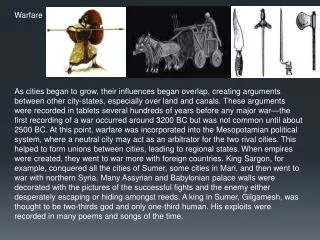
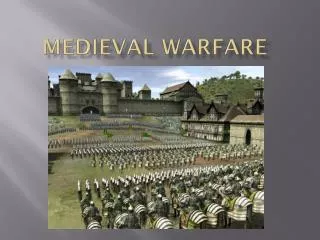
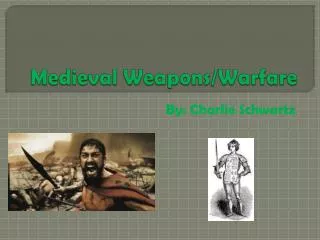
Medieval Warfare It was very important for commanders of medieval armies to realise that they needed to make effective use of the men under their command. However, the Scots never had enough knights or archers to make any difference in the war; they were forced to rely on their foot soldiers. At times this was a success, but often it meant that they were outclassed by the English. War on the Horizon
Foot soldiers • Foot soldiers are sometimes referred to as infantry or men-at-arms. • They made up the majority of medieval armies. It was their job to secure battlefields and capture towns. • English foot soldiers tended to be better armed and have better armour than their Scottish counterparts.
Archers • Archers tended to have little or no armour as that would just get in the way of shooting the enemy – most archers were common peasants. • English archers carried longbows. These were very powerful and could pierce most types of armour. • Later, in the middle ages, archers become more important than any other type of soldier.
knights • Knights wore the heaviest type of armour. It meant that they were almost invulnerable. • Warhorses were trained to run into battle: they could kill with their hooves. • Before the Scottish wars, most battles were won by knights. The army that had the most knights usually won. Later the knights become less important.
Activities Using P39-40 of the textbook answer the following questions: • Why would Walter of Guisborough claim such a high number of soldiers for the English side? • Describe the Scottish army • What type of soldiers • What type of weapons 10mins
England had many advantages: • England was a rich country: they could afford more soldiers, and better weapons and armour. • The English had far more knights than the Scots. • English archers had longbows, which were much more powerful and had a longer range than Scottish bows. • The English troops had recent experience at war. Edward had been fighting the Welsh and the French, and so the English were what was called ‘seasoned campaigners’. • The Scots had not fought a battle since Largs in 1266. They were out of practice. • Many powerful Scottish nobles would not fight against England in case they lost the lands they had there.
An artists impression of the battle of Stirling Bridge. It accurately portrays the narrow battlefield of the bridge Stirling and Falkirk Sitting on top of a volcano and surrounded by 2 separate sets of walls and a moat, Stirling Castle was virtually impregnable
Stirling's importance • If an army marches north into the heartlands of Scotland, they need to pass by Stirling Castle. • The land is blocked by the Firth of Forth. • The river Forth is only passable by ferry (too slow and too dangerous to do with an army.) • The only real crossing of the river Forth is at Stirling Bridge • An army can’t march up the west coast of Scotland • it’s very barren • The region is mountainous • There are rivers to cross (e.g. the Clyde a formidable obstacle.)
Stirling Bridge 11 September 1297
Battle of Stirling Bridge • English Army was called back twice: • Because Warrene had overslept • Because Warrene thought that they would negotiate It wasn’t until 11am (Started at dawn) that the battle began 'Tell your commander that we are not here to make peace but to do battle, defend ourselves and liberate our kingdom. Let them come on, and we shall prove this in their very beards.’
Wallace and Murray’s plan • The Scottish army will wait on a hill across the river bank. • The English will expect the Scots to wait until they finish crossing the bridge before they attack – the chivalrous thing to do. • As soon as the English were half-way across they charged into combat. • Wallace and Murray had no intention of being chivalrous
English commanders were arrogant and thought that they would win easily English Plan • Warenne decides to advance. He is advised to send a cavalry force upstream to The Ford of Drip in order to cover the infantry’s crossing, however Edward’s treasurer, Hugh de Cressingham, intervenes, pointing out that too much of the king’s money has already been wasted and insisting that they cross at once to bring the campaign to a swift end. Tactical error Hugh Cressingham’s contributions were not welcomed by the other commanders, he had already sent home thousands of men because he didn't want to pay the wages • Cressingham was anxious to end the uprising so he could dismiss the men and avoid paying more wages than he had to
Activities • What did Cressingham do wrong in the battle? • What did Wallace and Murray do right? • explain in your own words how Wallace and Murray managed to defeat Cressingham’s army. 15mins
Significance of the victory • Stirling Bridge was not a significant military victory. • However, it did prove that the mighty English army could be defeated in battle by the Scots • After the victory Wallace and Murray were able to win a lot of support in Scotland, and both were named joint Guardians of Scotland. • Unfortunately Murray died a few weeks later from infected wounds he received at Stirling.
What happened afterwards • Murray’s death was unfortunate, as he may have been the tactical genius behind the victory rather than Wallace. • Wallace decided to take the battle to England. • He raided as far south as York, causing a great deal of damage and terror in the northern counties. • However, Edward had now returned from France, determined to finally settle the Scottish question.
Activities Surviving documents show a confident government headed by Wallace and Murray • Why did the Nobility allow a man of low birth become so powerful? • There are 3 reasons given 5mins
Falkirk • Edward returned • These armies were becoming very expensive, but Edward needed to crush Wallace. • Wallace's best strategy was to retreat into the highlands and wait for the English to withdraw. • However, the Scottish nobles shamed him into fighting a pitched battle.
Falkirk Wallace was determined to withstand the English cavalry charge. He designed a new tactic called the schiltron (wall of thickets). According to some, he placed this formation behind sharpened stakes in the ground to provide even more protection from horses.
Falkirk Edward had brought with him 2000 knights and 1200 footmen, including a lot of archers. Edward’s charging cavalry forced the Scottish knights to flee the battle, leaving the Scottish archers vulnerable. Edward then used his superior archers to massacre the schiltron formations.