Download

1 / 52
520 likes | 659 Views
Asset Management NPMA Presentation May 28, 2014 Understanding Physical Inventory. Agenda. Understanding Physical Inventory. Extracts and Scopes Physical Inventory Occurrence Generating Extract File Data Collection Inventory Processing. Physical Inventory Steps.

E N D
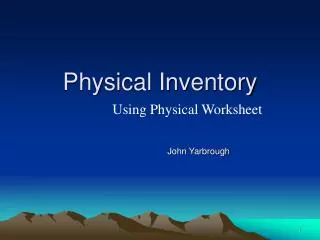
Asset Management NPMA Presentation May 28, 2014 Understanding Physical Inventory
Agenda Understanding Physical Inventory • Extracts and Scopes • Physical Inventory Occurrence • Generating Extract File • Data Collection • Inventory Processing
Physical Inventory Steps • Extracts and Scopes Extract Scope: Set of all assets that you might scan during a physical inventory. This set of assets is broader than the scan scope. It should include all possible locations for the assets to be inventoried. Scan Scope: Set of all assets that are defined in PeopleSoft Asset Management as belonging to a particular location to be scanned.
Extracts and Scopes Example: You plan to take an inventory on the top two floors of a building. Because the assets may have been redistributed since the last inventory, the extract file might include assets of the entire business unit. However, the scan scope would include only assets on the top two floors.
Extracts and Scopes Financial vs. Physical Assets
Extracts and Scopes Create Extract: Asset Management> Mass Change> Define Criteria • Extracts and Scopes are created through the Mass Change functionality. • Existing Extracts and Scopes need to be updated for each new Physical Inventory. • Each inventory must include an extract and scan scope for both capital assets and non-capital assets.
Extracts and Scopes Create Extract: Asset Management> Mass Change> Define Criteria
Understanding Physical Inventory Agenda • Physical Inventory Occurrence
Physical Inventory Occurrence Asset Management > Physical Inventory > Define Inventory Occurrence • The Physical Inventory ID will set the criteria defined in the extract and scan scope for each physical inventory performed for the agency. • Each occurrence links the extract and scan scopes of the inventory being performed.
Physical Inventory Occurrence The transaction date will become the inventory date in the PI history of an asset.
Understanding Physical Inventory Agenda • Generating Extract File
Generating Extract File • On the Physical Inventory page, select the PI ID for the Occurrence and click the Save button. There are five transactional steps for processing inventory on this page. • There is a sixth step that is completed for final posting. • The Last PI Step Executed will display the current step.
Generating Extract File • To create the extract, click the Extract button. Click Run. • Click the Process Monitor link to check the progress of the process.
Generating Extract File • Click the OK button.
Generating Extract File • Click the Go back to Physical Inventory link once the Run Status displays Success and the Distribution Status displays Posted.
Generating Extract File • Click the Gen Extr File button to run the second step to generate the Extract File. • The Step buttons are no longer grayed out after running the processes. Be careful to only run each process once.
Generating Extract File • Click the Run button.
Generating Extract File • Click the OK button.
Generating Extract File • Click the Go back to Physical Inventory link once the Run Status displays Success and the Distribution Status displays Posted.
Generating Extract File • The extract file to load onto the Scanner has been successfully created. • The Last PI Step Executed now displays 2 Extract File Generated and the yellow button is no longer grayed out. • To view the extract file click the View/Download link.
Generating Extract File File> Save As • The extract will open in another window. • This file will be placed on the barcode scanner in the CoreCTData folder.
Understanding Physical Inventory Agenda • Data Collection
Data Collection Scanner Method
Data Collection Spreadsheet Method
Understanding Physical Inventory Agenda • Inventory Processing
Inventory Processing Asset Management> Physical Inventory> Load/Match/Reconcile PI Info • Navigate to the Load/Match/Reconcile page to load the scan file into Core-CT. • The Last PI Step Executed should be 2 Extract File Generated. • Click the Load Scan File button. • Click the Garbage Pail icon to prepare to load the scan file from the scanner.
Inventory Processing • Click the Paper Clip icon to select the Scan file to be used.
Inventory Processing • Browse to find the .dat Scan file that was transferred from the scanner to the desktop. • Select the file and click the Upload button.
Inventory Processing • Click the Run button.
Inventory Processing • Click the OK button to run the process.
Inventory Processing • Click the Go back to Physical Inventory link once the Run Status displays Success and the Distribution Status displays Posted. • If the process runs to error, you must go to the Details page and delete the request.
Inventory Processing • The Last PI Step Executed will now display: 3 Scan file loaded. • To load multiple scan files and associate them to the same Inventory Occurrence, click the garbage pail icon, then attach the additional file(s).
Verify Scan Data Asset Management> Physical Inventory> Verify Scanned Data • To view the scan file online navigate to Asset Management> Physical Inventory> Verify Scanned Data. • Enter the Physical Inventory ID and click the Search button.
Verify Scan Data • A list of Assets from the scan file will display.
Inventory Processing Asset Management> Physical Inventory> Verify Duplicate Tags • The scanner software will not allow the same tag to be scanned twice. But, if several scan files are loaded to the same Physical Inventory, there is a chance that the same tag was captured in each scan file. • The verifying Duplicate Tags process will identify any duplicates that exist. • Enter the Physical Inventory ID. Click the Search button. • Delete any duplicate tags on this page.
Inventory Processing Asset Management>Physical Inventory>Verify Duplicate Serial ID • Assets that have duplicate serial numbers can not be processed for Physical Inventory in Core-CT. The serial numbers can be updated during the scan process or they can be updated during the Verify Duplicate Serial ID process. • Two assets that have the same legitimate serial number can be differentiated by adding a unique suffix at the end of the serial number. The Core-CT standard serial suffix is the first letter of the Manufacturers name. For example: a Dell laptop computer with a serial number of 4567 would be entered as 4567D. • The actual reconciliation can now be performed.
Inventory Processing Asset Management> Physical Inventory> Load/Match/Reconcile PI Info • To start the reconciliation, click the Gen Results button to generate the results of the scan against the extract. Click the Run button.
Inventory Processing • Click the OK button to run the process. • Go to the Process Monitor to check the run status of the job. This step can take a bit of time to run to Success and Posted. • Click the Go back to Physical Inventory link.
Inventory Processing • The Last PI Step Executed will display 4 PI Results Generated. • To back up step(s) select the corresponding Delete button and run the process through the Process Monitor. For example, if not ready to Generate Results, click the Delete Res button and start over.
Inventory Processing Asset Management> Physical Inventory> Review Matching Results • Navigate to the Inventory Results. • Enter the Physical Inventory ID and click the Search button to see a list display. • Click one of the links to see detailed information.
Inventory Processing • This is an example of an Under. An Under is an asset that was not found during the scanning process. • Unders can be reconciled by loading an additional file.
Inventory Processing • This is an example of an inventoried asset.
Inventory Processing • This is an example of an Over. This is a new asset that was added while scanning. • Assets that are “over” can be added by the system as physical assets when the inventory has been loaded.
Inventory Processing Asset Management> Physical Inventory> Load/Match/Reconcile PI Info • Returning to the Load/Match/Reconcile PI Info page, the last step is to generate the transactions to be ready for posting in Core-CT. • Click the Gen Trans button. Click the Run button.
Inventory Processing • Click the OK button on the next screen to run the process. • Click the Go back to Physical Inventory link once the Run Status displays Success and the Distribution Status displays Posted.
Inventory Processing • Last PI Step Executed will display 5 Transactions Generated. This generates pending physical inventory transactions that are ready to be loaded in Transaction Loader. • The final step (#6) is to run the Transaction Loader process.
Inventory Processing Asset Management> Send/Receive Information> Approve Physical Information> Review-A • The transactions have to be posted in Core-CT. To verify the data prior to posting, navigate to the Physical A staging table. • Enter the Interface ID and click the Search button.
Inventory Processing • A list of the data will display showing the load status. Every asset will have an Inventory History Insert record. • Assets that are changing location will have an Asset Location Change record. • New assets will have a Physical Add record. • Assets that have information updates (i.e. serial number change), will have an Asset Update record.
Inventory Processing • This is a screen shot of a transaction record. The asset processor will now load the transactions to finalize the inventory.
Inventory Processing Asset Management> Physical Inventory> Review Inventory History • Enter the Business Unit and an Asset ID, press Search