Download
1 / 46
460 likes | 570 Views
Backup workshop. Yi Shen Mar 18 th , 2014. Stanford Exploration Project. Two procedures. Two procedures. Two procedures. rsync & crontab. Two procedures. rsync & crontab. Two procedures. rsync & crontab. Time machine. The first procedure. rsync & crontab. Time machine.

E N D
Backup workshop Yi Shen Mar 18th, 2014 Stanford Exploration Project
Two procedures rsync & crontab
Two procedures rsync & crontab
Two procedures rsync & crontab Time machine
The first procedure rsync & crontab Time machine
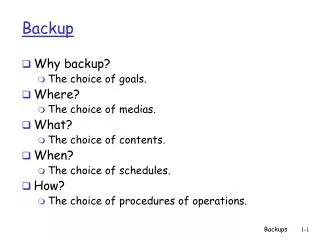
Introduction of rsync • Synchronize your files and directories from the server to your local computer; • Only back up the changes
Introduction of crontab • Allows tasks to automatically run in the background of the system at given intervals; • Helps you do the backup once a day without manual operation.
Procedure • Make a directory in your mac for backup • Copy the script to your backup directory • Change the script • Manually run the script • Create a cron schedule • Check the success of your crontab
Procedure • Make a directory in your mac for backup e.g. mkdir ~/backup • Create a file on the server for monitor • e.gmkdir ~/backup/ • Create a txt file like “I am doing backup”
Procedure • Make a directory in your mac for backup • Copy rsyncscript to your backup directory • Change the script • Manually run the script • Create a cron schedule • Check the success of your crontab
Procedure • Download it from • http://sepwww.stanford.edu/data/media/public/sep/yishen/backup/
Procedure • Make a directory in your mac for backup • Copy the rsync script to your backup directory • Change the script • Manually run the script • Create a cron schedule • Check the success of your crontab
Procedure • Make a directory in your mac for backup • Copy the script to your backup directory • Change the script • Manually run the script • Create a cron schedule • Check the success of your crontab
Manually test • ./backupscript.py • The first backup will take a while • Manually running the script for your first backup during the weekend or in the evening instead of using crontab is recommended.
Procedure • Make a directory in your mac for backup • Copy the script to your backup directory • Change the script • Manually run the script • Create a cron schedule • Check the success of your crontab
Create a cron schedule • Type “crontab –e” in the terminal window • The text editor will open a blank window for the “crontab entries” to be entered. • Each line presents a separate cron jobs.
Create a cron schedule • * * * * * /Users/yishen/backup/backupscript.py restart
Create a cron schedule • * * * * * /Users/yishen/backup/backupscript.py restart
Create a cron schedule • * * * * * /Users/yishen/backup/backupscript.py restart
Create a cron schedule • An asterisk (*) is used to indicate that every instance of the particular time period will be used. * * * * *
Change asterisks(*) accordingly For example, Yi Shen’s command would look: 40 1 * * * /Users/yishen/backup/backupscript.py restart
Procedure • Make a directory in your mac for backup • Copy the script to your backup directory • Change the script • Manually run the script • Create a cron schedule • Check the success of your crontab
Check • Type “ls -ltr /var/mail” • Check the time shown in bold as follows -rw------- 1 yishen mail 5559 Mar 16 1:40 yishen
Check • Type “ls -ltr /var/mail” • Check the time shown in bold as follows -rw------- 1 yishen mail 5559 Mar 16 1:40 yishen
Check (2) • Growl
The second procedure rsync & crontab Time machine
Procudures • Initialize your hard drive • Use time machine to back up your local computer
Procudures • Initialize your hard drive • Use time machine to back up your local computer
Introduction of time machine • The built-in backup that works with your Mac and an external drive; • Automatically backs up your entire Mac; • Remembers how your system looked on any given day; • Performs subsequent hourly backups of only the files that have changed on your Mac since the last backup
Change the backup interval • From the command line • Point-and-click
Change the backup interval • sudo defaults write /System/Library/LaunchDaemons/com.apple.backupd-auto StartInterval -int 18000
Change the backup interval • sudo defaults write /System/Library/LaunchDaemons/com.apple.backupd-auto StartInterval -int 18000 backup interval in seconds — five hours
Change the backup interval • From the command line • Point-and-click • Time machine scheduler
Notice • The first backup may take a while; • Set up Time Machine in the evening so that the initial backup can be done overnight.
Acknowledgement • Thanks Sjoerdfor helping with the rsync script • Thanks Bobfor purchasing the cases • Thanks Ohadfor providing the internal hard drives
Thank you Yi Shen Mar 18th, 2014 Stanford Exploration Project