Download
1 / 2
40 likes | 376 Views
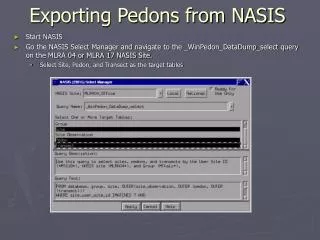
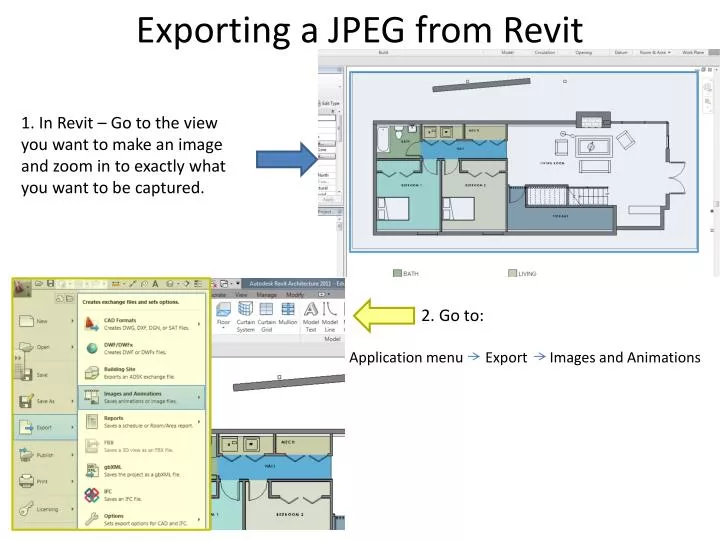
1. In Revit – Go to the view you want to make an image and zoom in to exactly what you want to be captured. Exporting a JPEG from Revit. 2. Go to: Application menu Export Images and Animations. Exporting a JPEG from Revit. 3. Click on Image.

E N D
1. In Revit – Go to the view you want to make an image and zoom in to exactly what you want to be captured. Exporting a JPEG from Revit 2. Go to: Application menu Export Images and Animations
Exporting a JPEG from Revit 3. Click on Image 4. Change the highlighted settings and hit OK ***Image size Fit to pixel number = pixel width. Change this number to the image size you need.