Download
1 / 25
330 likes | 590 Views
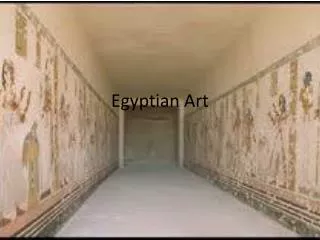
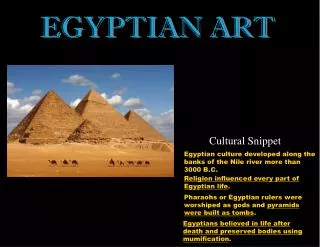
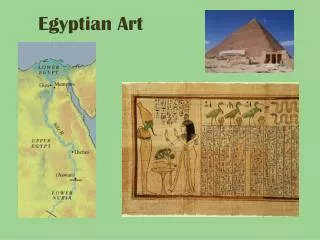
Egyptian Art. Sculpture, Painting, Architecture, Pottery. Art and Time. Most Art changes very quickly. For example, in our society art that was popular just a few years ago is no longer considered trendy. .

E N D
Egyptian Art Sculpture, Painting, Architecture, Pottery
Art and Time Most Art changes very quickly. For example, in our society art that was popular just a few years ago is no longer considered trendy. The art on the left is from the 1960s, on the right, 1920s. Looksatthe difference after just 40 years. I was considered modern 90 years ago Hi, I’m a painting of Marilyn Monroe. I was made by Andy Warhol in the 60s. I was crazy popular.
Egyptian Cultural Stability Remember, the Egyptians valued stability and disliked change. Also, they were geographically isolated, and had little influence from the outside world. These two statues were carved more than 1000 years apart! Look at how similar they are after all that time. The style has not changed at all.
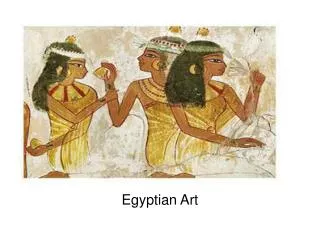
RULES! RULES! RULES! The Egyptian style comprised a set of very strict laws, which every artist had to learn from his earliest youth. Seated statues had to have their hands on their knees; Men had to be painted with darker skin than women; The appearance of every Egyptian god was strictly laid down: Horus, the skygod, had to be shown as a falcon or with a falcon's head; Anubis, the god of funeral rites, as a jackal or with a jackal's head. Every artist also had to learn the art of beautiful script.. He had to cut the images and symbols of the hieroglyphs clearly and accurately in stone. But once he had mastered all these rules he had finished his apprenticeship. No one wanted anything different, no one asked him to be 'original'. On the contrary, he was probably considered the best artist who could make his statues most like the admired monuments of the past. So it happened that in the course of three thousand years or more Egyptian art changed very little. Want to learn more? Click here!
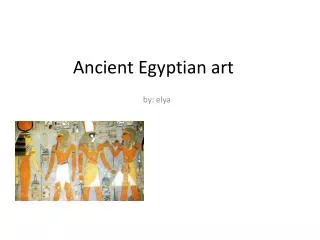
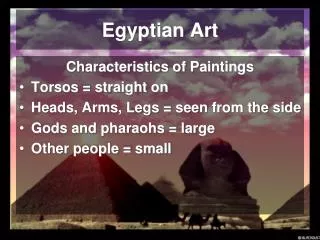
RULES ON NTHE HUMAN FORM Egyptians did not try to capture reality, Instead, everything had to be represented from its most characteristic angle. Consider the effect which this idea had on the representation of the human body. The head was most easily seen in profile so they drew it sideways. But if we think of the human eye we think of it as seen from the front. Accordingly, a full-face eye was planted into the side view of the face. The top half of the body, the shoulders and chest, are best seen from the front, for then we see how the arms are hinged to the body. But arms and legs in movement are much more clearly seen sideways. That is the reason why Egyptians in these pictures look so strangely...contorted. Moreover, the Egyptian artists found it hard to visualize either foot seen from the outside. They preferred the clear outline from the big toe upwards. So both feet are seen from the inside, and the man on [a] relief looks as if he had two left feet. It must not be supposed that Egyptian artists thought that human beings looked like that. They merely followed a rule which allowed them to include everything in the human form that they considered important. History 10 – Use these rules to create two pictures of yourself, in the Egyptian Style. 1 standing, 1 seated.
Rules on Writing • Hieroglyphics were expected to be perfectly and beautifully inscribed – a work of art all in themselves. • Egyptians use 2,000 symbols to make up the Hieroglyphic alphabet. Some stand for sounds, others for whole words. • Not all Egyptian sounds relate to ours. For example, the Egyptians had two different types of the letter “K.” One made the “kah” sound, the other made the “kay” sound. As well, they had a sound in their language that sounded like a combination of “W” and “O” (like the double o in too), so they only have one symbol for both O and W. • One of the rules for Hieroglyphics was that people’s names were separated from the rest of the text by placing the symbols that spelled the name in a separate oval with a line under it, called a cartouche. For example, this is the cartouche for King Tut. Whenever you see a symbol like this, you know that someone’s name is inside it.
The Book of the Dead • The "Book of the Dead" is the name given to the ancient Egyptian book which describes the mummification process, as well as well as how the souls of the dead could pass obstacles and enter the afterlife. The Book of the Dead was intended to assist the deceased in the afterlife and was a collection of songs, spells and the nine step instructions on mummy making.
The Book of the Dead- Step 9 • This detail scene shows step nine, a heart being weighed on the scale of Maat against the feather of truth, by the jackal-headed Anubis. The Ibis-headed Thoth, scribe of the gods, records the result. If his heart is lighter than the feather, the deceased is allowed to pass into the afterlife. If not, he is eaten by the waiting creature Ammut, composed of the deadly crocodile, lion, and hippopotamus.
Making A Mummy • Step 1: Announcement of Death • This first step was to let the people know that someone had died. A messenger was sent out to the streets to announce the death. This allowed people to get themselves ready for mourning period and ceremony. • Step 2: Embalming the Body • The second step was taking the body to be embalmed. The embalmers were located in special tents or buildings. These buildings were called embalming workshops, and were maintained by teams of priests. Oftentimes during the embalming, the priests would have to step outside to get away from the horrible smell. • Step 3: Removal of Brain • The first part of the body to be removed was the brain. Egyptians did not know the purpose of the brain, so they thought it was a waste of space. To extract the brain, a hook was inserted through the nose. The embalmers pulled out as much as they could, then put it in water to dissolve. Some people think the water was then thrown out, but others think it was taken with the mummy to the burial chamber. • Step 4: Removal of Internal Organs • Next to be removed were the internal organs: the liver, the lungs, the stomach, and the intestines. A small slit was made on the left side of the abdomen, then the embalmers reached in and pulled out the organs. Each of the organs was individually mummified, then stored in little coffins called canopic jars. There were four canopic jars, one for each of the organs. These jars were protected by the four sons of Horus. Once the internal organs were removed, the inside of the body was washed out with palm oil, lotions, and preserving fluids. Next the body was stuffed with linen, straw, or other packing material to keep the general shape of the person. Sometimes the embalmers were careless and either stuffed too much or too little. This caused the mummy to look puffy or disfigured. • Step 5: Drying Out Process • The body was placed on a slab and covered with either nacron or natron salt. The slab was tilted so that the water would run off into a basin. This removed moisture and prevented rotting. The body was taken outside and let dry for about forty days. After the body was completley dried out, the wrapping of the body began.
Step 6: Wrapping of the Body • Wrapping the body was a painstaking process. The body was anointed with oils, and a gold peice with the Eye of Horus was placed over the slit in the abdomen. Hundreds of yards of linen were used to wrap the body, and each toe and finger was wrapped separatley. Charms, amulets, and inscribed pieces of papyrus were placed between each layer of bandage. Egyptians believed that these charms had magical properties that would protect and bring luck to the body. The Eye of Horus, the symbol of protection, was used often. The wrapping process would be stopped every once in a while so that the priests could say certain prayers and write on the linen. A final shroud was placed on the mummy to keep all the wrappings together. Mummia was added to the shroud to "glue" it all together. (That's where the word "mummy" comes from.) Sometimes false eyes were inserted and make-up applied. Then a painted portrait mask was placed over the mummy's head so that dead person's soul (Ka) could recognize its owner. The mummy was then placed into a painted, decorated coffin. Step 7: Final Procession • The last step of mummification was the final procession. The final procession was where the family and friends of the deceased walked through the town on their way to the burial place. Mourners were paid to cry so that the gods of the other world would see that the person was well loved. The more people who cried, the more he was loved, and the better chance he had of going to the after world. Before the mummy was taken inside the tomb, a ceremony called the "Opening of the Mouth" took place. Step 8: Opening of the Mouth • The Opening of the Mouth was performed by priests outside the burial chamber. This was one of the most important preparations. The family of the mummy recited spells while the priests used special instruments to touch different parts of the mummy's face. The Egyptians believed that the mummy would not be able to eat, see, hear, or move in the afterlife if this ceremony did not take place. The mummy was then laid in the burial chamber along with all of his belongings, the canopic jars, and the Book of the Dead. The Book of the Dead was not actually a book, but a collection of over 200 magic spells written on papyrus. This book contained instructions on how to acheive eternal life. Then the tomb was sealed.Step 9: Weighing of the Heart – Done by the Goddess Ma’at. This page survives, and should be attached to the back of your book. • The most important task to achieve immortality was not actually seen by anyone. This task was called "The Weighing of the HeartIn this ceremony, the gods of the underworld judged the mummy's heart, or how well he behaved during his natural life. Maat, the goddess of truth, brought out her scale; on one side was the mummy's heart, and on the other was the Feather of Truth. Anubis, the god of the underworld, made the final judgement, and Thoth, the scribe god, recorded it all. If the heart balanced the feather, the soul of the mummy was granted immortality. If the heart was heavier than the feather (if the sins outweighed the virtues), the soul was doomed to a horrible fate. The heart was thrown to a monster called Ammit, or Devourer of the Dead.
Your Assignment • OH NO! • The Book of the Dead has been lost! Only page 9 survives!! • This book was very important to Ancient Egyptians. It explained the nine step process by which a Mummy was made. If you are not turned into a mummy, you do not get to enjoy the afterlife! • Your task is to recreate the Book of the Dead, pgs 1-8. • You must divide yourselves into groups of eight. Each of you will illustrate one page, which explains one step in the mummification process. • When you are done, staple all the pages together, and pass in your work. • You will be graded on how well you follow the Egyptian rules on art, not on your artistic skill. You will also earn points for the degree of detail and effort in your book. • Each person in the group will pick one of the attached steps, and illustrate it. • Each person will sign their own page with their name, both in English, and in a hieroglyphic cartouche. • Use the rules and the examples attached to give your book an authentic Egyptian feel.
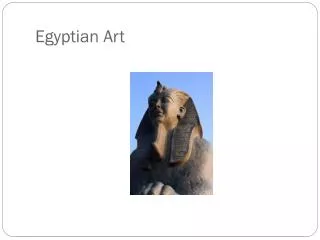
SCULPTURE The ancient art of Egyptian sculpture evolved to represent the ancient Egyptian gods, Pharaohs, and the kings and queens, in physical form. Massive statues were built to represent gods and famous kings and queens. These statues were supposed to give eternal life to the kings and queens, and to enable the subjects to see them in physical forms.
PAINTINGS Ancient Egyptian paintings survived due to the extremely dry climate. The ancient Egyptians created paintings to make the afterlife of the deceased a pleasant place. Accordingly, beautiful paintings were created. The themes included journey through the afterworld or their protective deities introducing the deceased to the gods of the underworld. Some examples of such paintings are paintings of Osiris and warriors. Some tomb paintings show activities that the deceased were involved in when they were alive and wished to carry on doing for eternity.
ARCHITECTURE Due to the scarcity of lumber,the two predominant building materials used in ancient Egypt were sunbaked mud brick and stone, mainly limestone, but also sandstone and granite in considerable quantities. From the Old Kingdom onward, stone was generally reserved for tombs and temples, while bricks were used for royal palaces, homes, fortresses, the walls of temples and towns. Thus, our understanding of ancient Egyptian architecture is based mainly on religious monuments,[ massive structures characterized by thick, sloping walls with few openings.
ARCHITECTURE Although the the arch may have been known to ancient Egyptians, all monumental buildings are of simple right angle based design, with flat roofs constructed of huge stone blocks supported by massive external walls and many closely spaced columns. Exterior and interior walls, as well as the columns and piers, were covered with hieroglyphic and pictorial frescoes and carvings painted in brilliant colors. Many motifs of Egyptian ornamentation are symbolic, such as the scarab, or sacred beetle, the solar disk, and the vulture. Other common motifs include palm leaves, the papyrus plant, and the buds and flowers of the lotus.[Hieroglyphs were inscribed for decorative purposes as well as to record historic events or spells.
POTTERY Different types of pottery items were deposited in tombs of the dead. Some such pottery items represented interior parts of the body, like the heart and the lungs, the liver and smaller intestines, which were removed before embalming. A large number of smaller objects in enamel pottery were also deposited with the dead. It was customary to craft on the walls of the tombs cones of pottery, about six to ten inches tall, on which were engraved or impressed legends relating to the dead occupants of the tombs. These cones usually contained the names of the deceased, their titles, offices which they held, and some expressions appropriate to funeral purposes.
Art Assignment for Homework Points • You must complete x drawings: • 1) A picture of yourself sitting • 2) A picture of yourself standing • 3) A decorated cartouche of your name • All Egyptian art was colourful and detailed, so you will be graded on this, as well as the amount of effort you put into it. • Finally, most of your grades will come from showing your understanding of the rules.