Download
1 / 12
120 likes | 315 Views
DHHS Open Window. Office of Procurement & Contract Services Login & Set up Profile. Initial Login screen. Click the “Login” link on the main screen. The URL for the LIVE (Production Site) is: http://openwindow.ncdhhs.gov/. Login.

E N D
DHHS Open Window Office of Procurement & Contract Services Login & Set up Profile
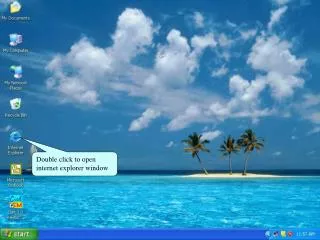
Initial Login screen Click the “Login” link on the main screen. The URL for the LIVE (Production Site) is: http://openwindow.ncdhhs.gov/
Login Please note the helpful instructions in case you are having trouble with this page or are not sure what information to enter. UserName: Your NCID Password: Your individual NCID password that you have set up (if you have trouble with your NCID, you will need to contact your division representative or ITS directly, we do not have the ability to help with this.)
Login Screen *** IMPORTANT *** Once you have logged in the system for the first time with your NCID and password, EXIT Open Window (Logout) and notify your division’s Contract Manager that you have completed step 1. They will notify the System Administrator who will need to finish setting up your access before you can navigate the system. Once that is completed, you may sign back in and access areas of the system. Your access roles will allow you to do certain things in the different areas. You will also need to acknowledge the Open Window Disclaimer the first time you enter the system. This is important since the system houses sensitive and confidential information that needs to be protected.
Getting to your Profile You will note that the Login link changed to display YOUR NCID and now includes a link to “Logout”. Click YOUR NCID to go to your profile to set it up the first time you access the system after your access is set up by the System Administrator.
Setting up your Profile 1 2 3 4 5 6
Setting up your Profile • Items per page This number determines the number of items that will display per page for all lists throughout the system. • Division This is set to the division you work in. If you happen to have responsibilities in more than one division, each division should be available in the drop-down, but you need to select the main division to which you are assigned. • Email Enter your correct email address. DHHS Open Window is set up to send certain types of emails and reminders so it is important to keep this up to date. • Display Name Enter your full name here. This is how your name will display in DHHS Open Window. Please do not enter just “Sally” – when others are searching through a list in the system, they will not know who Sally is. • Disclaimer Accepted This indicates that you have read and accepted the DHHS Open Window disclaimer and will protect any information that you come across in the system. • Current Roles This area displays the roles that you are assigned to in the system. You can be assigned more than one depending upon your responsibilities within the system.
SAVE your details • Be sure to SAVE your information when you have finished entering the data. • You will notice that your NCID has changed to the Display Name you entered. [Be sure to use your full name to display] • You may return to your profile page at any time by clicking the display name link.
Contact Details • Go to second tab, “Contact Details”. • Enter your MSC address and select the Address Type drop down to be “Main” address. Click Save New. • Enter your physical address and select the Address Type drop down to be “Ship To” address. Click Save New. • Enter your phone number and select the Phone Number Type save as “Main”. Click Save New. • Enter your fax number and select the Phone Number Type save as “Fax”. Click Save New. • If you need to make any changes to any of the items saved, click the “Edit” button next to the item, make the change and click “Update”.
Practice Site – https://uatopenwindow.dhhs.state.nc.us/default.aspx- Internal to the network (remote offices)https://uat-openwindow.dhhs.state.nc.us/default.aspx - External to the network (over the internet) • After you are registered, you can also go to the Practice/UAT Site to navigate and review what has been addressed in the Webinar sessions. • Nothing you do in the Practice/UAT Site will effect anything on the Production (Live) Site. • The practice site will be updated on a regular basis to mirror the Production (Live) Site. • The only time this may be an issue is when you register with the live site –the practice site is updated with all of the information usually once a week – including your login information. You will need to be patient and give it time to catch up.