Download
1 / 30
300 likes | 543 Views
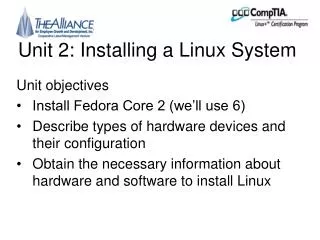
Module 1: Installing Windows XP Professional. Overview. Planning an Installation of Microsoft Windows XP Professional Installing Windows XP Professional Upgrading to Microsoft Windows XP Transferring User Settings and Files by Using the USMT Performing Post-Installation Tasks .

E N D
Overview • Planning an Installation of Microsoft Windows XP Professional • Installing Windows XP Professional • Upgrading to Microsoft Windows XP • Transferring User Settings and Files by Using the USMT • Performing Post-Installation Tasks
Lesson: Planning an Installation of Microsoft Windows XP Professional • Checking System Requirements • Checking Hardware and Software Compatibility • Determining Disk Partitioning Options • Choosing the Appropriate File System: FAT, FAT32, or the NTFS File System • Deciding on a Workgroup or Domain Installation • Completing a Pre-Installation Checklist
Checking System Requirements CPU Hard Disk Space Memory 2.0 GB P2 233 MHz or Higher Display Accessories VGA 64 MB RAM Required 128 MB RAM Recommended Other Drives Networking
Checking Hardware and Software Compatibility • Check hardware compatibility at: http:// www.microsoft.com/whdc/hcl/default.mspx • Generate compatibility reports by running:The Winnt32 /checkupgradeonly utility
Determining Disk Partitioning Options Create New Partition on Unpartitioned Hard Disk Create New Partition on Partitioned Hard Disk Install on Existing Partition Delete Existing Partition to Make Disk Space Available
Choosing the Appropriate File System: FAT, FAT32, or the NTFS File System Windows XP Professional Windows 98 NTFS FAT/FAT32 • File- and folder-level security • File compression • Disk quotas • File encryption • Supports dual-boot configurations • No file- and folder-level security
SAM SAM SAM SAM Deciding on a Workgroup or Domain Installation Workgroup Single User Account Domain Active Directory
Verify that hardware meets minimum requirements Verify that hardware is supported Determine disk partitioning strategy Select file system for the Windows XP Professional partition Determine whether to install in a workgroup or domain ü ü ü ü ü Completing a Pre-Installation Checklist
Lab A: Planning a Microsoft Windows XP Professional Installation • Exercise 1: Determining That the Computer Meets the Minimum System Requirements
Lesson: Installing Windows XP Professional • Installing Windows XP Professional from a Product CD • Installing Windows XP Professional over a Network
Installing Windows XP Professional from a Product CD Installation Tasks Running the Setup Program 1 Completing the Setup Wizard 2 Installing Network Components 3
Prepare client computer 1 Enable network connectivity 2 Connect to distribution server 3 Run the Setup program 4 Install Windows XP Professional 5 Installing Windows XP Professional over a Network
Lab B: Installing Windows XP Professional (Simulation) • Exercise 1: Simulation Instructions
Lesson: Upgrading to Microsoft Windows XP • Identifying Upgrade Paths • Preparing Your System • Choosing an Installation Type • Upgrading Computers Running Windows 98 • Upgrading Computers Running Windows 2000 or Windows NT 4.0 SP 5 • Installing Windows XP Professional in a Dual-Boot Configuration
Windows 98, Windows Me, Windows NT 4.0 Workstation SP 5, and Windows 2000 Professional Windows XP Professional Identifying Upgrade Paths Windows 95 Windows 98 Windows XP Professional Windows NT 3.51 Windows NT 4.0 Workstation SP 5 Windows XP Professional
Determine hardware and software compatibility Install hardware and software updates as necessary Back up files Scan for viruses Uncompress compressed drives Uninstall incompatible software ü ü ü ü ü ü Preparing Your System
Upgrading Computers Running Windows 98 • Plan your installation • Prepare your system • Run the setup program to install Windows XP Professional Windows 98 Windows XP Professional
Windows XPProfessional Windows 2000 Professional and Windows NT Workstation 4.0 Upgrading Computers Running Windows 2000 or Windows NT Workstation 4.0 SP 5 • Same registry • Same application support • Same device support • Easiest upgrade to Windows XP Professional
Installing Windows XP Professional in a Dual-Boot Configuration Windows 98 Windows XP Professional
Lesson: Transferring User Settings and Files by Using the USMT • Settings, Folders, and File Types Transferred by Default • Transferring a User State by Using the Files and Settings Transfer Wizard • Transferring a User State by Using Command-Line Tools • Changing Transferred Files or Settings by Modifying the .inf Files
Settings, Folders, and File Types Transferred by Default • Settings Transferred by Default • Folders Transferred by Default • File Types Transferred by Default
Transferring a User State by Using the Files and Settings Transfer Wizard Logon to the destination computer, open the FAST Wizard, and create a FAST Wizard Disk 1 On the Source Computer, log on as the migrating user, use the disk to run the Wizard, and store the user state on removable media or on a network share 2 On the destination computer, complete the FAST Wizard to restore the user’s settings 3
Transferring a User State by Using Command-Line Tools Requirements for transferring a user state by using command-line tools include: • A server to which the source and destination computers can gain access • A source computer containing an account for the user’s state being transferred • A destination computer running Windows XP Professional that does not contain a profile for the user whose state you will be transferring • An account with administrative privileges on the destination computer • The account name and password of the user whose settings and files are to be transferred
Changing Transferred Files or Settings by Modifying the .inf Files
Lab C: Transferring User Settings by Using the USMT • Exercise 1: Migrating a User’s Settings and Files • Exercise 2: Restoring User Settings and Files
Lesson: Performing Post-Installation Tasks • Activating Windows XP Professional • Troubleshooting Failed Installations
Troubleshooting Failed Installations CD errors Error Nonsupported CD-ROM drive Error Insufficient disk space Error Failure of dependency service to start Error Inability to connect to the domain controller Error Failure of Windows XP Professional to install or start Error