Download
1 / 26
260 likes | 484 Views
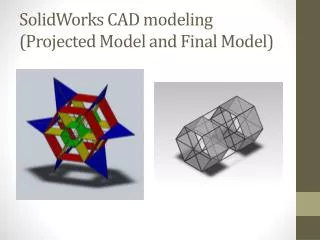
Model Railroad Concepts and Design With CAD. Todd Arnett Plumbing Systems Designer 35,500 Hours Seat Time Using AutoCad . What is CAD?. CAD is an acronym for Computer Aided Design. Also know as CADD: Computer Aided Drafting and Design.

E N D
Model Railroad Concepts and DesignWith CAD Todd Arnett Plumbing Systems Designer 35,500 Hours Seat Time Using AutoCad
What is CAD? • CAD is an acronym for Computer Aided Design. • Also know as CADD: Computer Aided Drafting and Design. • CAD software has replaced traditional drafting performed by hand with T-Squares, Angles, and other drawing instruments.
Advantages of Using CAD • Precision: CAD software can precisely draw objects and measure objects with tolerances up to .00000000” • Time: Designs can be modified in a minimal amount of time compared to traditional drafting. • Production: Drawings can be quickly scaled, dimensioned, and plotted.
Disadvantages of Using CAD • Learning Curve: All CAD software programs require learning commands and using them together efficiently. • Cost: CAD programs can cost anywhere from $100 to $15,000 per seat (copy). • Plotting: Producing architectural size drawings require a plotter or plotting services.
CAD Programs • AutoCad (http://usa.autodesk.com) Not model railroad specific. $1200-$3,745. Used early releases can be had for $150-$200. • 3rd Planit (http://www.eldoradosoft.com/3pi.htm) $159.90 • Cadrail (http://www.cadrail.com) $109.95 • XTrkCAD (http://www.xtrkcad.org/Wikka/HomePage) Free
Designing with AutoCad • Layers: Layers are the equivalent of the overlays used in paper-based drafting. They are the primary organizational tool in AutoCAD, and you use them to group information by function and to enforce linetype, color, and other standards. By creating layers, you can associate similar types of objects by assigning them to the same layer. For example, you can put construction lines, text, dimensions, and title blocks on separate layers. You can then control • Whether objects on a layer are visible in any viewports • Whether and how objects are plotted • What color is assigned to all objects on a layer • What default linetype and lineweight is assigned to all objects on a layer • Whether objects on a layer can be modified
Designing with AutoCAD • Room Dimensions: Draw the boundaries of the layout room on a dedicated layer. The room can be saved as an individual drawing and used as an external reference (X-Ref). • Track and Turnouts: For the best precision, obtain the turnouts that you wish to use, draw them individually, and save each as a “block”. • Block: A generic term for one or more objects that are combined to create a single object and saved as individual drawings that can be inserted into the main drawing.
Designing with AutoCad • Ever sketched your freight yard on paper and then realized during construction that you do not have enough room? I have, but only once!
Designing with AutoCAD • Yard Design: Now we have accurate drawings of turnouts, we can insert them and have an accurate yard.
Designing with AutoCAD • Track Spacing of a Yard: Modify the UCS (User Coordinate System). • UCS: You define a user coordinate system (UCS) to change the location of the 0,0,0 origin point and the orientation of the XY plane and Z axis. You can locate and orient a UCS anywhere in 3D space, and you can define, save, and recall as many UCSs as you require. Coordinate input and display are relative to the current UCS.
Designing with AutoCAD • Align UCS with centerline of diverging route of first turnout. • Insert turnout and, using construction lines, move turnouts along the plane to achieve desired track center distance. • Demonstration to follow, time permitting.
Grade and Elevation Here’s a question that I seen on a message board: “What is a 1.5% grade in HO scale?” Answer
Grade and Elevation 1.5% Why? Grade percentage is defined as rise in elevation over a distance of 100 feet. Therefore, grade percentage is the same regardless if it’s prototype, HO scale, N scale, etc.
Implementing a Grade • What grade percentage to use? • Most common and practical is up to 2.5% for typical mainline modeling. • Grades greater that 2.5% are typical for branch line and logging operations. • Consider your motive power when choosing a grade. A typical locomotive can loose one half of it’s pulling ability on a 1.5% grade. • Will one line cross over another? Calculate required clearances based on thickness of sub-roadbed, roadbed, rail code, and tallest type car. • Grade and curves: The broader the curve the better. The smaller the radii, the greater the drag of friction.
Grade Formulas • Rise/Run = Grade: 2’/100’=.02 (2%) • Grade x Run = Rise: .02 x 100’ = 2’ • Rise/Grade = Run: 2’/.02 = 100’
Vertical Curve A smooth parabolic curve in the vertical plane used to connect two grades of different slope to avoid an abrupt transition in passing from one to the other.
Vertical Curve • In model railroading, a gradual bend (arc) in the sub-road between the differing slopes will suffice. • Arc radius should be broad enough to accommodate the longest car type. • Trial and error most often works best!
Couplers and Grade Transition • Couplers will vertically shift when making a transition in grade. • Coupler height on each car and locomotive should be consistent to avoid train separation and “roll backs”. • Craftsmanship of track laying is critical.
Reverse Curves (“S” Curves) • Reverse curves add a nice visual to your layout. • Should be planned accordingly. The tangent section between the curves should be equal to or longer than your longest piece of equipment.
“Straight Line” Schematic • A schematic of the railroad is easy to create in AutoCad. • Use a schematic to indicate lengths of sidings, yard tracks and distance between crossovers on double track mains. • Doing such will help you plan your train lengths and the logistics of all movements based on equipment parameters.
Learning AutoCad • Central Piedmont Community College offers a an introductory class: DFT 151 CAD I. • Cost is approximately $225.00. • Students may be eligible to purchase a copy of AutoCad LT for a reduced price.