Download
1 / 60
610 likes | 1.08k Views
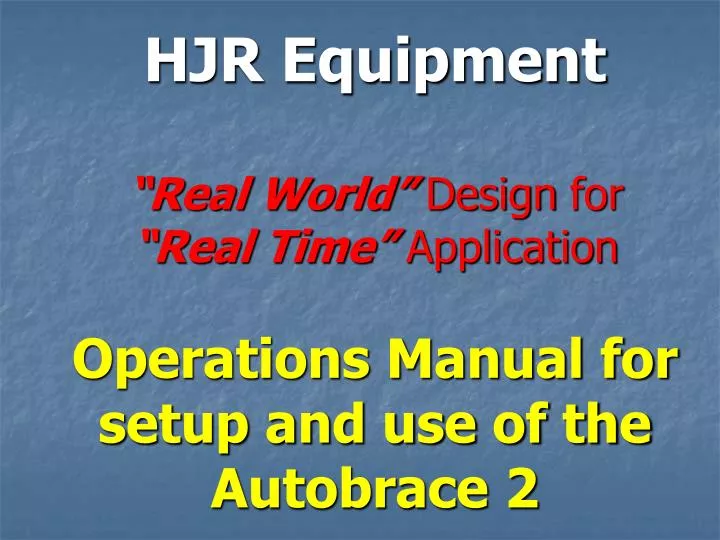
HJR Equipment “Real World” Design for “Real Time” Application Operations Manual for setup and use of the Autobrace 2. Autobrace 2 Vehicle Stabilization System. Autobrace 2 is the easiest and fastest stabilization system in the industry.

E N D
HJR Equipment“Real World” Designfor“Real Time”ApplicationOperations Manual for setup and use of the Autobrace 2
Autobrace 2 Vehicle Stabilization System Autobrace 2 is the easiest and fastest stabilization system in the industry. Even though it is simple, proper familiarization and training are required.
Autobrace 2 Vehicle Stabilization System This PowerPoint presentation will take you through a step by step procedure for strut familiarization and basic use of the struts with a vehicle on it’s side.
Autobrace 2 Vehicle Stabilization System Strut Familiarization
Autobrace 2 Locking collars prevent tube separation Simple to change anchor tops HJREquipment Holes and pins are indexed for easy alignment Plated steel tubing for long life and greater strength Spare pins located on the strut, where they belong, not in a bag Easiest ratchet strap system in the industry to deploy and rewind Large footplate for greater stability and securing the strut on unstable ground
Anchor Tops Lightweight High strength heat treated aluminum Close tolerances for exact fit NO pins needed for anchor tops
Anchor Tops Rubber o-ring holds anchor top on the strut. NO pins needed to slow you down during setup.
2 Telescoping Sections Both the long and short struts have 2 telescoping section each. Long strut capable of extending to 93” Short strut capable of extending to 59.5”
Locking Tubes Each telescoping section is locked with a stop at the end of the section. No telescoping section will ever separate causing delays in the setup.
Pins and Collars Pins are designed to seat on the collar Collars have a notch placed in them The pins are designed to fit into the notch
Indexed Holes Once the pins are placed in the strut and seated on the collar. ALL holes in the system will align. Set up can be done in virtually no light, once the pin is set you don’t have to search for the holes in the system.
Ratchet Strap System You will never have to work with a ratchet strap system that looks like this again !!!!! The Autobrace 2 Vehicle stabilization system has the entire ratchet strap assembly mounted on the brace. There is a full 27’ of strap on the strut This saves valuable time when deploying the strut.
Ratchet Strap System When ready, simply pull out the desired length of strap and connect the locking hook. Once the hook is connected, simply tighten the ratchet until you achieve the desired tension.
Ratchet Strap System To rewind the anchor strap: Release the tension on the system. Place the rewind handle on the spool. When the handle is turned: The ratchet will automatically unwind . The strap will wind back up on the spool
Base Plate Base Plate offers many advantages. Holes on the side for placing a second or third strap on the strut. Hinged plate offers the ability for the strut to stand on it’s own. Holes for pinning the strut on soft ground.
Patented Second Strap Never again will you have to use a strap that looks like this HRJ Equipments Patented Ratchet Strap Assembly offers the same ease of use as the strap on the strut only now with a stand alone ratchet strap. This second strap comes included with every strut you purchase
Patented Second Strap Some strut configurations require the use of 2 straps to complete the set up. Now you have the ability to do that with a stand alone version of the same system that is mounted on the strut. You can purchase this Ratchet Strap Assembly separately for all of you ratchet strap needs. Call your HJR Equipment Representative for more details.
Spare Pins The Autobrace 2 system is the ONLY vehicle stabilization system with spare pins located on the struts where you need them. All other systems provide you with spare pins, but you have to go get them out of an equipment bag. The Autobrace 2 system again saves you time by keeping the pins on the strut where you need them.
Screw Cap Screw cap is placed on the top of the strut in place of the anchor cap. Anchor cap is placed on the screw top. Screw top gives you fine adjustment capability Screw top allows for 8” of travel
Autobrace 2 Vehicle Stabilization System Use and Set up Procedures
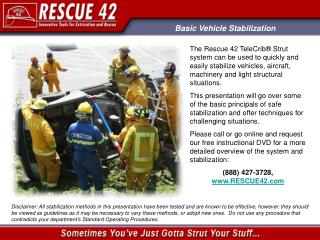
Size Up: It is imperative that a proper size up of the area and the vehicle(s) are performed prior to placing the Autobrace2 stabilization system into operation.
YOUR SAFETY COMES FIRST During your walk to the vehicle remember to check for the following: Downed Power Lines. Leaking Fluids - gasoline, oil, antifreeze, battery fluids. Once you reach the vehicle: Determine the surface you will be working on, different surfaces such as mud, gravel, snow and ice may require different tactics for stabilization. Autobrace2 gives you the option of using straps or pins to anchor the base of the stabilization system.
Size up Considerations How will you remove the victim? How will you stabilize the car once you determine the route of victim removal?
Wood Cribbing Many fire departments still use wood cribbing. While this is satisfactory, it takes more time and manpower to perform The Autobrace 2 system will allow you to get the job done faster and with greater safety to the rescuers and the victims
Ease of Use The Autobrace 2 vehicle stabilization system is the fastest system on the market today. Many times ONE firefighter can stabilize a vehicle in less than 90 seconds.
Getting to the car Carry all equipment to the scene. 2 struts or 4 struts w/ easy carry handle. Accessory bag.
Initial Set Up Remove struts from carry handle and stand strut upright. Strut will stand upright on its own.
Initial Set Up If you have the need to make fine adjustments you can place the Screw Cap on the brace prior to positioning the strut. You now have the capability to make any final adjustments by moving the screw out on the main stabilization unit.
Anchor Cap Place the anchor cap of choice on the strut. Many times fire departments keep the claw hook on the system all the time.
Pull the pin Remove bottom pin to extend main tube. For most rescues, you will only need the first extension section.
Extend the main tube Extend the main extension tube all the way. You will feel the stop.
Initial Set Up Replace the pin to lock the sections. You are now ready to place the strut on the car.
Strut positioning Anchor top and strut position will be dictated by the rescue path you choose to remove the patients.
Strut positioning The claw anchor top works well for most vehicle stabilization needs.
Strut Positioning Some of the more common points of stabilization are: • The A-post or C-post. • The point where the hood meets the fender. • The point where the trunk lid meets the fender. • There are many suitable places on the under side of the car.
Pull the strap The strut will pivot on the base. Lean the strut towards the car. Position the anchor top where you want it on the car
Initial Set Up Pull the strap out toward the car. Attach the strap to a good anchor point low on the car.
Anchor Strap Placement The frame works well for an anchor point on the bottom of the car The A-post or C post are good choices for the top of the car
Ratchet use Adjust the ratchet till the strut is tight. Repeat these steps until the vehicle is stable.
Rewinding the strap When finished with the rescue Simply release the tension on the strap Locate you rewind handle in the bag
Rewinding the strap Place the rewind handle on the spool. Rewind the spool. Your ready for your next rescue.
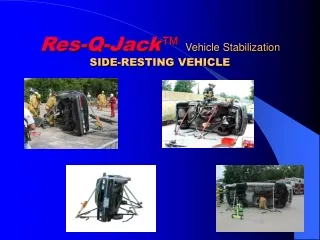
Vehicle on its Side Most vehicles that are found on their side are not likely to roll over onto their wheels again. The tendency is for the vehicle to want to roll over onto its roof. With this in mind the initial stabilization should be placed on the top side of the car to keep this from happening.
Vehicle on its Side Step 1 Determine the point on the car you want to use for stabilization. There are many options you can choose for this on most cars.
Vehicle on its Side Step 2 Place the Autobrace2 components near the points of the vehicle where stabilization will be performed. Adjust the strut extensions as needed to achieve a 45 to 60 degree angle when the brace is in place.
Vehicle on its Side Step 3 Pull the anchor straps from the stabilization base and attach it to a point on the vehicle suitable for anchoring. Tighten the strap until the strut is snug in the position you have chosen.
2 Strut Setup One strut on each side of the vehicle. Both struts are toward the back side of the car here
2 Strut Setup Caution !!! You must make sure the struts are opposite each other on the vehicle. If you do not do this you will spin the car resulting in an unstable situation.