Download
1 / 25
250 likes | 354 Views
Design Challenge. Floor Heating. What Was the Design Challenge?. Putting together a energy Christmas house Erika was in charge of the Christmas lighting Anna was in Charge of the fan and she helped me with heating

E N D
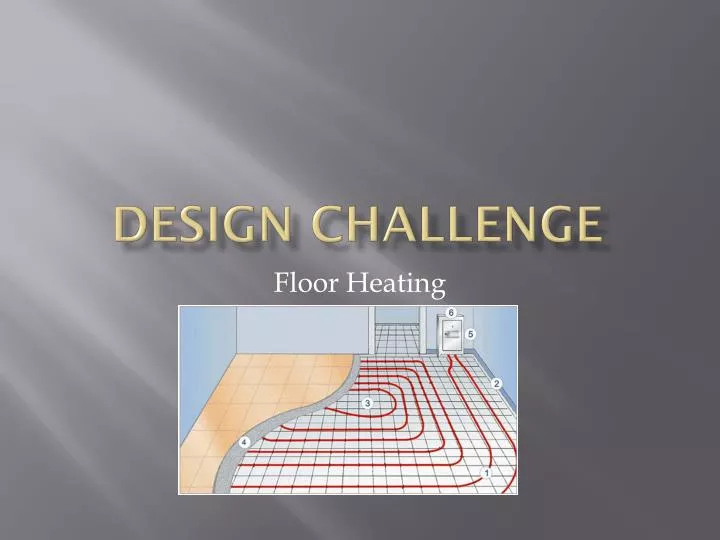
Design Challenge Floor Heating
What Was the Design Challenge? • Putting together a energy Christmas house • Erika was in charge of the Christmas lighting • Anna was in Charge of the fan and she helped me with heating • My main goal was to try and heat up the flooring of our model house using wires and batteries
Voltage • This effected our experiment because the more voltage applied effected how hot and how fast the wires heated up. • The more voltage the faster and hotter the wire heated up • The more batteries added created more voltage and therefore made the wire heat up faster and hotter this is why we used 3 for each group instead of maybe one
Insulator • Insulators are materials that are poor conductors of electricity • We use an insulator for the bottom of our flooring as a way to prevent the heat from escaping • We attached the foam material to the bottom of the aluminum and built the rest of the house with the same material as a way to insulate our house much like the houses in the real world
Resistance • Using wires with less resistance made the wires heat up quicker and hotter • Thinner wires have less resistance, which is the reason why we chose the thin copper wire rather then the thick metal rod
Temperature • The degree we used to measure the heat of the coils • We measured in Celsius • We used a tool used to measure temperature which is called a ‘Thermometer’ • We also used our sense of touched to feel the ‘temperature’
Heat • Is the transfer of thermal energy because of the difference of two substances • We created heat by transferring the thermal energy created with the battery and wires to the aluminum floor
Thermal Energy • Is the total energy of all atoms and molecules. It consists of both all the potential and kinetic energy in the particles • By heating up the wires, we made molecules and atoms move to create, kinetic energy. The total energy in which we created made heat and therefore also made thermal energy
Heat Capacity • Heat capacity is the amount of heat required to change the temperature of a substance by 1 degree C • Heating up the floor in a more efficient matter was a thought we had in mind which led us to think about heat capacity • In our case we then needed a material that was of a good conductor and had a low heat capacity • The lower the heat capacity the faster the floor would have heated up, having to take a shorter amount of time and energy to change the temperature of the wires
Kinetic Energy • The hotter our wire got the faster the atoms and molecules in the wire moved, therefore creating more kinetic energy. • In contrast the cooler the wire was there was less kinetic energy • Therefore if we wanted the coils to become hotter we had to create more kinetic energy
Conductors • When we first began brainstorming on the procedure of how we were going to create heat one of the first things that came to my mind was to use a good conductor • A conductor is a material which contains moveable electric charges and therefore makes it easier for electricity to flow through • The easier electricity moves the faster and hotter the wires get, creating more kinetic energy. For this reason we decided to choose a good conductor for the experiment, copper.
Current • Is the amount of electricity in which flows through wires • The more electricity or the greater the current the more movement of molecules occur which then produces more heat • By increasing the voltage and sodering the wires together the more current was produced having more energy and a better connection between wires
Step 1 • We started out brainstorming ways to create heat • Found that hooking up a battery on a conductor work quite well • Our first experiment started with us hooking up 2 batteries to the ends of one metal rod. We then put the metal rod in a closed container much like the environment our floor would be in, a closed area. We then put the thermometer inside the closed area to measure the temperature to see the effects of our attempt to create heat. Our results were much to our liking as we reached to about 45 C (see picture)
Step 2 • We then the next day tried the experiment again. However this time the rod wouldn’t heat up. This caught us off guard and made us confused on why the rod wouldn’t heat up the second time. I then began thinking that since we were using a different battery the batteries voltage could have changed. This then would have effected our results, having used a more run down battery. • Aside from the batteries voltage level the fact that the metal rod wasn’t heating got us thinking about other conductors in which might heat up better at a more efficient pace. We then turned towards copper wire, a strong conductor. Mr. Happer also suggested us think about resistance. We then learned that the thinner wirer the less resistance, and that less resistance meant that we could heat up the wire more efficiently. This then led us to our second experiment the heating of copper wire. To do this we took a the thinnest copper wire Mr. Happer could supply and hooked it up with two batteries. What we found was that the copper wire did heat up but didn’t generate the amount of heat that we were looking for, which became much of a disappointment. The next day in class however we did a lesson on electromagnets, wrapping copper wire around a nail. As we did this experiment in class I noticed that the nail with the copper wire wrapped around it soon became too hot to touch. I then made connections with the lesson and the design challenge thinking that maybe if we wrapped the copper wire around something it would reach the temperature we desired. (see picture)
Step 3 • With the thought of wrapping copper around a metal to generate heat we began experimenting. Once the copper wire was wrapped we hooked the ends of the wire to again two batteries. Our results were that the areas where the copper wire were loser together and less ‘spaced out’ felt warmer. (see picture). However the overall rod wasn’t heating up to what we expected but the fact that the parts of the rod which contained wires wrapped closer together felt warmer sparked new ideas into our heads.
Step 4 • We noticed that the copper wire when put closer together, got warmer more rapidly. This then generated the idea that if I wrapped the wire around my fingers into ‘loops’ in the shape of a circle, the layers of copper wire on top of one another would create more heat at a faster pace. (see picture) Once we created a circle I noticed that the thin wire we were originally used was too thin. As I wrapped the wire around my fingers it became brittle and broke off numerous of times. This then led us to turn to a semi-thicker piece of copper wire. With this wire I wrapped it around my fingers and excitedly noticed no breakage. We then hooked the ends of the wire to 2 batteries and felt the circular piece of wire heat up instantly. But there was a draw back in what we found, the created loops of the wire we found were messy to handle, in which we later found a solution to.
Step 4 • We found that taking our circular piece of wire and then taking both ends and wrapping the wire twice around the layers of the wire held the circles in place, keeping the copper loops together. We then decided that this was an efficient way to heat up the flooring of our house and made 12 more replicas of the copper circles. We then taped the circles onto aluminum (we researched it and found it to be a good conductor) and placed on top of the black foam flooring of our house. We then connected the ends of the circles together to create one big series circuit. We then found that once we connected 6 batteries to the circuit only some of the cooper circles heated up, the rest remaining cool. This lead us to think that maybe heating up coils in a series circuit is similar to lighting up light bulbs in series circuits. As in the beginning of the quarter when we lit up a light bulb in a series circuit the first light bulb was always the brightest, the others following much dimmer. This then led us to step 5. Picture of a cooper circle Picture of cooper circles on the foil
Step 5 • Once we noticed that using one big series circuit only heated up certain coils we then tried separating the coils into two groups. We divided the groups in half and unhooked one of the connected coils to use as a way to hook another alligator clip onto it. (see picture) • Once split into two groups we hooked 3 batteries to each group. Our results were that more coils were heated however some coils still remained cool. In spite of this confusion the aluminum floor however was warm, and the goal of our design challenge was accomplished.
Voltage, Resistance, and Current Data Current Resistance
Reflection • Though we successfully completed our design challenge we did have many complications throughout the process. One complication was that we couldn’t get the wires to heat up to a higher temperature level. After we measured the voltage, current and resistance before they were sodered compared to when when the ends were sodered you can see how the connections improved between the wires. We then had less resistance and more current. This then made the floor heating’s temperature rise, suggesting before when we only twisted the wires together we didn’t get the full impact of the energy flowing through the wires. The voltages however, was very close and from only .6 difference having most likely 0-no effect on the amount of heat generated from the coils. Another complication was that we couldn’t get all the wires to heat up, however after we improved the connections by sodering the wires all the ones that didn’t heat up, did. Overall, this design challenge taught us a lot about heating and the factors that go into generating heat for example conductors, voltage, and resistance. We learned a lot through the process of creating our design and overcame many obstacles. The floor heating system in which we made, can be found in many homes today. However, real floor heating systems do not use circular copper coils but instead use cooper wires shaped in waves (see picture). This is so the heating spreads throughout the floor evenly. My group could have tried this ‘wave’ technique but we decided to think of something new and creative using the materials we found while at the same time learning from the mistakes we encountered. In the end our home floor heating system replica was successful and very enjoyable to create.
Sources • Suchocki, Hewitt. Conceptual Integrated Science Explorations. San Francisco: Pearson Education Inc, 2010.