Download
1 / 35
350 likes | 356 Views
Interested in creating your own website? Ever wondered how cool is it to have a website that has a log-in/log-out functionality? Want to learn how to Create, Read, Update or Delete(CRUD) records in a database? Have you lost track on your previous tutorials?

E N D
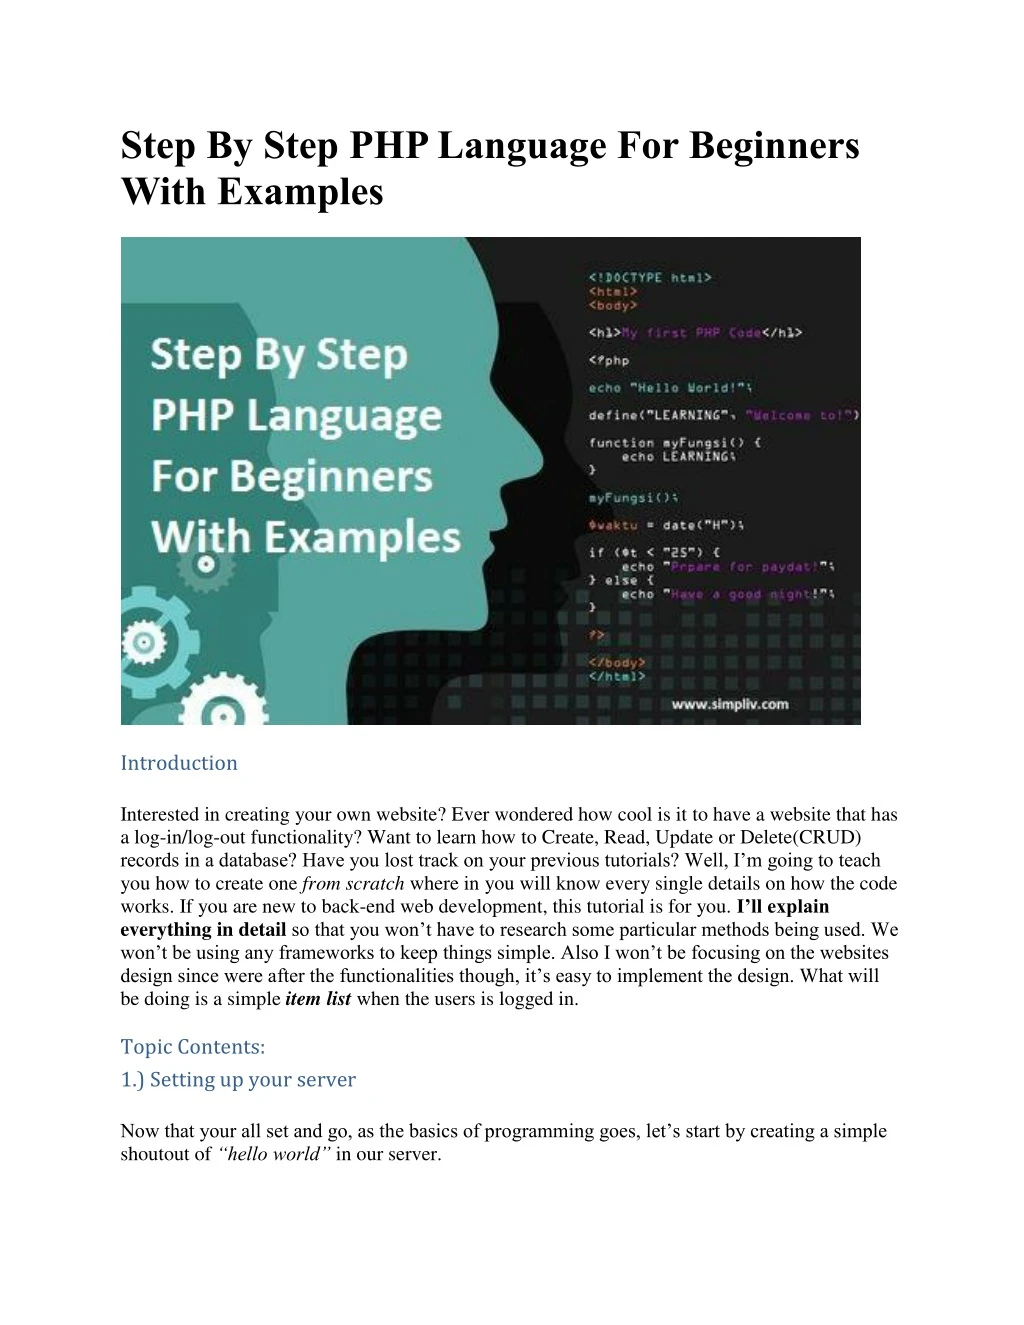
Step By Step PHP Language For Beginners WithExamples Introduction Interested in creating your own website? Ever wondered how cool is it to have a website that has a log-in/log-out functionality? Want to learn how to Create, Read, Update or Delete(CRUD) records in a database? Have you lost track on your previous tutorials? Well, I’m going to teach you how to create one from scratch where in you will know every single details on how the code works. If you are new to back-end web development, this tutorial is for you. I’ll explain everything in detailso that you won’t have to research some particular methods being used. We won’t be using any frameworks to keep things simple. Also I won’t be focusing on the websites design since were after the functionalities though, it’s easy to implement the design. What will be doing is a simple item list when the users is logged in. Topic Contents: 1.) Setting up your server Now that your all set and go, as the basics of programming goes, let’s start by creating a simple shoutout of “hello world” in our server.
First of, go to the directory where you installed your XAMPP (Commonly in C:\xampp). From there go to the htdocs folder (Commonly in C:\xampp\htdocs) and create a folder named “MyFirstWebsite“. From that part, you have now created a Local URL for your website. That folder will be used to supply in all website files (.html, .php, .css, .js, etc.). Open up your text editor and let’s get started! I use sublime text as my text editor. If your using Notepad++ or any others, it’s ok. It’s not really a big factor but it’s just a preference on which one would you like to use. What we will do is a basic HTML page and display “hello world” from the server using a basic PHP syntax. We then type the following syntax: Hide Copy Code <html> <head> <title>My first PHP Website</title> </head> <body> <?php
echo "<p>Hello World!</p>"; ?> </body> </html> Save the file to the “MyFirstWebSite” Folder and name it as “index.php“. (Directory as seen on the top part of the image) Now that you have the file. Let’s now open your XAMPP control panel. In case it doesn’t appear on your desktop, it is located in your XAMPP folder as seen on the image: Now that it’s there, Run your Apache and mySQL by clicking the “Start” button on the actions column. You should see a random PID(s) and the default port number. Apache is the name of our web server wherein it will handle all the files as well as serve as the communication to the web browser and MySQL is our database which will store all of our information. Open up your web browser and in the address bar, type localhost. You should see the menu of your XAMPP.
If it’s the first time you run it, it will ask what language would you prefer, just simply pick and it will lead you to the menu. If you will noticed the directory is localhost/xampp, it’s where the default page leads you even if you type in localhost. If that appears, then it means that your XAMPP server is now running. Now let’s try running the website you just placed. Try typing localhost/MyFirstWebsite. It should be the same as the picture below. If you will notice that the URL is MyFirstWebsite, it is derived from the htdocs folder and it automatically reads files that are named “index”(Be it index.html, index.aspx, etc), which serve as the default page. Typing localhost/MyfirstWebsite/index.php is just the same. You can also create your custom name for the URL by simply renaming the folder but let’s just stick to MyFirstWebsite. Note: If you don’t have a file named index and you entered the URL, you will receive an error 404 for not having the file on the server. If you do have different files that are not named index.<extention>, you have to specify the specific file name. E.x: localhost/MyfirstWebsite/page.php 2.) Creating the public HTML Pages Next, let’s re-modify our website and add a registration link where our users can register as well as a Log-in page right after getting registered. Let’s modify our home page with the following code: index.php
Hide Copy Code <html> <head> <title>My first PHP Website</title> </head> <body> <?php echo "<p>Hello World!</p>"; ?> <a href="login.php"> Click here to login <a href="register.php"> Click here to register </body> </html> As you can see, we only added 2 links which are for the Login and register. Let’s create the registration page first: register.php Hide Copy Code <html> <head> <title>My first PHP Website</title> </head> <body>
<h2>Registration Page</h2> <a href="index.php">Click here to go back<br/><br/> <form action="register.php" method="POST"> Enter Username: <input type="text" name="username" required="required" /> <br/> Enter password: <input type="password" name="password" required="required" /> <br/> <input type="submit" value="Register"/> </form> </body> </html> As you can see, it’s just a basic form where the user can input his/her credentials. Now for the login page: Hint: Just copy-paste the same code to make things faster. login.php Hide Copy Code <html> <head> <title>My first PHP Website</title> </head> <body> <h2>Login Page</h2> <a href="index.php">Click here to go back<br/><br/> <form action="checklogin.php" method="POST"> Enter Username: <input type="text" name="username" required="required" /> <br/> Enter password: <input type="password" name="password" required="required" /> <br/> <input type="submit" value="Login"/> </form> </body> </html> Basically it’s just the same code as from theregister.php but the changes made were the ones underlined.
Click here for the complete login.php code Try running localhost/MyFirstWebsite again and your pages should look like this: index.php login.php register.php 3.) Creating the database and it’s tables Now that we have our basic page for the public. Let’s proceed to the database. First, type localhost/phpmyadmin. This will lead you to the phpmyadmin homepage: localhost/phpmyadmin
From there, go to the Databases tab located on top then from the text box in the middle, type first_db then click on create. Just leave the Collation as is. You have just successfully created your first database. Now from there, let’s create a table wherein we can register our users and display information. First, click on first_db located on the left side and create a table named users with 3 columns then click on Go. For the table’s structure, make sure to have the following fields then click on save: • • Format: Column Name – Type – Length – Null Property – Other Properties id – INT – N/A – Not Null – Auto Increment
• • username – varchar – 50 – Not null password – varchar – 50 – Not null Leave everything by default if not specified. Note: You need to scroll right for the auto_increment. I just edited the picture to fit the A_I field Next, create another table named listwith 7 columns and for the table’s structure: • • • • • • • id – INT – N/A – Not Null – Auto Increment details – text – Not null date_posted – varchar – 30 – Not null time_posted – Time – Not null date_edited – varchar – 30 – Not null time_edited – Time – Not null public -varchar – 5 – Not null
4.)Adding users to the database Now that we have our tables. Let’s move on to the fun part, getting your registration page into action. From your registration.php, add the following below the html codes: register.php Hide Copy Code <html> <head> <title>My first PHP Website</title> </head> <body> <h2>Registration Page</h2> <a href="index.php">Click here to go back<br/><br/> <form action="checklogin.php" method="POST"> Enter Username: <input type="text" name="username" required="required" /> <br/> Enter password: <input type="password" name="password" required="required" /> <br/> <input type="submit" value="Register"/> </form> </body> </html> Here’s the explanation to the code: • $_SERVER[“REQUEST_METHOD”] == “POST”– checks if the form has received a POST method when the submit button has been clicked. The POST method is created in the html from the method=”POST”. Click here for the form method reference. $_POST[”]– gets the name coming from a POST method. This just simply gets the input based on the name from the form. In our case it’s username and password. mysql_real_escape_string()– encapsulates the input into a string to prevent inputs from SQL Injections. This ensures that your strings don’t escape from unnecessary characters. Click here to learn more about SQL Injections. • •
Now try to go to your register.phpand try to input anything then click on “Register”. In my case I placed in the username xtian and password as 123456. It should display the inputs below. Here’s my sample: On this part, you should have understood on how to get input from the form. Now to add it to the database. On your register.php, add the following code: register.php Hide Shrink Copy Code <html> <head> <title>My first PHP Website</title> </head> <body> <h2>Registration Page</h2>
<a href="index.php">Click here to go back<br/><br/> <form action="checklogin.php" method="POST"> Enter Username: <input type="text" name="username" required="required" /> <br/> Enter password: <input type="password" name="password" required="required" /> <br/> <input type="submit" value="Register"/> </form> </body> </html> alert("Username has been taken!");</script>'; // Prompts the user Print '<script>window.location.assign("register.php");</script>'; // redirects to register.php } } if($bool) { mysql_query("INSERT INTO users (username, password) VALUES ('$username', 'password')"); // inserts value into table users Print '<script>alert("Successfully Registered!");</script>'; // Prompts the user Print '<script>window.location.assign("register.php");</script>'; // redirects to register.php } } ?> Click here for the complete register.php file Here are the explanations to the code: • mysql_connect(“Server name”,”Server Username”,”Server Password”)– The syntax used to connect to our XAMPP server. localhost or 127.0.0.1 is the name of the server. The default username is root and no password for default. mysql_select_db(“database name”)– Selects the database to be used. or die(‘Message’)–Displays the error message if the condition wasn’t met. mysql_query(‘sql query’)– does the SQL queries. Click here for some SQL query samples. The again, i’m not here to discuss about mySQL. mysql_fetch_array(‘query’)– fetches all queries in the table to display or manipulate data. It is placed in a while loop so that it would query all rows. Take note that only 1 row is queried per loop that’s why a while loop is necessary. $row[‘row name’]– the value of the column in the current query. It is represented as an array. In our case $row is the name of the variable for our row in the loop. • • • • • Try the inputs that you have made earlier and see what happens. It should prompt that you have successfully registered. Try going to phpmyadmin and see your users table:
Congratulations! Now you know how to add data into the database with data validations. 5.)User log-in: Authentication Now for the login page. Let’s create a new file called checklogin.php. The reason is going back to our login.php, our form has an action called “checklogin.php”,particularly <form action = “checklogin.php”method= “POST”>. If you will notice on theregister.php, it’s also on register.php because the back-end is done on the same file as well. Let’s now code thechecklogin.php with the following syntax: checklogin.php Hide Shrink Copy Code <?php session_start();
$username = mysql_real_escape_string($_POST['username']); $password = mysql_real_escape_string($_POST['password']); $bool = true; mysql_connect("localhost", "root", "") or die (mysql_error()); //Connect to server mysql_select_db("first_db") or die ("Cannot connect to database"); //Connect to database $query = mysql_query("Select * from users WHERE username='$username'"); // Query the users table $exists = mysql_num_rows($query); //Checks if username exists $table_users = "": $table_password = ""; if($exists > 0) //IF there are no returning rows or no existing username { while($row = mysql_fetch_assoc($query)) // display all rows from query { $table_users = $row['username']; // the first username row is passed on to $table_users, and so on until the query is finished $table_password = $row['password']; // the first password row is passed on to $table_password, and so on until the query is finished } if(($username == $table_users) && ($password == $table_password))// checks if there are any matching fields { if($password == $table_password) { $_SESSION['user'] = $username; //set the username in a session. This serves as a global variable header("location: home.php"); // redirects the user to the authenticated home page } } else { Print 'alert("Incorrect Password!");'; // Prompts the user Print 'window.location.assign("login.php");'; // redirects to login.php } } else { Print 'alert("Incorrect username!");'; // Prompts the user Print 'window.location.assign("login.php");'; // redirects to login.php } ?> Click here for the complete checklogin.php code Here’s the explanation of the code (Some are explained earlier so there’s no need to reiterate): • session_start()– Starts the session. This is usually done on authenticated pages. The reason why we used this is because this is required for the $_SESSION[”]. mysql_num_rows()– This returns an integer. This counts all the rows depending on the query. •
• $_SESSION[‘name’]– Serves as the session name for the entire session. This is relatively similar to public variables in object-oriented programming. We will be using this for validating whether the user is authenticated or not. Now try to test your input with a wrong username and password. It should return the desired prompt. After testing, try inputting the correct values. It should lead you to home.php. Note: home.php does not exist yet so it will produce an error 404. 6.)Setting up the home page for Logged-in users and Logging-out Now that were authenticated, let now create our home page (home.php) with this following syntax: home.php Hide Copy Code <html> <head> <title>My first PHP Website</title> </head> <?php session_start(); //starts the session if($_SESSION['user']){ // checks if the user is logged in } else{ header("location: index.php"); // redirects if user is not logged in } $user = $_SESSION['user']; //assigns user value ?> <body> <h2>Home Page</h2>
<hello>! <!--Display's user name--> <a href="logout.php">Click here to go logout</a><br/><br/> <form action="add.php" method="POST"> Add more to list: <input type="text" name="details" /> <br/> Public post? <input type="checkbox" name="public[]" value="yes" /> <br/> <input type="submit" value="Add to list"/> </form> <h2 align="center">My list</h2> Id Details Edit Delete </body> </html> Here’s the explanation to the code: • • session_start()–Basically starts the session. Required for $_SESSION[”]. header()– redirects the user. Try refreshing your browser and it should look like this: Now that we have our home, let’s try creating ourlogout.php and test if the user’s session is off. What we would do is that if the user is logged-out, the user shouldn’t accesshome.php.So here’s the simple syntax to logout.php: logout.php Hide Copy Code <?php session_start(); session_destroy();
header("location:index.php"); ?> The syntax is simple. session_destroy()simply remove’s all session’s meaning, the value of $_SESSION[”] will be removed and header() will simply redirect it to the home page. 7.)Testing Page Security Now try refreshing home.php and click on logout. Now try Clicking on the back button of your browser and see what happens: As you can see, it doesn’t direct you to home.php because you are logged-out. Now for the second test, try manually inputting the address localhost/MyFirstWebsite/home.php. The same case should also happen. Since were logged-out, even a manual input of the address doesn’t access an authorized page. What we have done is a simple security mechanism wherein we redirect back unauthorized users into a public page. Now try logging in again and let’s go back tohome.php. 8.) Adding data to the list – User Access Only In our next step, let’s create the adding of item’s to the list. As you will notice from the form, it is written as <form action=”add.php” method=”POST”>, meaning our http post request goes to add.php and with that, we create our add.php with the following syntax: add.php Hide Copy Code <?php session_start();
if($_SESSION['user']){ } else{ header("location:index.php"); } $details = mysql_real_escape_string($_POST['details']); $time = strftime("%X"); //time $date = strftime("%B %d, %Y"); //date Print "$time - $date - $details"; ?> Take note that this ain’t our officialadd.phpsyntax yet, I’m just going to demonstrate the time and date syntax and getting your input. Now go back to your home.phpand try to add an item then click on “Add to list”. This should be the following output on add.php: As you can see, we have our current time, date, and your input. Here’s the explanation to the code: • • • • • strftime()–get’s the time based on what format your placed. %X– current system time. %B– current system month. %d– current system day. %Y– current system year. Now let’s modify ouradd.php and add the following data into the database together with the data from the checkbox: add.php
Hide Shrink Copy Code <?php session_start(); if($_SESSION['user']){ } else{ header("location:index.php"); } if($_SERVER['REQUEST_METHOD'] == "POST") { $details = mysql_real_escape_string($_POST['details']); $time = strftime("%X"); //time $date = strftime("%B %d, %Y"); //date $decision = "no"; mysql_connect("localhost","root","") or die(mysql_error()); //Connect to server mysql_select_db("first_db") or die("Cannot connect to database"); //Conect to database foreach($_POST['public'] in $each_check) //gets the data from the checkbox { if($each_check != null){ //checks if checkbox is checked $decision = "yes"; // sets the value } } mysql_query("INSERT INTO list(details, date_posted, time_posted, public) VALUES ('$details','$date','$time','$decision')"); //SQL query header("location:home.php"); } else { header("location:home.php"); } ?> Click here for the complete add.php code
Here’s a little explanation: • foreach()– gets the value of the checkbox. As you will notice, the checkbox format in the form is name=”checkbox[]”. To get data from checkbox, it has to be instantiated as an array. Doing so would make it possible to get data from multiple checkboxes. Now try entering some data and click “Add to list”. In my case, I’ll just use fish again. Let’s go to our phpmyadmin and let’s see if the data has been added. Here’s the result of my case: localhost/phpmyadmin 9.)Displaying data in the home page Now that we have seen that the data has been successfully added. Let’s now display the data in our home page. Let’s modify ourhome.phpand let’s add some columns for the date: home.php Hide Shrink Copy Code <html> <head> <title>My first PHP Website</title> </head> <?php
session_start(); //starts the session if($_SESSION['user']){ // checks if the user is logged in } else{ header("location: index.php"); // redirects if user is not logged in } $user = $_SESSION['user']; //assigns user value ?> <body> <h2>Home Page</h2> <hello>! <!--Display's user name--> <a href="logout.php">Click here to go logout</a><br/><br/> <form action="add.php" method="POST"> Add more to list: <input type="text" name="details" /> <br/> Public post? <input type="checkbox" name="public[]" value="yes" /> <br/> <input type="submit" value="Add to list"/> </form> <h2 align="center">My list</h2> '; Print '"; Print '"; Print '"; Print '"; Print ''; Print ''; Print ''; Print ''; } ?> Id Details Post Time Edit Time Edit Delete Public Post ‘. ‘. ‘. $row[‘date_posted’] . ” –” . $row[‘time_posted’] . “ ‘. $row[‘date_edited’] . ” –” . $row[‘time_edited’] .” ‘. $row[‘id’] . “ $row[‘details’] . “ editdelete $row[‘public’] . ‘ </body> </html> The explanation to the added code is quite simple. It just basically displays the data coming from the while loop. It has been explained earlier in our tutorial so I believe that by this point, you should have understood the process of getting the data in the query. Going back to the browser, try refreshing your home.php and see what happens:
It should now display that data. From our CRUD checklist, we have now accomplished Create and Read. Next is to update(edit) and delete information. If you will notice we have edit and delete links displayed on the column. I’ll add another data to the list named “tuna” to have another example and this time, it’s privacy tono: 10.) Editing Data Let’s now try editing our data and to do that we will use a new functionality called “GET“. With our previous methods, we have been using POST as our http request but this time, let’s use GET for editing and deleting records. To start of, let’s modify ourhome.php and add a little code to 2 columns: home.php Hide Shrink Copy Code
<html> <head> <title>My first PHP Website</title> </head> <?php session_start(); //starts the session if($_SESSION['user']){ // checks if the user is logged in } else{ header("location: index.php"); // redirects if user is not logged in } $user = $_SESSION['user']; //assigns user value ?> <body> <h2>Home Page</h2> <hello>! <!--Display's user name--> <a href="logout.php">Click here to go logout</a><br/><br/> <form action="add.php" method="POST"> Add more to list: <input type="text" name="details" /> <br/> Public post? <input type="checkbox" name="public[]" value="yes" /> <br/> <input type="submit" value="Add to list"/> </form> <h2 align="center">My list</h2> '; Print '"; Print '"; Print '"; Print '"; Print ''; Print ''; Print ''; Print ''; } ?> Id Details Post Time Edit Time Edit Delete Public Post ‘. ‘. ‘. $row[‘date_posted’] . ” –” . $row[‘time_posted’] . “ ‘. $row[‘date_edited’] . ” –” . $row[‘time_edited’] .” ‘. $row[‘id’] . “ $row[‘details’] . “ editdelete $row[‘public’] . ‘ </body> </html> If you have noticed, we only added URL parameter for the edit and delete links namely id. We will be using this later to handle thee data. The reason why we use id is because it’s a unique identifier. It is possible for the person to have enter the same data so it’s not recommended to use the details as a mean for manipulation later on. Try putting your cursor into the edit link and you will see the value of the id onthe lower left:
Now that we have that, let’s try creating ouredit.phpand let’s try to get the data from there: edit.php lines 1 – 42 Hide Shrink Copy Code <html> <head> <title>My first PHP Website</title> </head> <?php session_start(); //starts the session if($_SESSION['user']){ // checks if the user is logged in } else{ header("location: index.php"); // redirects if user is not logged in }
$user = $_SESSION['user']; //assigns user value ?> <body> <h2>Home Page</h2> <hello>! <!--Display's user name--> <a href="logout.php">Click here to go logout</a><br/><br/> <a href="home.php">Return to home page</a> <h2 align="center">Currently Selected</h2> 0) { while($row = mysql_fetch_array($query)) { Some explanations to the code: • !empty()– a method that checks if the value is not empty. The syntax can be reversed if you want to check if it’s empty by removing the explanation point (!), therefore it’s syntax would be empty(). $_GET[”]– Used to get the value from the parameter. In our case, we use id as our URL parameter so the syntax would be $_GET[‘id’]. $id_exists– the variable that checks whether the given id exists. $_SESSION[‘id’]– we place the value of id into session to use it on another file. • • • lines 42 – 76 Hide Copy Code Print "<tr>"; Print ' “; Print ‘”; Print ‘”; Print ‘”; Print ‘”; Print “”; } } else { $id_exists = false; } } ?>
Id Details Post Time Edit Time Public Post ‘ . ‘ . ‘ . ‘ . $row[‘date_posted’] . ” –” . $row[‘time_posted’].” ‘ . $row[‘date_edited’] . ” –” . $row[‘time_edited’].” $row[‘id’] . “ $row[‘details’] . “ $row[‘public’] . “ <br/> Enter new detail: <input type=”text” name=”details”/> <br/> public post? <input type=”checkbox name=”public[]” value=”yes”/> <input type=”submit” value=”Update List”/> </form> ‘; } else { <h2 align=”center”>There is not data to be edited.</h2> } ?> </body> </html> Click here for the complete edit.php code (Only refer to the front-end part. Github Sourced) The reason why we are putting the variable $id_exists is because in case the user modifies the URL parameter into a non-existing number(in our case we only have 2 rows/id’s), we can display a prompt in which the data doesn’t exist. Now try clicking the edit link into the first row and it should display like this: Complete edit.php code: Hide Shrink Copy Code <html> <head> <title>My first PHP Website</title> </head> <?php session_start(); //starts the session if($_SESSION['user']){ // checks if the user is logged in } else{ header("location: index.php"); // redirects if user is not logged in } $user = $_SESSION['user']; //assigns user value ?> <body> <h2>Home Page</h2> <hello>!
<!--Display's user name--> <a href="logout.php">Click here to go logout</a><br/><br/> <a href="home.php">Return to home page</a> <h2 align="center">Currently Selected</h2> 0) { while($row = mysql_fetch_array($query)) { Print ""; Print '"; Print '"; Print '"; Print '"; Print '"; Print ""; } } else { $id_exists = false; } } ?> Id Details Post Time Edit Time Public Post ‘ . ‘ . ‘ . ‘ . $row[‘date_posted’] . ” –” . $row[‘time_posted’].” ‘ . $row[‘date_edited’] . ” –” . $row[‘time_edited’].” $row[‘id’] . “ $row[‘details’] . “ $row[‘public’] . “ <br/> Enter new detail: <input type=”text” name=”details”/> <br/> public post? <input type=”checkbox name=”public[]” value=”yes”/> <input type=”submit” value=”Update List”/> </form> ‘; } else { <h2 align=”center”>There is not data to be edited.</h2> } ?> </body> </html> Click here for the complete edit.php code (Only refer to the front-end code. Github sourced) Let’s try modifying the URL parameter by removing?id=1and now should result to localhost/MyFirstWebsite/edit.php and it should result like this:
Now try putting a value that is greater than the id number, in our case, let’s try 5 and it should result like this: localhost/MyFirstWebsite/edit.php?id=5 Now that we secured our URL parameters, lets now place the edit syntax. Let’s go back to edit.php and add some following code to update the information to the database: edit.php Hide Copy Code <?php if($_SERVER['REQUEST_METHOD'] == "POST") { mysql_connect("localhost", "root", "") or die (mysql_error()); //Connect to server mysql_select_db("first_db") or die ("Cannot connect to database"); //Connect to database $details = mysql_real_escape_string($_POST['details']); $public = "no"; $id = $_SESSION['id']; $time = strftime("%X"); //time $date = strftime("%B %D, %Y"); //date foreach($_POST['public'] as $list)
{ if($list != null) { $public = "yes"; } } mysql_query("UPDATE list SET details='$details', public='$public', date_edited='$date', time_edited='$time' WHERE id='$id'"); header("location:home.php"); } ?> Click here for the complete edit.php code (Github) Now try refreshing and go back to the edit page. Let’s try a different data. In my case, I’ll be using “Salmon” and change it to non-public: edit.php?id=1 Go ahead and click Update list and you should be redirected to home.php and see the updated list. Now, we have a time and date of edit displayed on the Edit Time column. Our privacy has been set now to non-public and the value has changed into Salmon. Congratulations! We have now done the edit function!
11.) Deleting data Looking back to the CRUD, we have now done creating(adding), reading(displaying), and updating(editing) records. Now for the last part, deleting records. For this part it’s just relatively the same as what we have done on edit but what differs is just the SQL statement. Instead of using UPDATE, we will be using the DELETE syntax. In deleting records, we have to prompt people making sure that they’d really want to delete the record so we will be adding a little javascript in home.php.To do that, let’s modify our code and add some inthome.php home.php Hide Shrink Copy Code <table border="1px" width="100%"> Id Details Post Time Edit Time Edit Delete Public Post '; Print ''. $row['id'] . ""; Print ''. $row['details'] . ""; Print ''. $row['date_posted'] . " - " . $row['time_posted'] . ""; Print ''. $row['date_edited'] . " - " . $row['time_edited'] .""; Print '<a href="edit.php?id='.$row['id'].'">edit'; Print '<a href="#" nclick="myfunction('.$row['id'].')">delete</a>'; Print ''. $row['public'] . ''; Print ''; }
?> <script> function myFunction(id) { var r = confirm("Are you sure you want to delete this record?"); if(r == true) { window.location.assign("delete.php?id=" + id); } } </script> Click here for the complete home.php code As you have noticed, we edited the link for the delete. We changed hrefinto “#” and added and onclick function for Javascript for the method of myFunction and inside it’s parameter is the id of the row. Below the table written is the Javascript syntax wherein it prompts the user if he/she want’s to delete the record. If the user confirms, the page then directs to delete.php together embedded with the value of the id. Now let’s createdelete.phpand here’s the following syntax: delete.php Hide Copy Code <?php session_start(); //starts the session if($_SESSION['user']){ //checks if user is logged in } else { header("location:index.php"); //redirects if user is not logged in. } if($_SERVER['REQUEST_METHOD'] == "GET") { mysql_connect("localhost", "root", "") or die(mysql_error()); //connect to server mysql_select_db("first_db") or die("cannot connect to database"); //Connect to database $id = $_GET['id']; mysql_query("DELETE FROM list WHERE id='$id'");
header("location:home.php"); } ?> Click here for the complete delete.php code The code is just simple and the syntax are also the ones that we used before but noticed we have changed our request method into GET. We are now using the GET request since we have a URL parameter. Now try refreshing home.php and let’s try deleting the first record. This should be the result: Prompting: End-result: Congratulations! Now we have now officially completed our CRUD statements! 12.) Displaying public data Now for the last part, displaying public data. We will be displaying data that’s been set toyes in our index.php, in which is a page for non-authenticated users. It’s very simple. We just have to edit our index.php and add a some php code and table. Here’s our updatedindex.php: index.php
Now log-out and see your default page. It should look something like this: Note: You won’t see the data yet since we haven’t set any information to public. Now let’s log-in again and this time, let’s add some more data. In my case I’ve added the following: • • • • • Salad – public Corn – non-public Pasta – public Chicken – public Spaghetti – non-public With a total of 6 data’s with 3 of each privacy setting: home.php
Now let’s log-out and see our default page(index.php). It should now look like this: index.php As you can see, it only display’s data that are set to public. Congratulations! We have finally finished the tutorials for this session! 13.) De-briefing and Summary In the end, you should have the following files: As I mentioned earlier, I’ll be uploading the finished product. Click here
I also uploaded the sql file for the database in case you want to use the exact data that I have. To import the sql file, you can just simply click on export and select the sql file but make sure to create the database first. If you like, I can create a separate blog for that. Just let me know in the comments section. Resources to learn PHP PHP For Dynamic Websites Introduction to PHP In Arabic Learn SASS and SCSS PHP Specialist (2017 Edition) PHP: Import CSV File to MySQL Learn Complete PHP & MYSQL Programming From Scratch PHP and MYSQL Course from Scratch with Projects Learn Step by Step Codeigniter 3 with Bootstrap 4 From Scratch with Advance Learn Complete PHP MySQL by Building 5 Projects from Scratch PHP PDO – Create a Personal Contacts Agenda Project Learning PHP Data Objects PDO PHP Secure Login and Registration System + Email Activation Crear Documentos Pdf, Word, Excel en Php Generar Reportes