Download
1 / 31
310 likes | 426 Views
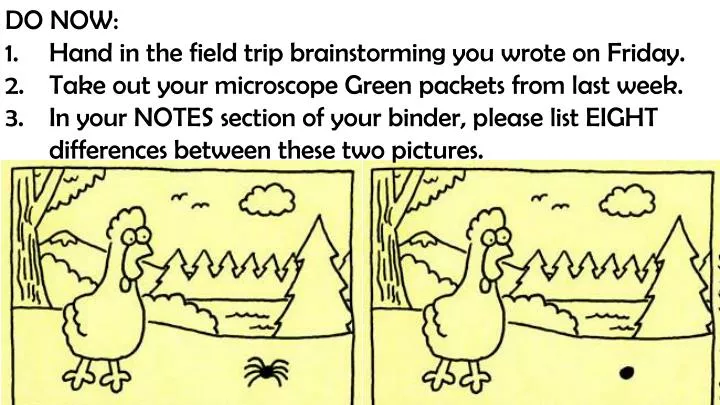
DO NOW: Hand in the field trip brainstorming you wrote on Friday. Take out your microscope Green packets from last week. In your NOTES section of your binder, please list EIGHT differences between these two pictures. Stare at the red dot on the girl’s nose for 30 seconds.

E N D
DO NOW: Hand in the field trip brainstorming you wrote on Friday. Take out your microscope Green packets from last week. In your NOTES section of your binder, please list EIGHT differences between these two pictures.
Stare at the red dot on the girl’s nose for 30 seconds. Turn your eyes to a plain surface. Blink repeatedly and quickly.
Using the Microscope • magnifies the image 10 x. 1.) Ocular lens (eyepiece): 2.) Low power objective: 3.) High power objective: • magnifies the image 10 x. • magnifies the image either • 40x or 43 x.
Using the Microscope • holds the objective and can be • turned to change from one magnification to the other. 4.) Revolving Nosepiece: 5.) Body Tube: 6.) Coarse Adjustment Knob: • maintains the correct distance • between the lens and objectives • Moves the body tube • up and down to allow focusing of the image
Using the Microscope • Moves the body tube • slightly to bring the image into sharper focus 7.) Fine Adjustment Knob: 8.) Stage: 9.) Stage Clips: • supports the slide • Hold the slide in place for viewing
Using the Microscope • Controls the amount of light coming • through the stage 10.) Diaphragm: 11.) Light: 12.) Arm: • A light source provides this for viewing • the slide • supports the body tube
Using the Microscope • supports the microscope 13.) Base: 14.) Inclination Joint : • Allows the upper part of the • microscope to be tilted back to view the specimen • while seated
Proper Use of the Compound Light Microscope • 1.) Describe how you would carry a microscope • Use both hands • - one hand beneath the base • - other hand to hold the arm • Hold the microscope close to your body
Proper Use of the Compound Light Microscope • 2.) How many centimeters should the microscope be from the edge of the table? • 3.) What power objective should you ALWAYS begin working with? • 5 cm • The low-power objective lens
Proper Use of the Compound Light Microscope • 4.) If your microscope is not in low power, what should be adjusted? • 5.) Describe what you do with your prepared slide next • The revolving nosepiece • Place it over the hole in the stage and secure the • slide with stage clips.
Proper Use of the Compound Light Microscope • 6.) When looking through the ocular lens, describe why you adjust the diaphragm • 7.) Once you are looking at the stage from eye level what you should do next? • To adjust the amount • of light coming through the stage. • Slowly turn the coarse • Adjustment to lower the objective until it almost • touches the slide.
Proper Use of the Compound Light Microscope • 8.) What should you NOT allow the objective to do? • 10.) What is responsible for raising the low-power objective? • 11.) What does raising the low-power objective do? • Touch the slide! • The coarse adjustment knob • Allows the image to be in focus
Proper Use of the Compound Light Microscope • raising • 12.) Complete the sentence: “Always focus byaway from the slide. Never focus ”. • 13.) After the course adjustment knob initials focuses the image, describe what the fine adjustment knob does • the • the objective • objective downward. • It sharpens the focus.
Proper Use of the Compound Light Microscope • 14.) When looking in the microscope, describe where the image should be located before switching to high power • 15.) Once you have switched the microscope to high power, explain what you do with the fine and course adjustment knobs • Exactly in the center of your field of vision • Focus the image, using ONLY the • fine adjustment. NEVER use the coarse adjustment • at high power.
Proper Use of the Compound Light Microscope 16.) When you are all DONE with the microscope, what should you do next before you leave the classroom? • You must remove the slide. Clean the ocular lens • and objective lenses with lens paper. Return the • Microscope to its storage area. Remember, you • Should use both hands to carry the microscope.
Making a Wet Mount Slide 1.) When cleaning a glass slide, you should use sand paper to clean the slide and coverslip. When cleaning a glass slide, use lens paper to clean the slide and a coverslip.
Making a Wet Mount Slide 2.) Place the specimen you want to observe to the left of the slide. Place the specimen you wish to observe in the center of the slide.
Making a Wet Mount Slide 3.) Place 5 drops of water on the specimen using the medicine dropper. Place one drop of water on the specimen using the medicine dropper.
Making a Wet Mount Slide 4.) Hold the coverslip at the edge of the water at a 90 degree angle to the slide. Make sure the water runs along the middle of the coverslip. Hold the coverslip at the edge of the water at a 45 degree angle to the slide. Make sure the water runs along the edge of the coverslip.
Making a Wet Mount Slide 5.) Quickly lower the coverslip to trap as many air bubbles as possible. Lower the coverslip slowly to avoid trapping air bubbles.
Making a Wet Mount Slide 6.) Water might evaporate from the slide as you work so do not add any more water to keep the specimen fresh. Water might evaporate from the slide as you work. Add more water to keep the specimen fresh.
Making a Wet Mount Slide 6a.) Place the tip of the medicine dropper next to edge of the coverslip and add 4 drops of water. Place the tip of the medicine dropper next to edge of the coverslip. Add a drop of water.
Making a Wet Mount Slide 6b.) Add excess water from the slide by using the corner of a paper towel as a blotter. Remove excess water from the slide by using the corner of a paper towel as a blotter.
Making a Wet Mount Slide 6c.) You must lift the coverslip to add or remove water. DO NOT lift the coverslip to add or remove water.