Download
1 / 219
2.19k likes | 2.21k Views
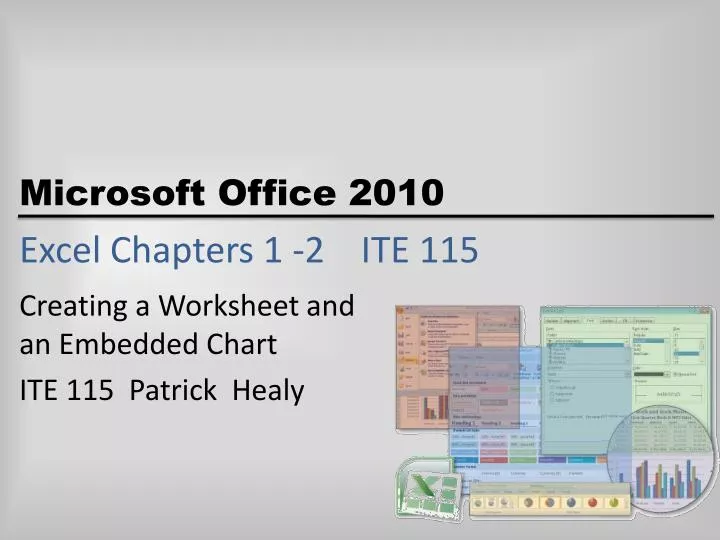
Excel Chapters 1 -2 ITE 115. Creating a Worksheet and an Embedded Chart ITE 115 Patrick Healy. Objectives. Start and quit Excel Describe the Excel worksheet Enter text and numbers Use the Sum button to sum a range of cells

E N D
Excel Chapters 1 -2 ITE 115 Creating a Worksheet andan Embedded Chart ITE 115 Patrick Healy
Objectives • Start and quit Excel • Describe the Excel worksheet • Enter text and numbers • Use the Sum button to sum a range of cells • Copy the contents of a cell to a range of cells using the fill handle Microsoft Office 2010: Introductory Concepts and Techniques - Windows 7 Edition
Objectives • Save a workbook • Format cells in a worksheet • Create a 3-D Clustered Column chart • Change document properties • Save a workbook a second time using the same file name Microsoft Office 2010: Introductory Concepts and Techniques - Windows 7 Edition
Objectives • Print a worksheet • Open a workbook • Use the AutoCalculate area to determine statistics • Correct errors on a worksheet • Use Excel Help to answer questions Microsoft Office 2010: Introductory Concepts and Techniques - Windows 7 Edition
Planning Ahead… • Select titles and subtitles for the worksheet • Determine the contents for rows and columns • Determine the calculations that are needed • Determine where to save the workbook • Identify how to format various elements of the worksheet • Decide on the type of chart needed • Establish where to position and how to format the chart Microsoft Office 2010: Introductory Concepts and Techniques - Windows 7 Edition
The Excel Worksheet Window • Default view is: Normal View • Ribbon • Formula bar & window • Mode indicator: Lower left is usually “Ready” • Rows & Columns • Row are numbered 1 2 3 4 5 6 etc • Columns are lettered A B C D E F etc • Scroll bars: Horizontal & Vertical scroll bars Microsoft Office 2010: Introductory Concepts and Techniques - Windows 7 Edition
The Excel Worksheet Window • An Excel workbook is composed of worksheets • Each workbook has: • 16,384 columns • 1,048,576 rows • Total number of cells: More than 17 Billion cells ! • The active cell is the one with the heavy border around it. It is the one into which you can enter data. Microsoft Office 2010: Introductory Concepts and Techniques - Windows 7 Edition
File Tab & Excel Options • File Tab: At top left of Excel window. • Click File Tab; Click Excel Options at bottom • Excel Options (9): • Popular ( popular Excel options ) • Formulas ( calculation options & error checking) • Proofing (Autocorrect options & spelling ) • Save (saving & Auto recovery options ) • Advanced (editing options and much more …) • Customize (customize Quick Access Toolbar ) • Add-ins (manage Microsoft application add-ins ) • Trust Center (privacy and security options ) • Resources (get Excel updates & run diagnostics) Microsoft Office 2010: Introductory Concepts and Techniques - Windows 7 Edition
The Excel 2010 File Tab • The Excel File Tab consists of tabs, groups, and commands. The Ribbon has 8 tabs: • File • Home • Insert • Page Layout • Formulas • Data • Review • View Microsoft Office 2010: Introductory Concepts and Techniques - Windows 7 Edition
The Excel Home Tab • Each tab surrounds a collection of groups • Each group contains related commands • Example : Home Tab groups: • Clipboard group • Cutting, Pasting & Copying • Font group (Font types, sizes, colors) • Alignment group (aligning & orienting text) Microsoft Office 2010: Introductory Concepts and Techniques - Windows 7 Edition
The Excel Home Tab (contd) • Number group • Number, Accounting, Currency, General , Percentages • Styles group contents • Conditional formatting • Format as Table, Cell styles • Cells group • Insert, Delete & Format cells [Protect sheet, etc] • Editing group • Sum ∑, Sort & Filter, Find & Select Microsoft Office 2010: Introductory Concepts and Techniques - Windows 7 Edition
The View Tab • In the Workbook Views group… • Normal • Page Break Preview (to view various pages) • Page Layout • Full Screen • Custom Views Microsoft Office 2010: Introductory Concepts and Techniques - Windows 7 Edition
Protecting a Sheet • Click the Reviewtab on the Ribbon • Click the Protect Sheet icon • Enter a password of your choice • Enter the same password again • Once this is done, the spreadsheet can only be accessed after you enter the correct password • If you lose the password, it cannot be covered and you may be out of luck trying to gain access. Microsoft Office 2010: Introductory Concepts and Techniques - Windows 7 Edition
Changing the Number of Sheets • Click the File tab • Click the Options entry in the left menu bar • Select the General options • Locate “When Creating New Workbooks” • Change the “Include This Many Sheets” entry to the desired number • Click OK Microsoft Office 2010: Introductory Concepts and Techniques - Windows 7 Edition
More Excel Features • Enhanced Screen Tips ( tool tips ) • Dialog Box Launchers (small arrows in southeast corner of an Excel group) • Formula Bar fx [ To enter formulas ] • has a sizing handle on the left • 2 sets of up-arrows, down-arrows on right for expanding the formula bar • Mini Toolbar (initially transparent) • Quick Access Toolbar (used for customized commands) Can be above or below the Ribbon Microsoft Office 2010: Introductory Concepts and Techniques - Windows 7 Edition
More Excel Features • The File Tab command menu • New , Open • Save , Save As • Print, Prepare • Send, Publish, Close • Key Tips • Press the ALT key to display the Key Tip Badges • These are short-cuts keys Microsoft Office 2010: Introductory Concepts and Techniques - Windows 7 Edition
Importing Templates from Microsoft • Your computer must be connected to the Internet • Click on the Help button (with ? mark) in upper right of the Excel window. • Type: Templates in the search window. • Click on the magnifying glass symbol to search • Find and download a template of your choice such as one of the “Budget” templates. Microsoft Office 2010: Introductory Concepts and Techniques - Windows 7 Edition
Excel Spreadsheet Templates • Click File Tab in upper left • Click New • Look at templates in the left column • Many to choose from: • Agendas • Budgets • Calendars • Expense Reports • And many more… Microsoft Office 2010: Introductory Concepts and Techniques - Windows 7 Edition
Entering Text in Excel 2010 • Enter worksheet titles, row titles, column titles • Merge & Center text • Under the Home Tab on the Ribbon • Select the line of text to Merge & Center • Click the Merge & Center icon (White square with a small letter “a” across it) Microsoft Office 2010: Introductory Concepts and Techniques - Windows 7 Edition
AutoCorrect Feature in Excel • Click the File Tab (Top left) • Click “Excel Options” square button (bottom) • Click “Proofing” option • Click “AutoCorrect Options” button • Select desired options for autocorrecting words, etc Microsoft Office 2010: Introductory Concepts and Techniques - Windows 7 Edition
Summing a Column of Numbers • Click cell B9 to make it the active cell and then point to the SUM button on the Ribbon • Click the Sum button on the Ribbon to display =SUM(B4:B8) in the formula bar and in the active cell B9 • Click the Enter box in the formula bar to enter the sum of the first quarter sales for the five product types for the Northeast region in cell B9. Select cell B9 to display the SUM function assigned to cell B9 in the formula bar Microsoft Office 2010: Introductory Concepts and Techniques - Windows 7 Edition
Working with Numbers in Excel • Use Currency Style format • Use Accounting Style format • Use Percentage Style format • Enter a formula using the keyboard: e.g. =SUM(B4:B10) • Change the Height and Width of rows, columns by dragging the column or row separator (Cross hairs) • Identify the arithmetic operators +, -, *, /, %, and ^ (exponents) • Increase and decrease decimal values (2 icons) Microsoft Office 2010: Introductory Concepts and Techniques - Windows 7 Edition
Working with Numbers in Excel • • Apply the AVERAGE, MAX, and MIN , COUNT functions • • Determine a percentage (%) • • Use AutoSum (Sigma symbol) ∑ • • Copy a Range of Cells using the Fill Handle • • Copy Formulas using the Fill Handle • •Verify a formula using Range Finder; Double-click the cell if you want to check a formula or to view the formula. Press Esc to quit. • •Change the font style and size of a cell (to Font size 24) • •Color the characters in the spreadsheet (Home Tab) • •Change the color of the background of a cell (Home tab) Microsoft Office 2010: Introductory Concepts and Techniques - Windows 7 Edition
Copying Formulas using Fill Handle • Copying Formulas Using the Fill Handle • Click some cell, say F4, and point to the fill handle; drag the fill handle down thru some cell, say, F12 and hold down the mouse button. • The mouse pointer changes to a cross hair. Microsoft Office 2010: Introductory Concepts and Techniques - Windows 7 Edition
Inserting Rows & Columns • Click the Home tab • In the Cells group on the right… • Click Insert to insert sheet rows or sheet columns • Click Delete to delete sheet rows or sheet columns Microsoft Office 2010: Introductory Concepts and Techniques - Windows 7 Edition
Applying a Theme • Click Page Layout tab on the Ribbon • Click Themes • Click the Foundry style • What is a theme ? • It is the overall design of a spreadsheet to include • colors, fonts, and effects Microsoft Office 2010: Introductory Concepts and Techniques - Windows 7 Edition
Importing External Stock Data • Click the Data tab on the Ribbon • Click Get External Data; click down arrow • Click Existing Connections • Click MSN Money Central Investor Stock Quotes • Click OK if the cell reference displayed is OK • Enter the stock symbols such as: AAPL, BA, CAT, GOOG, IBM, KO, MMM, MSFT, WMT, T CSCO, DELL, GOOG, HPQ, IBM, INTC, MSFT, SYMC, YHOO • Click OK and wait for stock data to appear Microsoft Office 2010: Introductory Concepts and Techniques - Windows 7 Edition
Adding a 3-D Column Chart • [See pages Ex-50 thru Ex-54 in the textbook] • Under the Home tab, select the data in the “Walk and Rock Music “ spreadsheet • Click the Insert tab • Click the Column button on the Ribbon • Point to the 3-D Clustered Column chart type • Hold down the left mouse button and drag the chart to the left under the spreadsheet Microsoft Office 2010: Introductory Concepts and Techniques - Windows 7 Edition
Goal Seeking in Excel • Refer to the spreadsheets entitled: • Click on the Data tab on the Ribbon • In the Data Tools group, Click What-If Analysis • Click Goal Seek; then fill in the data in the box • Examples: • ITE 115 Excel Goal Seeking Starbucks Coffee Sales.xlsx Microsoft Office 2010: Introductory Concepts and Techniques - Windows 7 Edition
Consolidating Data from Various Sheets Purpose: Consolidate data from various sheets in an Excel workbook: (SUM or AVERAGE) In the Excel fx formula window, type: =SUM(Atlanta!B10,Baltimore!D10,Miami!F10) =AVERAGE (Atlanta!B10,Baltimore!D10,Miami!F10) Do: Shift+F11 to create Sheet1 Right-click on Sheet1 to rename it as Totals See example: ITE 115 Consolidated Data Sales Sheets.xslx Microsoft Office 2010: Introductory Concepts and Techniques - Windows 7 Edition
Conditional Formatting • See pages EX-104 thru Ex-105 in the Office 2010 textbook Microsoft Office 2010: Introductory Concepts and Techniques - Windows 7 Edition
Gridlines & Headings • Click the Page Layout Tab on the Ribbon • Be sure that there is a Check Mark by both “View” boxes if you want to see gridlines and headings when using Excel. • Put a check mark in the “Print” boxes if you want gridlines and headings to appear on the printout of the Excel spreadsheet Microsoft Office 2010: Introductory Concepts and Techniques - Windows 7 Edition
Creating Custom Lists in Excel • You can create custom lists such as: Sun, Mon, Tue, Wed, Thu, Fri, Sat, Sun East, West, North, South Small, Medium, Large, Extra Large Excellent, Above Average, Average, Fair,Poor (This saves typing time; just drag across the cells) • Click the File Tab; click Advanced on the left • Click Excel Options at the bottom & scroll down • Click Edit Custom Lists near the bottom • Create a new custom list Microsoft Office 2010: Introductory Concepts and Techniques - Windows 7 Edition
Changing Excel Document Properties • Click the File Tab • Click the “Prepare” item on the list • Click “Properties” • Type in the data in the boxes (as desired) • Click the Close button [X] on the Properties window Microsoft Office 2010: Introductory Concepts and Techniques - Windows 7 Edition
Printing a Section of a Spreadsheet • Drag the mouse thru the desired cells • Click the File Tab • Click the Print item (the first item on the list) • Click the “Selection” button in the dialog box • Click “OK” Microsoft Office 2010: Introductory Concepts and Techniques - Windows 7 Edition
Printing (Fit to One Page) • Click Page Layout tab on the Ribbon • In the Page Setup Dialog group, click the Dialog Box launcher in the lower right corner. • Click the “Fit to” option button under “Scaling” Microsoft Office 2010: Introductory Concepts and Techniques - Windows 7 Edition
Excel Error Messages • #N/A – A formula refers to a value it cannot find. The formula is probably pointing to an empty cell. • #DIV/0! - A formula is trying to divide a number by zero • #NUM! - Excel sees one of the formula’s arguments as invalid, such as “$500” when it can only accept “500”. Microsoft Office 2010: Introductory Concepts and Techniques - Windows 7 Edition
Excel Error Messages • #REF! – A formula refers to a missing cell. • #NAME? – Text is used incorrectly in a formula. • ##### - The cell is not wide enough to contain the contents designated for it. • #NULL – A formula includes an improper reference to a range of cells. (a null or bad address) Microsoft Office 2010: Introductory Concepts and Techniques - Windows 7 Edition
Excel Project 1 Starting Excel • Click the Start button on the Windows taskbar to display the Start menu • Click All Programs on the Start menu to display the All Programs submenu • Click Microsoft Office in the All Programs submenu to display the Microsoft Office submenu • Click Microsoft Office Excel 2010 to start Excel and display a new blank workbook titled Book1 in the Excel window • If the Excel window is not maximized, click the Maximize button next to the Close button on its title bar to maximize the window • If the worksheet window in Excel is not maximized, click the Maximize button next to the Close button on its title bar to maximize the worksheet window within Excel Microsoft Office 2010: Introductory Concepts and Techniques - Windows 7 Edition
Starting Excel Microsoft Office 2010: Introductory Concepts and Techniques - Windows 7 Edition
Entering the Worksheet Titles • Click cell A1 to make cell A1 the active cell • Type Walk and Rock Music in cell A1, and then point to the Enter box in the formula bar • Click the Enter box to complete the entry and enter the worksheet title in cell A1 • Click cell A2 to select it • Type First Quarter Rock-It MP3 Sales as the cell entry • Click the Enter box to complete the entry and enter the worksheet subtitle in cell A2 Microsoft Office 2010: Introductory Concepts and Techniques - Windows 7 Edition
Entering the Worksheet Titles Microsoft Office 2010: Introductory Concepts and Techniques - Windows 7 Edition
Entering Column Titles • Click cell B3 to make cell B3 the active cell • Type Northeast in cell B3 • Press the RIGHT ARROW key to enter the column title, Northeast, in cell B3 and make cell C3 the active cell • Repeat Steps 2 and 3 to enter the remaining column titles in row 3; that is, enter Southeast in cell C3, Midwest in cell D3, South in cell E3, West in cell F3, and Total in cell G3 (complete the last entry in cell G3 by clicking the Enter box in the formula bar) Microsoft Office 2010: Introductory Concepts and Techniques - Windows 7 Edition
Entering Column Titles Microsoft Office 2010: Introductory Concepts and Techniques - Windows 7 Edition
Entering Row Titles • Click cell A4 to select it • Type Video and then press the DOWN ARROW key to enter the row title and make cell A5 the active cell • Repeat Step 1 to enter the remaining row titles in column A; that is, enter Mini in cell A5, Micro in cell A6, Flash in cell A7, Accessories in cell A8, and Total in cell A9 Microsoft Office 2010: Introductory Concepts and Techniques - Windows 7 Edition
Entering Row Titles Microsoft Office 2010: Introductory Concepts and Techniques - Windows 7 Edition
Entering Numbers • Click cell B4 • Type 66145.15 and then press the RIGHT ARROW key to enter the data in cell B4 and make cell C4 the active cell • Enter 79677.1 in cell C4, 34657.66in cell D4, 52517.2 in cell E4, and 99455.49 in cell F4 • Click cell B5 • Enter the remaining first quarter sales numbers provided in Table 1–1 on page EX 23 for each of the four remaining offerings in rows 5, 6, 7, and 8 to display the quarterly sales in the worksheet Microsoft Office 2010: Introductory Concepts and Techniques - Windows 7 Edition
Entering Numbers Microsoft Office 2010: Introductory Concepts and Techniques - Windows 7 Edition
Summing a Column of Numbers • Click cell B9 to make it the active cell and then point to the SUM button on the Ribbon • Click the Sum button on the Ribbon to display =SUM(B4:B8) in the formula bar and in the active cell B9 • Click the Enter box in the formula bar to enter the sum of the first quarter sales for the five product types for the Northeast region in cell B9. Select cell B9 to display the SUM function assigned to cell B9 in the formula bar Microsoft Office 2010: Introductory Concepts and Techniques - Windows 7 Edition
Summing a Column of Numbers Microsoft Office 2010: Introductory Concepts and Techniques - Windows 7 Edition