Download
1 / 29
300 likes | 479 Views
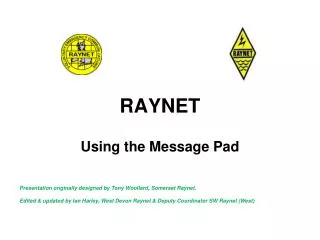
Raynet Data Working FLDigi. Ian Harley, G6BJJ Deputy Coordinator SWRA (West) & Controller West Devon Raynet. FLDigi is…. A small but very effective data handling program A suite of over 60 different modes of sending and receiving data Used mainly by Raynet for handling text based messages

E N D
Raynet Data WorkingFLDigi Ian Harley, G6BJJ Deputy Coordinator SWRA (West) & Controller West Devon Raynet
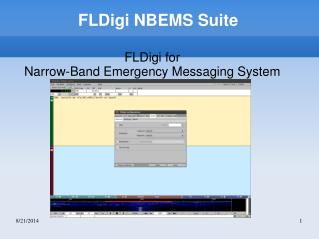
FLDigi is… • A small but very effective data handling program • A suite of over 60 different modes of sending and receiving data • Used mainly by Raynet for handling text based messages • Able to work even when voice conditions are poor.
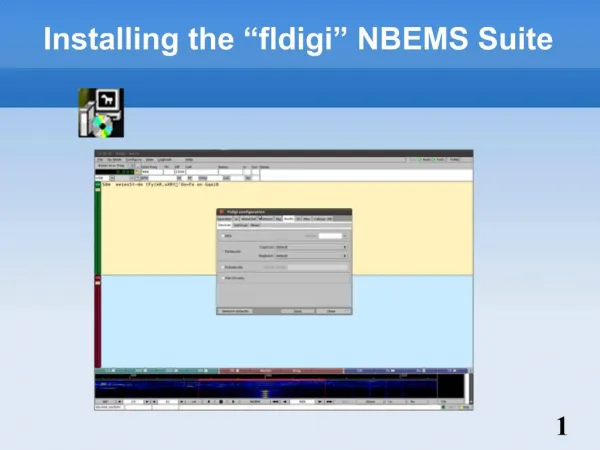
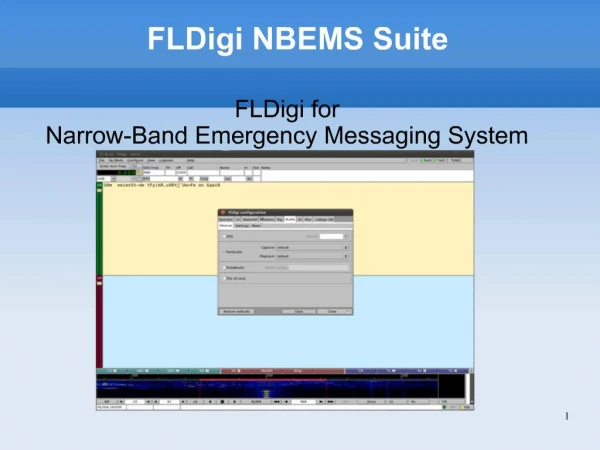
Starting FLDigi… FLDigi main screen opens to show this screen. The screen is divided into 4 areas • Top toolbars & controls • Receive window • Transmit window • Bottom toolbars & controls It is recommended that the window is set to maximum size to enable all sections to be seen and accessed. (If the size is set to a smaller window some critical sections are “hidden off screen”)
The top tool bar & controls • The top toolbar has 4 rows of controls. • The standard 1’ row of classic windows explorer controls [File – Help] • File: selects & opens the location of the Configuration files, specialist ARRL User service forms – not required in UK & NBEMS Files, selects &/or changes the macro set to be used – for Raynet use ICEmacro_v(x).mdf and starts/stops constant text capture for the log - not recommended for Raynet use, as it will record and log any and all sorts of spurious characters that may be generated. • Op Mode: selects data mode and speed – the default for Raynet use is BPSK250 • Configure: selects and sets all the operational parameters for the station • View: selects how the screen is displayed • Logbook: controls what is recorded and how the logbook is displayed • Help: normal help files • We need to be concerned primarily with rows 3 and 4 as these are used in the log and by the macros that control how the program works for us.
Starting the default Fldigi macro If you are starting FLDigi for the first time for Raynet operations you will need to select the correct macro set. It is called ICEmacros_v(x).mdf & contains a series of standardised pre-set automated shortcuts. (x) is the version number & the current ICEmacro is v6 (as of October 2012) Select [File], [Macros], [Open] Select ICEmacros_v6.mdf or the latest version. This can be found in your C:\user\...\fldigi.files\ macros\ folder A confirmation message will appear on the top (Yellow) receiving screen. Location of ICEmacros_v(x).mdf
Set the default data mode • Select Op Mode • Select PSK • then BPSK250 • Confirmation of the operational mode appears in the Bottom left window BPSK orBinary Phase Shift Keying is a method of using 2 signal phases to carry the data and looks for a phase change to decode the information. It is extremely robust & independent of the volume or quality of the signal. BPSK will work even when voice conditions are at or below the most marginal levels.
Configuring FLDigi – operator details • Click “Configure” and select “Operator” • Enter your station information in all boxes* *The information is used by the macros • For VHF and UHF you do not need to enter the antenna details but it may be useful when checking signal paths as it is recorded in the station log. • Click “Save” If not known NGR or similar
Configuring FLDigi – User Interface or UI • Click on “Configure” then “UI” • You will now see 6 option tabs. • The first 4 & number 6 can all be left at their default settings • Select Macros • Under number and position of macro bar select Two Bars (scheme 3) Although you may wish to change this to another of the 2 bar schemes later once you are familiar with the workings of the program. • Select the last 2 options at the bottom of the page • Load last used macro on start • Display macro name on start • Click “Save”
Configuring FLDigi – Rig & Com port • Click “Configure” then “Rig Controls” • Select “Hardware PTT” • Set box 2 h/w ptt to • Use separate serial port PTT • Use RTS & Use DTR • Device: enter the correct USB port number for the data interface you are using. If this is changed a red Initialize button appears, click this to activate the USB port. Make sure your radio is switched OFF and the interface is ON, press the macro button [TX>|] and you should see and hear the PTT relay activate briefly then shut down. This means you have the correct COM port. If not check the port number and try again. • All other tabs can be left at their default values. • Do not use CAT controls as this can interfere with some Raynet operational settings. • Once correct, click “Save”
Configuring FLDigi – ID & Talk-thro’ delay • Select “Configure” and then “ID” • Set the Pre-Signal Tone to ~3 seconds. This puts a 3 second tone on all transmissions to allow talk-thro’ unit(s) or repeaters to latch prior to starting the data burst. • Click “Save”
Configuring FLDigi – miscellaneous settings • Click on “Configuration” then “Misc” • Select “Sweet Spot” • Set all boxes to 1000 • Click “Save” All the main settings are done click “Close” Select “Configure” then “Save Config” All your settings are now saved ready for this run and all future runs. Shut down and restart the program.
Ready to start? – keep the screens clear By now it is probable that the top “Receive” Screen has all sorts of random characters. It is always a good idea to clear all the screens as soon as possible or the random stuff will be saved with the log file, making it difficult and time consuming to read or edit afterwards. This may be due to the Squelch threshold being set too low. Make sure the button marked SQL is ON (yellow light) and the slider is set to ~1/3 up. Too High and you may lose some data. Do not use AFC but make sure that LK (lock) is ON Right Click anywhere on the yellow screen and select “Clear”
Enter the Station you are calling… Enter the frequency/callsign/name and location of the station you will be working. The callsign and location will be added to a QTH log for you. You may add additional notes if you wish. After you have been working some time and changing the station being called, you can use the QTH download button to fill in regular contacts. The times stamps are added automatically for you. You are now ready.
The macro buttons… The 2 rows of Macro buttons are designed to speed up message preparation and to ensure everyone uses the same format. The buttons are laid out in normal use order starting top left (1) to bottom right (24) either side of the waterfall display. The next slide show what each button is and does. When you are first ready (and the frequency is clear!!!), click “Net Tune” this send a short message to say who and where you are, allowing everyone else on the net to lock into your signals. 2. … Copied to the top (Yellow) Receive window in red to show is was out going. 1. The data to be sent is added to the lower (Blue) Transmit window, then…
The full macro button list… A macro ending with >|or>>or|| will carry out an action automatically >| will transmit the message. >> will insert text at the start of a line || stops transmission
Ready to join the net? You first need to let Control, and everyone else, know that you are “On Net & Ready” • Clear the top and bottom screens. • Enter the net control station details in the Callsign, Name & Location boxes at the top of the screen (lines 3 & 4) • Click macro button 2 [My ID >|] • This sends a message to the station in the boxes in the format : • G0NET G0NET de G6BJJ G6BJJTheir c/sign de your c/sign • 29/05/2012 09:20 GMT Daylight Time Date Time • This Station is at Devonport Ctrl Your Location • Op name is Ian Your Operators Name • On net and ready Message “I’m ready to start” • K Over • All the information is collected from the Configuration file (your info) and from the boxes at the top (The station you are working). • Control should now send : • G6BJJ de G0NET Your c/sign de their c/sign • Rgr - Msg Ack Roger - Message received • + Out • You will see this on the top (yellow) receive screen. • As good practice you should now highlight the in- and out- going traffic you have just sent and received on the receive screen and save it as the file <xxx><DTG>_OnNet.txt where <xxx> is your location code & DTG is the date time i.e. PLY290939_OnNet.txt
Saving a message • Received data is in Black. Sent data is in Red. • Left click and highlight sent/received text. • Right click on highlighted area. • Select “Save as” • Save the file in the format • <XXX>Serial#.txt where • <xxx> is the location code of the station who SENT the message and the serial number is a sequential 4 digit number i.e. DOR0002.txt • If operating over more than 1 day use the format <xxx>DTGSerial#.txt • Save the file in you nominated Raynet Messages In or Out folder. • Now Clear all the screens! • Select each screen in turn • Right click then Clear.
Sending a pre-prepared message • Click macro “Msg 4U >|” • Transmits message to the station entered in callsign box that you have a message to send. • Wait for “Send ur Message” to be received • Click “Start of Msg” • Enters message headers and preamble including a DTG • Right click below the message preamble. select “Insert file” • A new window opens, select the pre-prepared text message from the saved location on your computer/drive or flash key. The text is inserted into the transmit window. • Click on the line below message just entered. • Click “End of Msg” – the message tail is entered and the whole message is automatically sent. • A copy will appear in the receive window in red as it is sent. • Receiving station will send “Msg Ack” which will appear in the top Receive window. • When you have “Msg Ack”, highlight the sent message and the “Msg Ack” in the receive window. Right click and “save as” to confirm receipt. • Clear all screens top and bottom.
Sending a message pad ‘on the fly’ Non-preprepared message should if at all possible be avoided, however they may sometime be necessary. • Click macro 3 [Msg 4u >|] & await permission to send (macro 4). • Click macro 5 [Start of Msg >>] which enters header info & DTG • Click line below last character on blue transmit screen then click macro 19 [>>Msg Pad] this inserts a blank standard message form. • Enter the information exactly as given by your user service. • Leave a blank line after the last character. • Click macro 6 [End of msg>|] this enters a DTG and message tail and sends it. • Await “Message ack” (macro 8). When received, highlight the message & reply and save it.
Sending a free QSO message. • Sometimes you may need to send a free QSO type message between 2 stations. • If the station you need to contact is not the net control, you must make sure that you have clearance to “talk” to them. Net control will give both stations permission to talk-thro’ once the net is clear of all other traffic. • Once permission is given, change the callsign/location and name boxes at the top of the FLDigi main window to the appropriate information. • If you are calling or are being called: • Click macro 15 [Free QSO>>] this inserts the callsigns and a > character on the next line. • Type your message after this character. • Enter a blank line • Click macro 16 [BTU >|] • Once finished you must say so (macro 6) then reset the callsign, name location etc back to net control and inform net control. [My ID>|] macro 2. • Save your messages (“en block”) in the format <xxx>2<xxx>DTG.txt • Always be prepared to stop immediately if net control requests it! they will have higher priority traffic.
Other macro buttons – “Say Again” [Say again>|] • If for any reason a data transmission is unreadable or incomplete click this macro to request the message is repeated. • The receiving station will see : c/sign de c/sign Message broken … send again K • Highlight the previously sent message on the top receive screen (It will be in red as it was sent out) then copy & paste in the bottom transmit window. • Move to the line above the first character & type in “RESEND>>>” • Move to the line after the last character – if it is ^r delete it. (this is the stop transmitting control) • click macro 9 [DTG>>] this adds the new DTG to the re-sent message • Click macro 6 or 12 to transmit message.
Other macro buttons – [VOX>|] • When you are working in data modes your speaker will normally be muted, as neither you nor our user services will want to listen to the “racket” of data signals. • If you need to speak to another station send the [Vox>|] request, macro 10. • You will see an message similar to: M0XXX M0XXXde G1XYZ G1XYZ@ Swindon Ctrl ____________________________________________________________ I need to speak to you. Request you change to VOX mode and call me when ready. K ____________________________________________________________ ^r • turn up your speaker and wait until called.
Other macro buttons [TX>|] & [Tx STOP! ||] • [Tx STOP! ||], macro 11, is an emergency transmission abort. It forces FLDigi to stop any transmission and revert back to receive mode. – useful if you find an error or have accidentally hit a transmit key (any macro with >|) • If you need to use this clear all screens and start again. • [TX >|] macro 12, transmits all the information in the blue transmit screen
Other macro buttons - BPSK31 to BPSK500 The default data mode and speed is BPSK250, however control may feel that if conditions warrant it a different speed should be used. • The mode will remain BPSK but the speed will change. • If very good to BPSK500 • If poor BPSK125 or lower. • The last 4 macro buttons 21 to 24 are labelled BPSK31 to BPSK500 • Click the new speed button as directed. • Screen will show - “changed to BPSKnnn” • Re-apply the Lock button, LK, which will have been turned off on any speed or mode change.
Other macro buttons – send CW ID • To ensure we comply with our licences we need to make sure that we send a station ID at regular intervals ~ 15 minutes or so. • Macro button 2 [My ID>|] send a data message to show your callsign, name and your location, but is not readable without a data program or interface so is not completely suitable for full ID purposes. • Macro button 20, [Send CW ID>|] sends your callsign and location as a data burst and in CW.
Other macro buttons – CQ, ANS & SK • [CQ >|] sends a general CQ call • [ANS >|] send an acknowledgement to a call without the callsign of the specific station inserted. (eg - not yet added to top window boxes). • [SK >|] sends a station closing down signal along with the DTG
Post operations General • After operations are completed it is important that all stations remain ‘on net’ until “stood down” by control. All the data must be saved to a designated secure location, preferably with the group controller (to maintain legal obligations) & the EPO or user service. Ideally the saved files should be transferred to the designated person(s) by usb memory stick. Once safe transfer is confirmed, it is important that all information is removed from all Raynet non-designated machines to preserve confidentiality. Hard copy print-outs should not be held by Raynet personnel, but handed to EPO or user service. Signal Logs • In the case of exercise ICE or other inter-group/county/zone operations, a log of signals heard by data/voice should be completed and forwarded to the appropriate Net Controller. (Callsigns, frequencies, signal RS and Locations, Talk-through units used / permit number.) using the ICE Log form.
Remember…. • A data net is always a directed net. Net control invites a station to transmit, at all other times all stations must remain silent. • If you have a message, use the “Msg 4U” macro. Then wait for control to invite you to send. They may be working a station you can’t see or hear on another part of a repeater network. • When you are working in data modes your speaker will normally be muted, as neither you nor our user services will want to listen to the “racket” of data signals. • If you need to speak to another station send the “Vox” macro request, turn up your speaker and wait until called. • Where possible always pre-prepare any messages “off-air” save them as a .txt file then insert them into the transmit window. • Always record your messages in the format <Group><serial number>.txt or <group><DTG><serial number>.txt The group reference ideally should be in the form of 3 letters and refer to a location which has meaning to our user services. i.e. PLY = Plymouth, EXE = Exeter, DOR = Dorchester, TTN = Taunton The serial number should ideally be 4 digits starting from 0001.
Resources • This project and related resources:http://swraynet.org.uk/ SWRA Operations Guides for FLDigi SWRA CHALETS and Message pad forms • Additional material Latest version of FLDigi and help files. http://www.w1hkj.com/download.html • SW Raynet Association - Data Working Group