Download

1 / 64
660 likes | 804 Views
This guide walks you through the installation and utilization of data mining tools in Microsoft Excel. First, follow the provided installation instructions to set up the necessary components. Once installed, learn how to access the Data Mining tab, select target variables, and analyze key influencers in customer data. Discover how to interpret Key Influencer and Discrimination Reports to understand the relationships between demographic factors and purchasing behavior. This tutorial is essential for anyone looking to leverage Excel for data-driven decision-making.

E N D
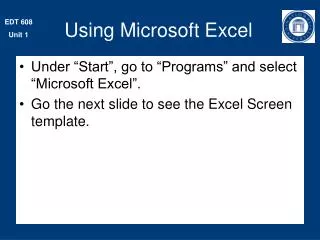
Installation (optional) • Before you can begin this tutorial on your own computer, you’ll need to follow the installation instructions found at: • http://isys201.org/CommonFiles/Readings/1-InstallSQLServer.pptx • http://isys201.org/CommonFiles/Readings/2-ConfigureAddIn.pptx • You do not need to install it on your own computer because it is installed installed in the 240 and W204 computer labs. However, you must login using the following account: • Username: .\SQL User • The “.\” is to make sure you’re logging into the local machine • Password: analysis101
Getting to the Analyze Menu 1. When you Select, Data Mining tab in Excel, you see the following menu: 2. In the example workbook, Select the [Table Analysis Tools sample] sheet. 3. Highlight a cell within the table so the ribbon at the top displays the Table Tools 4. Select that Analyze option on the ribbon.
Analyze Key Influencers • Scenario: • You are a store manager who collects demographic information on all of your customers • You want to know which factors are correlated to those who made purchases from you • These are “key influences” – the variables which appear to influence whether they are a customer or not. • Question…are these variables actually causing them to be customers? • In the Sample Excel Data workbook, select the Table Analysis Tools Sample sheet. • Click the Analyze Key Influencers button (furthest left on the ribbon)
Analyze Key Influencers • Select your target column (i.e. the variable you’re trying to correlate with). This will analyze correlations between all other variables and this one. • In this case “Occupation” • Select Run button
Key Influencers Report • A new sheet is created called Key Influencers for Occupation. • You can decide later to keep or delete this new sheet
Understanding the Key Influencers Report • Notice the four columns: Column, Value, Favors, Relative Impact • Column gives you all of the other factors (variables) • Value gives you the value of each column which is most related to the target factor • Favors refers to a particular value of the target factor • In this example, Occupation has the values Skilled Manual, Clerical, Professional, Manual, and Management • Relative Impact gives you a graphical depiction of the strength of each correlation • Questions: • Why are there 10 correlations listed for the Professional value of Occupation and only 7 correlations for the Clerical value of Occupation? • Is it possible that you may have certain values of Occupation which are not listed in the Key Influencers Report at all? • IMPORTANT: • The length of a bar in the Relative Impact column is only being compared to other bars in the same Favors category (within-category relative impact only), so it is not appropriate to compare bar length across categories (e.g., Skilled Manual versus Clerical).
Discrimination Report • Notice in the Key Influencer’s Report that the income range 39000 to 71062 is a strong influencer for both the Skilled Manual and the Professional values of the target column • Recall that you should not compare the length of the Relative Impact bars between sets of target column values. • In Contrast, a Discrimination Report allows you to make direct comparison between the correlation strength of two values of a target column • Select Skilled Manual and Professional in the Discrimination Reporting window and click Add Report • It should add this report to the same worksheet
Discrimination Report • Key influencers for all existing values of occupation are produced. • The dialog box below lets you do pairwise comparisons of types of occupations, e.g., Skilled Manual versus Professional
Discrimination Report • Notice you now have the “Favors Skilled Manual” and “Favors Professional” columns • Many of the values in the discrimination report are very different from those in the Key Influencers Report • Why? Because the correlation values can be much different when you’re comparing a value of the target column to those of ONE other value versus ALL of the other values.
Discrimination Report Summary • What is this tool useful for? • Data exploration • Not prediction • Not determining causality • Only when you know which target columns you’re interested in • What happens to numeric columns? • They’re discretized (broken into specific, useable ranges) • How are the correlations calculated? • These are not your typical Pearson correlations • Based on the Naïve Bayes algorithm
Detect Categories • When dealing with a very large number of records, it is often very useful to group them into a manageable number of groups • Want all records in each group to be very similar. • Rather than dealing with hundreds or thousands, you’re dealing with a much smaller number of groups of similar objects. • This practice (called clustering or segmentation) eases many data analysis tasks • This is the purpose of the Detect Categories tool
Detect Categories • In the Sample Excel Data workbook, select the Table Analysis Tools Sample worksheet • Click the Detect Categories button (2nd button from the left on the Analyze ribbon)
Detect Categories • Notice the list of columns to be analyzed • Allows you select which factors you wish to create your groups or clusters around • Why would you not use some of the factors? • Notice the Maximum number of categories option • Allows you decide whether to custom fit your data into a certain number of categories or else allow the statistical process to decide for you • What is the real difference between having a large number of smaller groups versus a small number of larger groups? • Notice you have the option of recording the categorization for each data entity. • This is a good idea because it adds raw data which can be used in later analyses
Detect Categories • Leave all of the default selections and click Run • The process should produce a new worksheet titled “Categories Report” with three sections • List of categories produced and the count of records in each • The summary of characteristics for each category • By default, it’s filtered to show you only Category 1 • You can change that or remove the filter altogether • Visualization of the data in each category displayed one factor at a time
Detect Categories: List of Categories • Feel free to edit the names of each category. This is probably a good idea; use a name to describe the data in that category
Detect Categories: Characteristics • You get the factors and values which define each category • This may help you to define meaningful labels to the data • For example, how you describe the category below?
Detect Categories: Profile Chart • This is actually an advanced Pivot Chart • All of the same features apply; try them out • For clarity, only shows one factor at a time (e.g. age) • Notice if you change the category names, it will not automatically change them in the profile chart • Right-click the border, select Refresh Data
Detect Categories: Summary • This is a useful tool for: • Grouping instances (rows) with similar categories • Helping you understand the boundaries within your data • Add new data (category labels) to a well-known dataset • Explore a new data set • Not for prediction • How are the categories identified statistically? • Based on the Microsoft Clustering algorithm
Fill From Example • Do you always give the store clerk at the mall your email address and phone number when they ask for it? I hate that… • Sometimes, you will suffer from missing data. • The Fill From Example tool makes educated guesses to fill in missing data. • The Fill From Example tool examines data in other records to automatically generate the most probable values in the records missing data
Fill From Example • With the Fill From Example worksheet selected, click the Fill From Example button on the Analysis ribbon (3rd button from the left). • This worksheet contains missing data in the High Value Customer column
Fill From Example • In the dialog box, make sure you’ve selected the column with missing data (High Value Customer in this case) • Notice that the tool will try to automatically select the column it thinks you want to generate probabilistic values for. • Click the “Choose columns to be used for analysis” link • Notice it also tries to automatically select the columns you will want to use to predict the missing data. • How does it do that? • Click OK, then click Run
Fill From Example • Two new elements are added to your workbook • A new column in your original data table named columnname_Extended • A new worksheet which includes a Pattern Report for your missing data column • This is very similar to the Analyze Key Influencers tool where it indicates the relatively impact of each factor • These are the “rules” for how it determined the missing data
Fill From Example • European customers with a commute distance of 2 to 5 miles and 5 children are generally considered high-value customers • Basically, there is a Yes-weight and No-weight produced for each factor. Why are some factors not in the table?
Fill From Example: Refining the Results • If the new patterns appear reasonable, then you are done with the Fill From Form tool • Sometimes this is not the case. You may notice a predicted result that is obviously incorrect. In that case… • …replace the missing data with your expert judgment • Re-run the Fill From Example tool • Re-inspect and repeat the process as needed through multiple iterations • The statistical logic which is used to predict the data is based on Microsoft’s Logistic Regression algorithm • Is this tool for data exploration or prediction?
Forecasting • You are a retail manager and your company collects sales data for various products across various regions. • This data should help you predict future sales. • The Forecasting tool analyzes numerical data, detects patterns, and extrapolates these patterns to produce forecasts. There are 3 types of patterns it analyzes: • Trends • E.g. ascending versus descending • Periodicities (aka seasonality) • Regular intervals when an event occurs. E.g. Christmas season, Fridays, etc. • Cross-correlations • More complex; shows interdependencies between the values of two different data series; e.g. an agricultural company’s stock price and their volume of wheat production in the prior year.
Forecasting • Select the Forecasting worksheet. Notice it includes: • A time stamp • Sales volumes for Europe, North America, and the Pacific • Launch the tool by selecting the fourth button in on the Analysis Ribbon • Remember you’ll only see the ribbon if you’ve select a cell in the table range
Forecasting • The dialog box contains a list of all numerical columns (aka data series) in the Excel table • Any column which appears to be a unique identifier (like ID or a timestamp) will be automatically deselected. However, you can re-select it if needed. • If a column doesn’t appear which should, then it likely has some non-numeric data in it. If so, just delete or edit the text data. • This is where VBA skills come in VERY handy (e.g., Findamine example) • Missing data is okay • Next, select the number of time units you want to forecast. The default is always 5. • In this case, the data appears in a monthly series. Therefore, change it to 6 to forecast the next 6 months • The timestamp option allows you indicate which column contains the timestamp. Not necessary, but useful when producing reports • You can manually indicate which period-types your data is referring to or allow the tool to detect automatically.
Forecasting • Click Run • In addition to the Forecasting Report generated in Excel, new table values were appended to the Forecasting data table • In the graph… • Notice the dotted lines to depict forecasted values • The Y axis contains the actual and forecasted sales volume • The X axis contains the numeric periods • Why are there spikes on certain dates (particularly in N.A.)? • Was that periodicity detected by the forecasting tool?
Forecasting Summary • The Forecasting tool evaluations trends, periodicities, and cross-correlations in numeric data series to forecast the next data steps for the series. • Each column must be numeric. • You may need to clean data in order to use the tool • Uses the Microsoft Time Series algorithm
Highlight Exceptions • Designed to find needles in a haystack • Or more particularly, to find everything that’s not hay • i.e. which of these data rows is not like the other? • Why are some rows so much different than others? • Data entry errors • Interesting phenomena • This makes a great first step when analyzing data. • It helps you to clean it, and gives you ideas about potential directions you might take
Highlight Exceptions • Select the Table Analysis Tools Sample worksheet and select a cell in the table range. • Click the fifth button on the Analysis ribbon called Highlight Exceptions • Make sure the correct columns are checked • Unique identifiers should not be checked • Free-form text should not be checked • Anything left unchecked will be ignored (just like all other analyses) • Does this tool analyze ordinal, nominal, or interval data? • Click Run (this may take a bit longer)
Highlight Exceptions • What exactly is the tool doing? • Analyzing the Excel table data and detecting common patterns • Comparing all table rows against the patterns and marks certain rows as exceptions (which don’t match the patterns) • For each row, identifies the column(s) that seems to cause the exception • For each column, computes the count of exceptions caused by that column • How does this process compare to the Detect Categories tool?
Highlight Exceptions • When it’s done, you’ll find a new worksheet containing a list of all columns with the number of exceptions caused by each column
Highlight Exceptions • Also, in the original spreadsheet, the rows containing exceptions are colored with a shade of dark yellow and for each row, the column that is the most probable exception cause is highlighted with yellow • Why is record 22864 an exception? • Let’s assume this is a typo. Fix it by typing 1 into the cars cell for that row. Notice that the data is automatically re-evaluated
Highlight Exceptions • More complex interactions can be understood by adjusting the Exception Threshold • Select the View tab/ribbon • Click the New Window button • Click the Arrange All button and choose Vertical • In one of the two vertical windows, select the Table Analysis Tools Sample spreadsheet • In the other window, select the Table2 Outliers spreadsheet • Lower the value of the Exception Threshold field by using the mouse of typing in a new value
Highlight Exceptions • The number of outliers in each column increases as you decrease the threshold for exceptions • Thankfully, you don’t have to scan the entire data table to find exceptions as you change the threshold • Just sort by color on any table column to see all exceptions together • Notice that whenever you do an operation which changes the data in the original table (e.g. filtering), the model is automatically re-evaluated.
Highlight Exceptions: Summary • This tool generates a lot of extra data and objects in order to run. To clear all results, you would have to delete them one-at-a-time. • To get around this, run the tool again on the same table, click the OK button to delete the previous results, and then click the Close button to keep from running a new model • The Highlight Exceptions tool detects rows in your data that are unlike most other rows. These may be anomaly's (like data entry errors) or interesting, unusual rows. Like the Detect Categories tool, this tool uses the Microsoft Clustering algorithm to measure the distance between each row in the table and all the clusters detected by the model. Rows which seem far from all other clusters are marked as an exception
Prediction Calculator • You are a salesperson with many customers. You want to decide which customers you should follow up with to close a transaction. • Why not follow up with everyone? • Following up takes time. Time costs money. So choose carefully • On the other hand, choose too few and you lose opportunities • Therefore, you need to find the correct number of customers to follow up with (and who they are) so that benefits of following up equals the costs of lost opportunity. Make sense? • This is why you need the Prediction Calculator
Prediction Calculator • The Prediction Calculator tool helps you build a score card • The score card below allows you to assign each customer a score which indicates how likely they are to transact with you • What score does a potential customer with 4 kids, 1 mile commute, and 0 cars get?
Prediction Calculator • In addition to predicting a score, it helps you detect the optimum threshold for using the scorecard • When do I stop using the card? • NOTE: the Prediction Calculator can only perform binary predictions • You can predict whether or not income is in the 70k-80k range, but not if it’s in 70k-80k or 80k-90k or 90k-100k • It works much like the Key Influencers tool by filtering out the weak influences and presents only the strong ones.
Prediction Calculator • Select the Table Analysis Tools Sample worksheet • Click the Prediction Calculator button in the Analyze ribbon • We want a scorecard that predicts whether someone will buy a bike. • So set Target to “Purchased Bike” and Exactly to “Yes” • Notice that if you have an interval variable with many values, you can specify a range of values. Otherwise, you just select the single value your want to base your scorecard on.
Prediction Calculator • You should get 3 new worksheets: 1) Prediction Report, 2) Prediction Calculator, and 3) Printable Calculator • Select the Prediction Calculator worksheet • Attribute column • Each of the IVs • Value column • The most common value for each IV • Relative impact • The weight associated with that IV • Higher weights mean more important • Notice the total row gives you an overall score for a particular instance of all IVs
Prediction Calculator • Notice at the top of the page, there is a suggested threshold score. This tells you the suggested cutoff for whether or not each record will likely buy a bike. • Notice that the default set of values in the Value column total to something less than 584. Therefore, Prediction for ‘Yes’ is FALSE…meaning you should probably ignore this customer for now • Where did the ‘Yes’ come from in the Prediction for row? • Try this—in the Value column, select the following values: • Marital Status: Married • Gender: Male • Income: 97111-127371 • Children: 3 • Education: Graduate Degree • Occupation: Professional • Home Owner: Yes • Cars: 2 • Commute Distance: 0-1 Miles • Region: Pacific • Age: 46-55 • The Total score (642) exceeds the 584 threshold and the Prediction for ‘Yes’ is now TRUE
Prediction Calculator • NOTE: the scores in each column are normalized so that: • The relative importance of the scores is preserved • The minimum possible score is 0 • The maximum possible score is 1000 • Beneath the Prediction Calculator is a Score Breakdown table with all of the possible values of all IVs that were used in the analysis (except the DV column) • Select the Printable Calculator worksheet • This contains a printer-ready prediction calculator
Prediction Calculator • The Prediction Report worksheet is not used for prediction. It allows you to tweak the performance of the Prediction Calculator • Basically, it allows you to specify the costs of Type I (false positive) and Type II (false negative) errors as well as the benefits of true positives and true negatives • By default: • False positives have a cost of 10 because you spent time and effort pursuing that customer but they didn’t purchase a bike • False negatives have no cost because you didn’t pursue them, yet they actually would have purchased. You may choose to add a cost here because you lost the OPPORTUNITY cost of that sale • True positives have a profit of 10 because you pursued that customer and they did purchase a bike • True negatives have profit of 0 because you didn’t purse them and they wouldn’t have purchased a bike. Similar to false negative, you may choose to add a value here because you earned the OPPORTUNITY benefit of not “mis-pursuing” that customer.
Prediction Calculator • Notice that if the false values mirror the true values, there is no change in the threshold • Why would you ever have different false/true positive or false/true negative costs? • If you believe your costs of pursuing have significantly decreased • E.g. your company has improved marketing campaign which reduced the cost of soliciting customers • Basically, the total value of your Prediction Calculator is equal to the sum of profits made by true positives minus the sum of costs made by false positives
Prediction Calculator • How exactly is the threshold calculated? • A sample of data is drawn from your table • By comparing the scores of the test rows against the actual value of the DV for the same rows, the tool computes the optimum threshold which maximizes profit • Examine the table at the bottom of the Prediction Report worksheet. Which row has the greatest profit? • That row produces a Score of 584 • It has the optimal balance between the costs/benefits of false/true positive/negatives. • See pages 70-71 for a complete explanation
Prediction Calculator • Notice the graph showing the total profit for each score. • What’s causing the profit to decrease as you move lower than a score of 584? Higher?