Download
1 / 45
890 likes | 1.82k Views
PyMOL – Molecular Graphics System. A free, open-source tool to visualize molecules. PyMOL Features. Real-Time 3D Visualization Publication Quality Renderings Extensive Animation Capabilities Support for X-ray Crystallography Modular Architechture Flexible API for Custom Applications

E N D
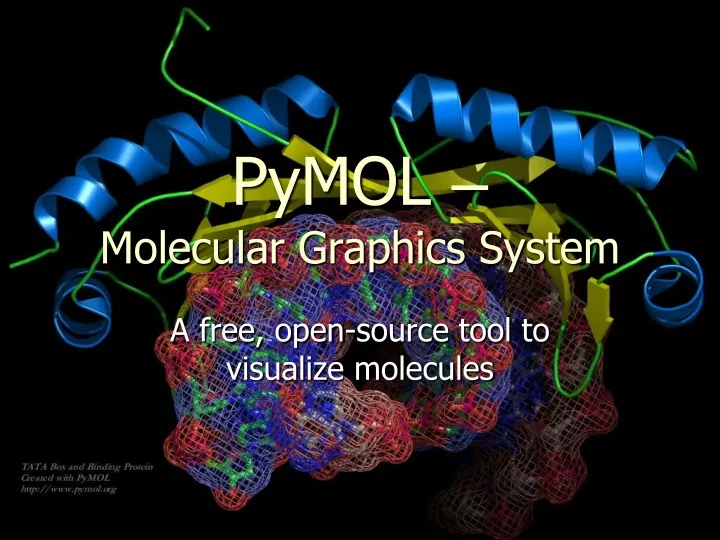
PyMOL –Molecular Graphics System A free, open-source tool to visualize molecules
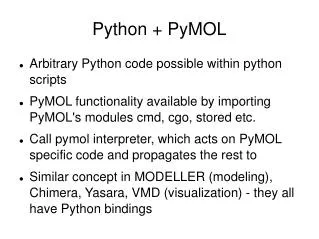
PyMOL Features • Real-Time 3D Visualization • Publication Quality Renderings • Extensive Animation Capabilities • Support for X-ray Crystallography • Modular Architechture • Flexible API for Custom Applications • Open Source and Freely Available • Written in C and Python
System Requirement • Recommendations • Windows 2000 or XP. • A late-model 3D OpenGL compatible graphics accelerator card from nVidia, ATI, 3Dlabs or similar. • 512 MB RAM (768 MB or 1 GB preferred). • 3 Ghz Pentium 4 processor or similar. • Minimal System Requirements • Windows 98 and ME, or later. PyMOL will not run on Windows 95 and NT. • 3D OpenGL compatible graphics accelerator card. • 256 MB RAM. • 500 Mhz Pentium 3 processor. • Unless you have prior experience with Python, we recommend installing a version of PyMOL which does not require an external Python interpreter. Avoid versions of which contain "-py21", "-py22", "-py23" or similar in the filename.
Accelerated OpenGL Hardware Recommendations • For monocular visualization under Windows, we recommend the ATI Radeon 9700 Pro. This is by far the fastest OpenGL engine we have ever seen PyMOL run on! • For stereo visualization under Windows, we are re-evaluting our recommendation of the nVidia Quadro FX 1000, because we and other users have encountered image stability problems (on Windows only!). • For stereo visualization under Linux, we recommend the ATI FireGL2. It is not the fastest card in the world, but IT SIMPLY WORKS. If you need better performance, go with the nVidia Quadro FX1000, but be prepared for driver updates. • For stereo visualization under Mac OSX, we recommend the nVidia GeForce4Titanium (approx. $400). However, we would expect even better performance from the ATI Radeon 9700 (not yet tested). • For monocular visualization on a laptop, we recommend the nVidia GeForce4 Go 460 chip running under Windows. However, we also expect excellent performance from the ATI Mobility Radeon 9700 chip, which will likely do better with smooth (antialiased) lines.
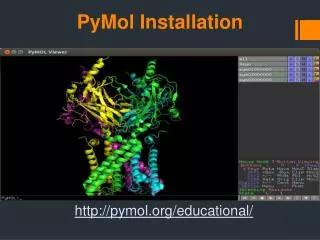
Installation • Python-Free Installation • Download the ".zip" format archive. For example, pymol-0_97-bin-win32.zip • Extract the .zip file using WinZip (Windows XP can open .zip files directly). • Double click on the "Setup" or "Setup.exe" icon in the folder. • Answer the questions which follow. • You can now launch PyMOL from the Start menu. • Python-Dependent Installation • If you already have Python installed and wish to use PyMOL with that interpreter, the process is virtually identical. The only difference is that you need to download a version of PyMOL which matches your desired Python version in the filename. For example: • pymol-0_97-bin-win32.zip. would work withPython-2.3.exe available from http://www.python.org .
PyMOL's WindowsPyMOL normally starts with two windows: The Viewer Window and the External (Tcl/Tk) GUI Window. External GUI External GUI Viewer
Name Panel Mouse Matrix Frame Indicator Command Line Movie Controls The Viewer Window
The External GUI Window By default, PyMOL comes with a single external GUI window which provides a standard menu bar, an output region, a command input field, and a series of buttons. One important advantage of the external GUI window is that standard "cut and paste" functions for text will only work within the External GUI, and not within in the PyMOL Viewer. Furthermore, you must use Ctrl-X, Ctrl-C, and Ctrl-V to cut, copy, and paste because a standard Edit menu has not yet been implemented.
Loading PDB Files Using the External GUI Menu • The default external GUI provides a standard Open... item in the File menu which you can use to select the file you wish to open. • Using Commands • SYNTAX • load <filename> • EXAMPLE • load test/dat/pept.pdb
Manipulating the View • Basic Mouse Control 3-Button Viewing
Atom Selection Macros • /object-name/segi-identifier/chain-identifier/resi-identifier/name-identifier • /object-name/segi-identifier/chain-identifier/resi-identifier/name-identifier • /object-name/segi-identifier/chain-identifier/resi-identifier • /object-name/segi-identifier/chain-identifier • /object-name/segi-identifier • /object-name • EXAMPLES • PyMOL> zoom /pept • PyMOL> show spheres, /pept/lig/ • PyMOL> show cartoon, /pept/lig/a • PyMOL> color pink, /pept/lig/a/10 • PyMOL> color yellow, /pept/lig/a/10/ca
Atom Selection Macros resi-identifier/name-identifier chain-identifier/resi-identifier/name-identifier segi-identifier/chain-identifier/resi-identifier/name-identifier object-name/segi-identifier/chain-identifier/resi-identifier/name-identifier • EXAMPLES • PyMOL> zoom 10/cb • PyMOL> show spheres, a/10-12/ca • PyMOL> show cartoon, lig/b/6+8/c+o • PyMOL> color pink, pept/enz/c/3/n
Atom Selection Macros • resi-identifier/ • resi-identifier/name-identifier • chain-identifier// • object-name//chain-identifier • EXAMPLES • PyMOL> zoom 142/ # Residue 142 fills the viewer. • PyMOL> show spheres, 156/ca # The alpha carbon of residue 156 # is shown as a sphere • PyMOL> show cartoon, a// # Chain "A" is shown as a cartoon. • PyMOL> color pink, pept//b # Chain "B" in object "pept" # is colored pink.
Secondary Structure Assignment • SYNTAX dss selection, state • EXAMPLE • dss mov, 1 • show cartoon • alter 11-40/, ss='H' # assign residues 11-40 as helix • alter 40-52/, ss='L' # assign residues 40-52 as loop • alter 52-65/, ss='S' # assign residues 52-65 as sheet • alter 65-72/, ss='H' # assign residues 65-72 as helix • rebuild # regenerate the cartoon
Cartoon Types • set cartoon_color,blue • set cartoon_cylindrical_helices,1 • set cartoon_fancy_helices, 1 • set cartoon_smooth_loops, 1 • set cartoon_highlight_color, grey • set cartoon_transparency, 0.5
Output >ray >png my_image.png High Quality Ouput >ray 2000,2000 >png
Ray Types pymol>bg_color, white pymol>set ray_shadow,0 pymol>set ray_trace_fog,0 pymol>set depth_cue,0 pymol>set antialias,1
Advance Topics • Hydrogen Bonding • Eletropotential Surface • Movie • Electron Density Map
Hydrogen Bonding • distance 542/oe1,538/ne • distance 542/oe2,538/nh2 • hide labels, dist01 • label (542/oe1), " %s" % (" E542") • label (538/ne), " %s" % (" R538") • set label_font_id,4
Additional Option for Hydrogen Bonding • set label_color,white • set dash_gap,0.09 • set dash_width,3.0 • set dash_radius,0.0 • set dash_length,0.15 • set dash_round_ends,on
Electrostatic Surface in PyMOL-GRASP • Read DelPhi format (.phi) file that generated by GRASP • On the SGI computers: • 1) Start up the computer, log in and in a command line prompt, change the directory to where the .pdb fi le, .siz file and .crg files are located. • 2) Run grasp (command: /hhmi/software/grasp/grasp) • 3) Open up the menu by right-clicking on the window • 4) With the menu open, right-click on the Read option. • 5) Right-click on the PDB File option and load the .pdb file. • 6) Open the read menu again (steps 3-4), and select the Radius/Charge File option, then load the raidus file. Repeat again, loading the charge file. • 7) Open the main menu, click on display, show, molecular surface. • 8) Open the main menu, click on calculate, new potential map. • 9) Open the main menu, click on calculate, Pot. via map at surface/atoms • 10) Open the main menu, click on write, potential map, internal map, let me enter it. In the command lin e prompt, type in the name of the file (namefile.phi)
GRASP generated Surface
10) Open the main menu, click on write, potential map, internal map, let me enter it. In the command lin e prompt, type in the name of the file (namefile.phi)
10) Open the main menu, click on write, potential map, internal map, let me enter it. In the command lin e prompt, type in the name of the file (namefile.phi)
10) Open the main menu, click on write, potential map, internal map, let me enter it. In the command lin e prompt, type in the name of the file (namefile.phi)
10) Open the main menu, click on write, potential map, internal map, let me enter it. In the command lin e prompt, type in the name of the file (t2a.phi)
Pymol Input – for GRASP • load t2a.pdb, t2a • load t2a.phi, map • load dna-t2a.pdb, dna • show surface, t2a • ramp_new e_lvl, map, [-8.0, 0, 8.0] • set surface_color, e_lvl, t2a
APBS (Adaptive Poisson-Boltzmann Solver) • APBS is a software package for the numerical solution of the Poisson-Boltzmann equation (PBE), one of the most popular continuum models for describing electrostatic interactions between molecular solutes in salty, aqueous media. http://agave.wustl.edu/apbs/ • Currently, only offer RPM-format binaries for RedHat Linux platforms. • On Windows, APBS could be complied via Cygwin. Therefore, compilation had to use the GNU compilers and the performance was pretty mediocre. • Installation Guide (http://agave.wustl.edu/apbs/doc/html/user-guide/x142.html) • In order to install APBS from the source code, you will need: • C and Fortran compilers • The APBS source code • The MALOC hardware abstraction library (available from http://www.scicomp.ucsd.edu/~mholst/codes/maloc/index.html)
Electrostatic Surface-APBS • Make sure you have PyMOL version 0.97 or higher. • Make sure you have APBS installed.
Run under Cygwin • $./apbs.exe pymol-generated.in • This will spend 5-10 mins. • Output file:pymol-generated.dx • Pymol Input • load t2a.pdb, t2a • load pymol-generated.dx, map • load dna-t2a.pdb, dna • show surface, t2a • ramp_new e_lvl, map, [-4.0, 0, 4.0] • set surface_color, e_lvl, t2a
Additional Option • set transparency,0.0 • set name, [,value [,object-or-selection [,state ]]]
Rotation.pml to generate png files • mset 1 x360 • util.mroll(1,360,1) • set ray_trace_frames=1 • set cache_frames=0 • mclear • mpng ./png/8dna
MovieMaker • Make a collection by windows MovieMaker • Produce an animation gif file by Adobe ImageReady or Ulead Gif animator
e-map.pml • load refine.pdb • load 2fofc.xplor,map1,1,xplor • isomesh msh1,map1,1.0,refine,carve=2.0 • color blue, msh1 • isomesh msh2,map1,2.0,refine,carve=2.0 • color red, msh2 • sele active=((resi 560:573 or resi 545) and chain b) • isomesh msh3,map1,0.8,((resi 560:573 or resi 545) and chain b),carve=2.0 • color green,msh3
Additional Option • set mesh_radius,0.0 • set mesh_lighting,off • set stick_radius,0.1 • set sphere_scale,0.1
THE END THE END