Download
1 / 19
200 likes | 449 Views
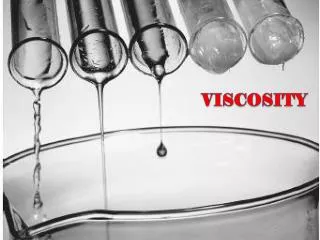
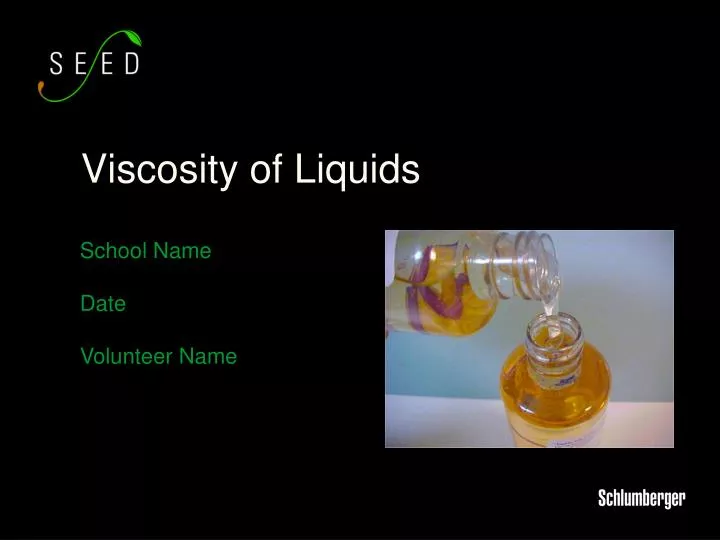
Viscosity of Liquids. School Name Date Volunteer Name. Introduction. A little bit about me. Why is viscosity important? What are we going to do today? Learn about the viscosity of liquids.

E N D
Viscosity of Liquids School Name Date Volunteer Name
Introduction • A little bit about me. • Why is viscosity important? • What are we going to do today? • Learn about the viscosity of liquids. • Learn how to compare the viscosity of different liquids and how viscosity changes with temperature.
Experiment: Viscosity of Liquids II Viscosity of Liquids II steps on the Web Prepare your materials. Do the activity. Discuss your results. Think of extension ideas.
Experiment: Viscosity of Liquids II Step 1 • Place one marble in each bottle. • Fill the three bottles with their assigned liquid all the way to the top (with no air bubble) and recap tightly. • Take out the stop watch and make sure you know how to use it. • Take out the small cardboard box. This will be used to create an incline for the bottles during the experiment.
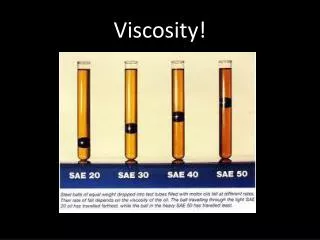
Experiment: Viscosity of Liquids II Step 2 • For each test, invert the bottle so that the marble is above the top black line. • Rest the cap on the cardboard box to form an angle.
Experiment: Viscosity of Liquids II Step 3 • Starting with the bottle of water, time how long it takes the marble to travel from the top black line to the second (bottom) black line. • Repeat 5 times for each liquid • Record results on the experiment sheet provided. • Calculate the average time for the five trials. • Repeat the same steps for the other two liquids. • Compare results and discuss.
Experiment: Viscosity & Temperature II Viscosity and Temperature II steps on the Web Prepare your materials. Do the activity. Discuss your results. Think of extension ideas.
Experiment: Viscosity & Temperature II Step 1 You need: • The bottle containing shampoo and marble • warm water (from the tap) • Silver aluminum pan from the SEEDKIT
Experiment: Viscosity & Temperature II Step 2 • Using the bottle of shampoo, invert it so the marble falls to the cap area. • Turn over the bottle and time how long it takes the marble to fall from the top black line to the bottom black line. • Repeat this step 5 times and record your data on the chart • Find the average of all your trials • Compare results and discuss
Experiment: Viscosity & Temperature II Step 3 • Place the bottle of shampoo in the basin. • Fill the basin with warm water, covering the bottle completely. • Leave the bottle in the warm water for 15 minutes, turning every 5 minutes so it heats evenly. Remove the bottle carefully. • Repeat timing the marble drop 5 times and record results. • Find the average time.
Experiment: Viscosity & Temperature II Step 4 • Place the bottle back in the basin. • Remove about ½ of the water and then add ice to cover the bottle • Leave for 15 minutes, turning it every 5 minutes to cool evenly. Remove bottle carefully • Repeat the same timing test 5 times, record your data and find the average • Compare classroom results and then compare with our web site results at www.planetseed.com
Extending the Activities If you want to extend the exercise further try this: Repeat the experiment using • marbles of different sizes • a different liquid, such as corn syrup. • a taller bottle or a different sinking distance
Virtual Viscosity! Virtual Viscosity Explorer on the Web Select your liquid. Set the temperature. Drop the balls. Discuss your results. Think of extension ideas.
Now What? What can you do with your new knowledge? What problems can you solve? What predictions can you test? What other things can you do with this idea?
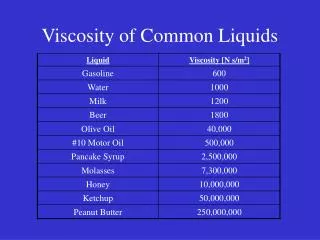
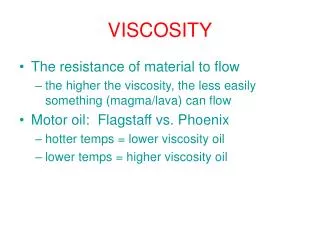
Viscosity Summary Not all liquids flow readily. Viscosity refers to how readily a liquid will flow. Liquids that flow more slowly than others are more viscous, and seem to be thicker and slower moving. The viscosity of a heated liquid is lower than that of the same liquid when cooled.
Follow-Up Ideas Search for more viscosity information on the Internet. Use this to create a presentation. Use Scratch to make a viscosity animation. Develop a song or skit about viscosity. Do a viscosity project with another school. Create a report or video for publication.
Additional Links Honey Viscosity Activity A Very Slow Flow!