Download
1 / 18
180 likes | 304 Views
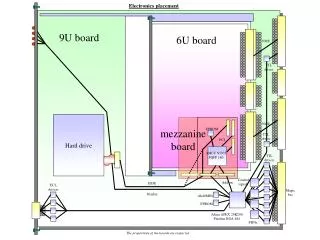
Hard Drive Information Module. HAAS HARD DRIVE. SLIDE LEGEND. UPPER CASE (WHITE) - ACTION YOU WILL TAKE. PRESS THREE TIMES TO GET TO THIS PAGE (Continued on next slide). KEYS 0N THE CONTROL. UPPER CASE (ORANGE) - INSTRUCTIONS. UPPER AND LOWER CASE (BLUE) - INFORMATION.

E N D
Hard Drive Information Module
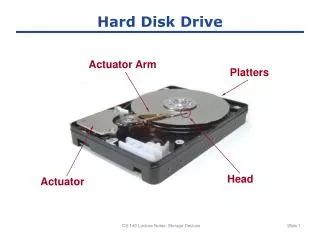
HAAS HARD DRIVE
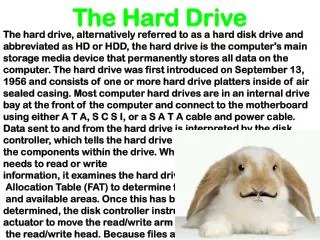
SLIDE LEGEND UPPER CASE (WHITE) - ACTION YOU WILL TAKE PRESS THREE TIMES TO GET TO THIS PAGE (Continued on next slide) KEYS 0N THE CONTROL UPPER CASE (ORANGE) - INSTRUCTIONS UPPER AND LOWER CASE (BLUE) - INFORMATION To advance through the presentation click on your left mouse button or press the <ENTER> key. To exit press the <ESC>.
The benefits of the Haas Hard Drive are: • Store large programs on the Control • Don’t need to use DNC to run large programs • Select programs easily from different storage areas • Easily transfer programs between different storage areas
Note that with the Hard Drive and SW version 13.1, setting 133 is not used for turning on the Network/Hard Drive. Instead you use Parameter 57 bit 6.
There is also an Advanced TCP Screen. This is accessed by selecting ADV TCP in setting 135. It allows you to enter a DOMAIN name, and allows the use of names up to 40 characters long (for CNC, Server name, and User name). You can also see the password on this screen. It is recommended that you not change these settings unless necessary. Change Setting M to return to the other screen.
DEVICE MANAGER PRESS With Parameter 57, bit 6 ON you will see the new Device Manager Screen instead of the list of programs. Note that there are two windows. On the left is the Device window and on the right is the Directory window. The Right and Left Arrow keys switch from one to the other.
PRESS and twice This selects the Hard Drive and displays the Directory for the Hard Drive. Now PRESS to go back to the Directory Window.
PRESS to highlight the Program you want and PRESS to select it.To copy the Program, PRESS and select the destination device.Type a new name if you wish, and PRESS
FNC You can run a Program from the Hard Drive or Network using File Numerical Control, FNC. Highlight the Program you want and PRESS PRESS <CYCLE START>. Sub-programs must be in the same directory. Programs cannot be edited in FNC.
MAPPING You can map the CNC Hard Drive from any computer on the network. This allows network users to easily access the CNC Hard Drive from their computer. Once mapped, it is easy to “Drag and Drop” files into the Hard Drive. The files do not have to be located in the shared folder shown in Setting 139. To transfer a file from the Control to the network (using Device Manager), you must still use the shared folder. The following screens will explain how to map the control to your computer.
RIGHT CLICKon “Network places”,and SELECT “Map Network Drive” from the Menu
TYPE in\\CNC\HAAS MILL UNCLICK the “Reconnect at logon” box and CLICK on “OK”. (Windows 98)
This is the menu you get in Windows 2000. HAASMILL is the name of the directory on the Haas Hard Drive.With this window you click on “Finish” to complete the action.
You will see a box indicating that the system is trying to connect. Then you will see a directory of the Hard Drive like that shown here
If you click on “My Computer”, you will see the Hard Drive listed as one of the drives on your computer.
Requirements • LCD Monitor • 2 MB of Flash Memory • 13.01 software or later • Floppy Drive Option • MOCON 12.03 or later
Prepared by Haas AutomationTraining DepartmentOxnard, CA 93030