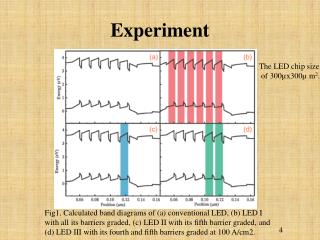
Download
1 / 11
120 likes | 261 Views
Experiment 14. Series RC Circuit. Circuit to be constructed. It is good practice to short the unused pin on the trimpot when using it as a variable resistor. Velleman function generator. Shunt resistor. Current Measurement: Shunt Resistor.

E N D
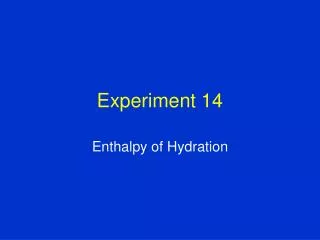
Experiment 14 Series RC Circuit
Circuit to be constructed It is good practice to short the unused pin on the trimpot when using it as a variable resistor Velleman function generator Shunt resistor
Current Measurement:Shunt Resistor • Oscilloscopes can measure voltage as a function of time, but not current. • To measure time-varying current, we include a small resistor at the bottom of the branch in which the current measurement is desired. • The value of the resistor chosen should be at least a factor of 10 times smaller than the other resistors in the branch. • The voltage across the small resistor divided by its resistance yields the current through the branch.
Measurement point for voltage across capacitor 100nF Measurement point for input voltage 10 Measurement point for current through resistor where V(t)/10W equals the current.
Transient Response:Period of Input Voltage ≥ 5t Steady state values for the capacitor’s voltage and current are assumed to be reached by the time t = 5t.
Transient Response:Period of Input Voltage < 5t The capacitor never fully charges or discharges. The maximum and minimum capacitor voltage oscillates around ½ of the voltage source connected to the RC combination. The range of the capacitor voltage depends on how small the period is compared to 5t. The smaller the period, the smaller the range.
MatLab ProgramInclude the appropriate plots into the report template • Plot a graph of vC(t) versus t when the frequency of the square wave using Equations (1) + (2) and (7) + (8) as described in the lab manual for Experiment 14. • Plot a graph of iC(t) versus t given by Equations (5) + (6) and the derivative of Equations (7) + (8) as described in the lab manual for Experiment 14.
PSpice Simulations:Transient Analysis • Plot of the voltage across the capacitor as a function time • Use either Vpulse or Digclock as the voltage source • Instructions on setting up a transient simulation using these sources are posted under Resources/Technical Support: Circuit Simulation • Include the input voltage in the plot and show three periods. • Plot of the current through the capacitor as a function time • Plot of the voltage across the shunt resistor divided by its resistance as a function time • Instructions on how to perform calculations in the PSpice plotting routine are posted under Resources/Technical Support: Circuit Simulation. • Use a current marker instead of a voltage marker • Show three periods.
Time Constant of RC Circuit • Calculated using multiple methods: • Analytically (Step 1) • Experimentally after measurements of R, C, and Rshunt • Note that you have the ability to measure capacitance on your digital multimeter • From a curve fit of V(t) as the voltage across the capacitor decreases when the input voltage changes from +5V to ground. • This is done for each time constant.
Voltage Measurements • Set the Velleman function generator such that Vin is a square wave that swings from 0V to +5V. • Settings for the square wave are 5V amplitude with 2.5V offset. • The duty cycle is 50%. • Frequency should be set to 1 kHz. • Use DC coupling on Channel 1 and Channel 2 • Ignore the comments in the lab manual about AC coupling unless you select AC Coupling when performing the measurements. • Ignore all comments about a sound card or the Zeitnitz oscilloscope software program.
No Extra Credit • No credit will be given for step 32 so you do not need to complete this step.