Download

1 / 20
220 likes | 639 Views
Gold Abutment for crown. Gold abutment Product portfolio . NC. RC. For NC and RC. Gold abutment Concept . Intended use Screw- or cement-retained crowns Cement-retained bridges via mesostructure Telescopic bridgeworks or telescopic crowns. Component materials

E N D
Gold abutment Product portfolio NC RC • For NC and RC Education
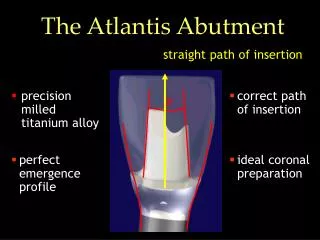
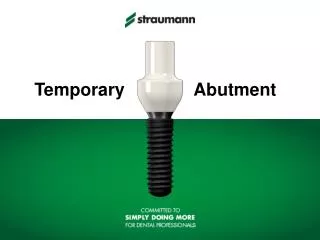
Gold abutment Concept • Intended use • Screw- or cement-retained crowns • Cement-retained bridges via mesostructure • Telescopic bridgeworks or telescopic crowns • Component materials • Gold Abutment (non-oxidizing Gold) • Basal Screw (TAN – TAN is one type of titanium alloy material) • Modeling Aid (Polymer) Benefits • Precise wax modelation • Safe cast-to procedures • Esthetic solution even with thin mucosa biotype The Gold abutment is not suitable for direct splinting Education
Gold abutment – Lab procedures Step 1- Preparation • Fabricate a master cast • Make a diagnostic wax-up • Make a silicone key Education
Gold abutment – Lab procedures • Hand-tighten Gold Abutment onto analog • Shorten burn-out modeling aid to height of occlusal plane • Attach Gold Abutment to polishing aid for easier handling Education
Gold abutment – Lab procedures Step 2 - Wax modeling • Wax layer must be at least 0.7 mm thick • Do not cover margins of abutment with wax • For sharp-edged finish of screw channel, use modeling aid Education
Gold abutment – Lab procedures For proper hygiene: Cement margin must be no more than 2.0 mm below gingival level Education
Gold abutment – Lab procedures Step 3 - Investing of customized abutment • Do not use wetting agents • Thoroughly clean abutment before investing • Remove all wax particles (use insulating agents) • Invest customized abutment in usual method Education
Gold abutment – Lab procedures • No wax on delicate margins • Speed investment materials are not recommended • Invest following the manufacturers’ instructions • Follow recommended mixing ratio and preheating time Education
Gold abutment – Lab procedures Step 4 - Devesting • Devest abutment with ultrasound, waterjet, pickling acid or glass fiber brush • Always devest with a polishing aid to protect the implant-abutment connection Education
Gold abutment – Lab procedures Never sand-blast to devest without mounting abutment on polishing aid! Education
Gold abutment – Lab procedures Casting errors and incorrect handling Procedure must be repeated if: • The casting gold did not flow out sufficiently Education
Gold abutment – Lab procedures Casting errors and incorrect handling • Intruded casting metals and casting pearls cannot beremoved from the connection part of the Gold Abutment! Education
Gold abutment – Lab procedures Casting errors and incorrect handling • The Ceramicor® alloy surface cannot be covered with ceramic veneering material. • Ceramicor® is a non-oxidizing alloy and allows no ceramic bonding Education
Gold abutment – Lab procedures Step 5 - Fabricate the cement-retained single crown • Trim and polish the abutment Education
Gold abutment – Lab procedures • Block out screw channel • Wax framework directly on top • Silicone key shows relations for restoration Education
Gold abutment – Lab procedures • Cast framework in conventional manner • Trim and fit precisely onto customized abutment Education
Gold abutment – Lab procedures • Complete ceramic veneering • Deliver final restoration to dentist Education
Gold abutment - Lab Procedures Final insertion • Remove the healing abutment or temporary restoration and thoroughly clean the implant and bridge • Position restoration and check fit Education
Gold abutment - Lab Procedures Final insertion • Tighten to 35 Ncm with SCS screwdriver and torque ratchet • Close screw access with cotton, sealing compound (i.e. gutta percha) and composite • Cement single unit crown Education