Download
1 / 43
440 likes | 576 Views
A Tool Kit for Summary Writing. Writing to Achieve Training #2 October 21, 2009. Welcome…. Changes to future WTA trainings: 4 th Grade: January 15 th Report Writing 5 th Grade: February 5 th Report Writing 6 th Grade: February 4 th Report Writing. RTL Follow-Up….

E N D
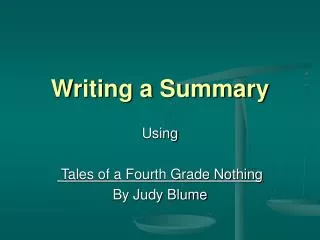
A Tool Kit for Summary Writing Writing to Achieve Training #2 October 21, 2009
Welcome… • Changes to future WTA trainings: • 4th Grade: January 15th Report Writing • 5th Grade: February 5th Report Writing • 6th Grade: February 4th Report Writing
RTL Follow-Up… • Goal for the next hour… • Analyze student writing • Select anchor papers for each score • Decide on instructional plans for the next three weeks
RTL: Summary of Student Writing Strengths and Needs • Categorize student writing into 4 stacks. • Begin with stack #1(those with a score of 1) • Summarize the strengths & needs using factual statements ( For example: 50% of students scoring a 1 understand theme). • Document on summary sheet • If you did not bring student writing, consider strengths and needs based on teacher observation, thus far. • Repeat process with remaining stacks
RTL: Summary of Student Writing Strengths and Needs: Sharing • Share your summary with your partner. • Gather ideas for planning the next three weeks. • Whole group chart of strengths and needs. • Planning time will be available this afternoon.
RTL: Summary of Student Writing Strengths and Needs • Once you have a set of writing for each individual students, then… • Select one paper from each stack, that best demonstrates that score. • This will provide you with an anchor for a score of 1, 2, 3, & 4. • Complete a rubric for each anchor paper and attach. • Note: As you get closer to the end of the trimester, you will want to re-assess to see if you need to replace anchors.
Summary & Fictional Narrative Writing Information • Writing prompts will be electronically emailed to you in a couple of weeks. • Writing pacing guide: • Trimester 2: November 23rd-March 6th (12 weeks) • Fictional Narrative: 6 weeks • Summary Writing: 6 weeks • Trimester 2 Benchmark Testing Dates: • March 9-13th
Table Group: Create a poster that answers the following: • Why teach summary writing? • What are the essential components of a summary piece? • What specific skills should kids demonstrate when writing a summary? **Whole group debrief to follow**
Why Teach Summary Writing? • “It is one of the two most powerful skills students can cultivate. It provides students with tools for identifying and understanding the most important aspects of what they are learning.” • Robert J. Marzano
Marzano adds that… • “In order to effectively summarize, students must learn how to delete some information, substitute some information, and keep some information.”
He goes on to say… • “ In order to effectively delete, substitute, and keep information, students must analyze the information at a fairly deep level.” • “Being aware of the explicit structure of information is an aid to summarizing information.”
One summarizing strategy… • Teach students to: • Delete trivial material that is unnecessary to understanding. • Delete redundant material. • Substitute super-ordinate terms for lists (e.g., “flowers” for “daisies, tulips, and roses” • Select a topic sentence or invent one if it is missing.
The standards state that… • Good summary writing “is characterized by paraphrasing of the main ideas and significant details.”
Paraphrasing simply means… • To put the author’s thoughts into your own words.
The main ideas of the passage mean… • You need to tell your reader simply and clearly why the passage was written. • Basically, you need to answer the question, “What is this article about?” in a sentence or two at the beginning of your essay.
The significant details mean… • That you need to tell the reader only the important facts about the passage. • Every detail in the article is not equally important. • Report only the facts that are needed to understand the author’s point and leave out extraneous information and small details.
How to Write a Summary: Step 1 • Read the title of the article. Think about what you know about the topic. • Skim: read the first and last lines of each paragraph in the article to get an idea about what it’s about. • Decide if this article is a narrative or expository text.
How to Write a Summary: Step 2 • Write a word or phrase in the margin for each paragraph to remind you what it was about.
How to Write a Summary: Step 3 • Read the paragraphs carefully and underline key words related to the main idea of the paragraph.
How to Write a Summary: Step 4 • List the main points of the article. • Matrix can be used • Write key words and/or a couple of details (phrases) under each idea.
How to Write a Summary: Step 5 • Oral practice • Have students practice using the key words and main idea to summarize each section. • This needs to be done with a partner. • Providing oral practice, allows the students to rehearse what they will be writing; but also provide support for language development.
How to Write a Summary: Step 6 • Write a simple sentence that tells the reader what the article was about. For example: • The article, _________, tells how ________________________________ • The article, _________, is mainly about ________________________________ • In the article, _______, we learn that ________________________________
How to Write a Summary: Step 7 • Write your summary by using the key words or synonyms for the key words to explainwhat it was about, in a shorter way.
How to Write a Summary: Step 8 • Conclude the summary with a sentence that repeats the main idea of the article in a new way.
Summary Frames for the Content Areas • Narrative Text • Opinion Frame • Compare and Contrast • Problem / Solution • Cause / Effect • Northern Nevada Writing Project. http://nnwp.org
Why Teach Note Taking It is important to “…explicitly teach two of the most useful academic skills students can have: summarizing and note taking.” Marzano. Classroom Instruction that Works. p. 29. to “provide students with tools for identifying and understanding the most important aspects of what they are learning.” Marzano. p. 48.
4th Grade Standards • Comprehension and Analysis of Grade-Level Appropriate Text • 2.2 Use appropriate strategies when reading for different purposes (e.g., full comprehension, location of information, personal enjoyment). • Research and Technology • 1.5 Quote or paraphrase information sources, citing them appropriately. • 1.6 Locate information in reference texts by using organizational features (e.g., prefaces, appendixes)
Summary Link to Report Writing • Summarize from a book • Step One – Identifying type of research • categories • Step Two - Generate questions “The less structure we create in the beginning, the harder it becomes later to find patterns and relationships in the fragments or the collection of bits and pieces.” • Jamie Mackenzie From Now On: Educational Technology Journal. Vol. 7. No 3. November-December 1997. • Step Three – Procedures • Step Four - Model Note Taking • Step Five – Student Taking Notes • Step Six - Organize notes into paragraphs
Step One – Identify Type of Research • People • Historical Events • Cultures • Places / things • Animals
Step Two – Generate Questions • Use blank matrix - teacher generated categories (butcher paper) • Ask students: • What would you like to know about our topic? • Where does it go on the matrix? • Ability to identify similarities / differences
Step Three – Procedures • Hand out matrix generated previous day • Review categories and questions • Create note card folder • Label pockets
Key Word Note Taking • READ • THINK • main idea or fact • in your own words • no small words, use dashes • NO SENTENCES -- Tarzan talk • ONE idea per card Step Four – Model Note Taking • Discuss Note Taking Rules • Features of text • Fiction vs. Non-Fiction • Table of Contents • Index • Headings • Model note taking • Sample cards • Note: Initially the teacher finds the resources • Goal – student application
Step Five – Student Taking Notes • Students work in pairs • Choose tribe – lottery • Review steps • What categories and questions do you have to answer? • Matrix • How will you find the answers? • Features of text • Skim • How will you take notes? • Note taking rules • Begin note taking
Step Six – Organize Notes into Paragraphs Oral Practice: Always have students rehearse their paragraphs with a partner, prior to writing. Providing oral practice, provides support for language development. • Homesp.29 • made of bark • MB • Homesp.29 • long poles = frame • MB • Homesp.29 • shape • MB
What’s Next? • Generating topic sentence for each category • Lesson on compound sentences / sentence combining • Concluding sentence • Bibliography • Available on school library website
Identify Type of Research • People • Historical Events • Cultures • Places / things • Animals
Planning/Resource Search • Options 1 • Use remaining time to plan your RTL instruction (remaining 3 weeks); and/or plan 2nd trimester genres (fictional narrative & summary writing) • Option 2 • Collaborate with colleagues: peruse resources, share ideas/instructional practices • Option 3 • Use lab to gather or create needed resources • Work with Margaret to upload resources to curriculum locker • Option 4 • Private questions/coaching with me
QUESTIONS???? • Complete the presentation check form and turn in. • Thank you!