Download
1 / 21
210 likes | 308 Views
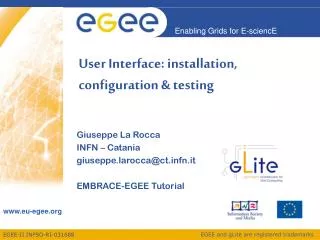
User Interface installation and configuration. Vanessa Hamar Universidad de Los Andes – Mérida, Venezuela 12 th EELA Tutorial Lima, 24-29 September,2007. Outline. What is a UI? Installing User Interface Installation pre-requisites Security pre-requisites site-info.def

E N D
User Interface installation and configuration Vanessa Hamar Universidad de Los Andes – Mérida, Venezuela 12th EELA Tutorial Lima, 24-29 September,2007
Outline • What is a UI? • Installing User Interface • Installation pre-requisites • Security pre-requisites • site-info.def • UI Installation and Configuration • Default VO • Testing User Interface Lima, 12th EELA Tutorial, 27.09.2007
What is a UI? • The UI is a suite of clients and API that users and applications can use to access the gLite services. • The gLite UI includes the following components: • VOMS command-line tools • Workload Management System clients and APIs • Logging and Bookkeeping clients and APIs • Data Transfer command-line clients and APIs • Data Catalog command-line clients and APIs • gLite I/O client and APIs • R-GMA client and APIs • LFC client Lima, 12th EELA Tutorial, 27.09.2007
Installing User Interface Lima, 12th EELA Tutorial, 27.09.2007
Preliminary and common steps • Start from an instalation of SLC 3.0.8 • Install JAVA SDK • Check the hostname • Install and configure ntp daemon • Install X.509 host certificates /etc/grid-security and check their file permissions. • Install the latest version of glite-yaim • Install the middleware Lima, 12th EELA Tutorial, 27.09.2007
Installing pre-requisites • JAVA is not included in distribution. Install it separately (>= 1.4.2_08) apt-get install j2sdk Lima, 12th EELA Tutorial, 27.09.2007
Installing pre-requisites • Check the FQDN hostname • Ensure that the hostnames of your machines are correctly set. Run the command: hostname -f Lima, 12th EELA Tutorial, 27.09.2007
Installing pre-requisites • Syncronization among all gLite nodes is mandatory. Install ntp if not already available for your system: • apt-get install ntp • Add your time server in /etc/ntp.conf • restrict <time_server_IP_address> mask 255.255.255.255 nomodify notrap noquery • server <time_server_name> • (you can use ntp-1.infn.it – IP 193.206.144.10) • Edit /etc/ntp/step-tickers adding your(s) time server(s) hostname • If you are running a firewall, you will have to allow inbound comminication on the NTP port: • -A INPUT -s <NTP-serverIP-1> -p udp --dport 123 -j ACCEPT • Activate the ntpd service with the following commands: • ntpdate <your ntp server name> • service ntpd start • chkconfig ntpd on • You can check ntpd’s status with: • ntpq -p Lima, 12th EELA Tutorial, 27.09.2007
Installing pre-requisites • Install glite-yaim apt-get install glite-yaim-core apt-get install glite-yaim-clients Lima, 12th EELA Tutorial, 27.09.2007
site-info.def • All the configuration values to sites have to be configured in a site configuration file using key-value pairs. • This file is shared among all the different gLite node types. So edit once and keep it in a safe place • Create a copy of /opt/glite/yaim/examples/site-info.def template (coming from the glite-yaim-core package) to your reference directory for the installation (e.g. /root/siteinfo): • cp /opt/glite/yaim/examples/site-info.def /root/siteinfo/site-info.def Lima, 12th EELA Tutorial, 27.09.2007
site-info.def • A good syntax test for your site configuration file is to try to source it manually running the command: source site-info.def • The configuration is stored in a directory structure which will be extended in the near future. Currently the following files are used: site-info.def file and the vo.d directory. Lima, 12th EELA Tutorial, 27.09.2007
vo.d directory • The /root/siteinfo/vo.d directory Each file name in this directory has to be the lower-cased version of e VO name defined in site-info.def. The matching file should contain the definitions for that VO and will overwrite the ones which are defined in site-info.def. SW_DIR=$VO_SW_DIR/eela DEFAULT_SE=$CLASSIC_HOST STORAGE_DIR=$CLASSIC_STORAGE_DIR/eela Lima, 12th EELA Tutorial, 27.09.2007
site-info.def • Open /root/siteinfo/site-info.def file using a text editor and set the following values according to your grid environment: MY_DOMAIN=ring.pucp.edu.pe CE_HOST=grid001.$MY_DOMAIN RB_HOST=glite-rb.ct.infn.it WMS_HOST=lima01.$MY_DOMAIN PX_HOST=grid001.ct.infn.it BDII_HOST=lima01.$MY_DOMAIN MON_HOST=grid014.$MY_DOMAIN FTS_HOST=fts.$MY_DOMAIN REG_HOST=rgmasrv.ct.infn.it Lima, 12th EELA Tutorial, 27.09.2007
site-info.def • Add LFC settings: LFC_HOST=lima02.$MY_DOMAIN • Check/Modify VO and VOMS specific configurations: VOS=“gilda alice eumed eela euchina … ALL_VOS=“gilda alice eumed eela euchina … ALL_VOMS=“gilda alice eumed eela euchina … #Specific VO settings VO_<VONAME>_<CONFIG_ITEM>=… Lima, 12th EELA Tutorial, 27.09.2007
UI Installation and Configuration • Install the node /opt/glite/yaim/bin/yaim -i -s /root/siteinfo/site-info.def -m glite-UI • Configure the node /opt/glite/yaim/bin/yaim -c -s /root/siteinfo/site-info.def -n UI Lima, 12th EELA Tutorial, 27.09.2007
Default VO • You can set the default Virtual Organization for user accessing your UI editing the file /opt/glite/etc/glite_wmsui_cmd_var.conf [ ErrorStorage = "/tmp/glite/glite-ui" ; DefaultLogInfoLevel = 1 ; LoggingTimeout = 10 ; rank = - other.GlueCEStateEstimatedResponseTime ; NSLoggerLevel = 1 ; LoggingSyncTimeout = 10 ; DefaultVo = "gilda" ; Set your default VO here OutputStorage = "/tmp/glite/glite-ui" ; ListenerStorage = "/tmp/glite/glite-ui" ; RetryCount = 3 ; DefaultStatusLevel = 1 ; requirements = other.GlueCEStateStatus == "Production" ; ] Lima, 12th EELA Tutorial, 27.09.2007
Testing User Interface Lima, 12th EELA Tutorial, 27.09.2007
Create user account # adduser <your surname> # passwd <your surname> • Log on with user account # su – gildauser Lima, 12th EELA Tutorial, 27.09.2007
Create .globus directory # mkdir .globus • Copy your own certificates to the UI in directory .globus • Verify permissions of the certificates # chmod 400 userkey.pem # chmod 644 usercert.pem Lima, 12th EELA Tutorial, 27.09.2007
References • gLite v3.0 Advanced Installation and Configuration Guide http://glite.web.cern.ch/glite/packages/R3.0/R20060502/doc/installation_guide_3.0-2.html • YAIM 3.1.1 guide for sysadmins https://twiki.cern.ch/twiki/bin/view/LCG/YaimGuide311 Lima, 12th EELA Tutorial, 27.09.2007
Questions … Lima, 12th EELA Tutorial, 27.09.2007