Download

1 / 23
360 likes | 698 Views
Calibration of the DAP-meter. Step-by-Step. Comparing the readings of the DAP-meter being calibrated and those of the reference meter results in the calibration factor Real Dose can be aquired from the readings on the DAP-meter with the help of the calibration factor

E N D
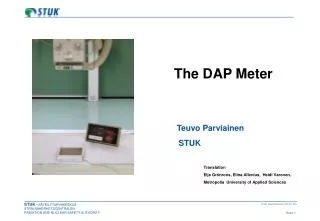
Calibration of the DAP-meter Step-by-Step
Comparing the readings of the DAP-meter being calibrated and those of the reference meter results in the calibration factor Real Dose can be aquired from the readings on the DAP-meter with the help of the calibration factor Real Dose can be compared with national and international patient dose recommendations The reference meter has to be calibrated beforehand by a reliable facility (e.g. STUK in Finland) The reference meter needs to have its own calibration factor DAP-meter must be calibrated
Either Air Kerma meter or another DAP-meter can be used for calibration of DAP-meter Calibration Meters
Displays the dose absorbed in air Air Kerma Meter
A precise real field size is needed Remember to check the distance. You will need to know it when calibrating Area exposed can be calculated from the field size Air Kerma Meter
The field size can be adjusted with a film, an imaging plate (CR) or a direct digital imaging (DR) Remember to measure the distance perpendicularly The field size should be relatively large e.g. 15cmx15cm with 1m distance Verifying the Field Size
The real field size is measured with the accuracy of 1mm either from the film or the display Please do notice that the image on the display can be in the wrong scale and must be adjusted with a proper measurement technique included in the computer program It is also possible to place the scale on the film/image plate to make the measuring easier Verifying the Field Size
The air kerma meter should be exposed to radiation with the same distance and field size as in the verification of the field size If you do use a different distance for some reason, remember to calculate the correct dose from the reading on the air kerma meter accordingly Air Kerma Meter
The film is replaced by the air kerma meter The exposure parameters should stay the same as before Radiation of the Air Kerma Meter
The exposure parameters and filtering should be the same as commonly used with patients The exposure parameters should be realtively high for example those used for thorax, hip or abdomen Please do notice that with lower exposure parameters the accuracy of the DAP-meter might decrease Air Kerma Meter
The calibration factor can be calculated by dividing the reading on the DAP-meter with the multiplication of the area exposed and the air kerma DAP/(Air Kermaxcm2) If the calibration factor is below 1, the reading on the DAP-meter is too high. In other words the DAP-meter is showing higher dose than it should If the calibration factor is above 1, the reading on the DAP-meter is lower than the real dose. Calibration Factor
How to Use the Calibration Factor • The calibration factor is multiplied with the reading on the DAP-meter • The result is called Real Dose, which can be compared with both national and international reference values • For the comparison purposes it is necessary to gather the DAP-values of several similar examinations. For example the thorax-examinations of 10 patients weighing about 70kg • Please do notice that the patient dose given by the DAP-meter is not adequate to determine the real dose received by an individual patient
In the tandem method the DAP-meter readings are to be compared with those of a reference DAP-meter The reference meter should be positioned in the air at appropriate distance (e.g. 30cm) of the DAP-meter to be calibrated. This is done to minimize the effect of the electromagnetic scattering The field size should be fitted so that it is completely within the ionisation chamber of the DAP-meter e.g. 8cmx8cm Tandem Method
Both of the DAP-meters are to be exposed to radiation simultaneously The exposure parameters and filtering should be the same as used commonly with real patients Tandem Method
The reading on the meter to be calibrated is divided by the reading on the reference meter. The result is called calibration factor The calibration factor is used to determine the real dose Real dose can be used for comparison with other doses measured Calibration Factor
It is very important that the reference meter used in the tandem method has been calibrated by a reliable facility List of such facilities in the Nordic countries is presented at the end of this slide show Calibration of the Calibration Meter
Reference Values • DAP-values cannot be used to determine the real dose received by an individual patient • DAP-meter is best suited for valuation of quality in an x-ray unit
DAP and ESD • ESD =entrance surface dose • ESD can be determined with help of DAP-meter • For determening the ESD you need the DAP value and the size of the radiation field on the patient’s skin level • It is necessary to change DAP values to ESD values if the reference values are ESD values
ESD • ESD = (DAP/A)·BSF DAP = Reading on the DAP-meter A = Field size on the patients skin BSF = Back scatter factor
Reference Values • Council Directive 97/43/EURATOM • Authorities Responsible for Radiation Safety in the Nordic Countries • Calculation of backscatter factors for diagnostic radiology using Monte Carlo methods • N Petoussi-Henss et al 1998 Phys. Med. Biol. 43 2237-2250
Back Scatter Factor • Council Directive 97/43/EURATOM • Authorities Responsible for Radiation Safety in the Nordic Countries • Patient and staff doses in interventional X-ray procedures in Sweden. • Jan Persliden1,2 1 Department of Medical Physics, Örebro University Hospital, Örebro University, SE-701 85 Örebro, Sweden2 Department of Radiation Physics, IMV, Linköping University, SE-581 85 Linköping, Sweden • Dose-image optimisation in digital radiology with a direct digital detector: an example applied to pelvic examinations • Jan Persliden1, , K.-W. Beckman1, H. Geijer2 and T. Andersson2 ´(1) Department of Medical Physics, Örebro University Hospital, 701 85 Örebro, Sweden (2) Department of Radiology, Örebro University Hospital, 701 85 Örebro, Sweden
Authorities Responsible for Radiation Safety in the Nordic Countries • Sweden: Strål säkerhets myndigheten/ Swedish Radiation Safety Authority/ SKI • Norway: Statens strålevern/ Norwegian Radiation Protection Authority/ NRPA • Denmark: Statens institut for strålbeskyttelse/ National Institute of Radiation Hygiene/ SIS • Iceland: Geislavarnir Rikisins/ Icelandic Radiation Safety Authority/ GE • Finland: Säteilyturvakeskus/ Finnish Radiation and Nuclear Safety Authority/ STUK