Download
1 / 2
20 likes | 24 Views
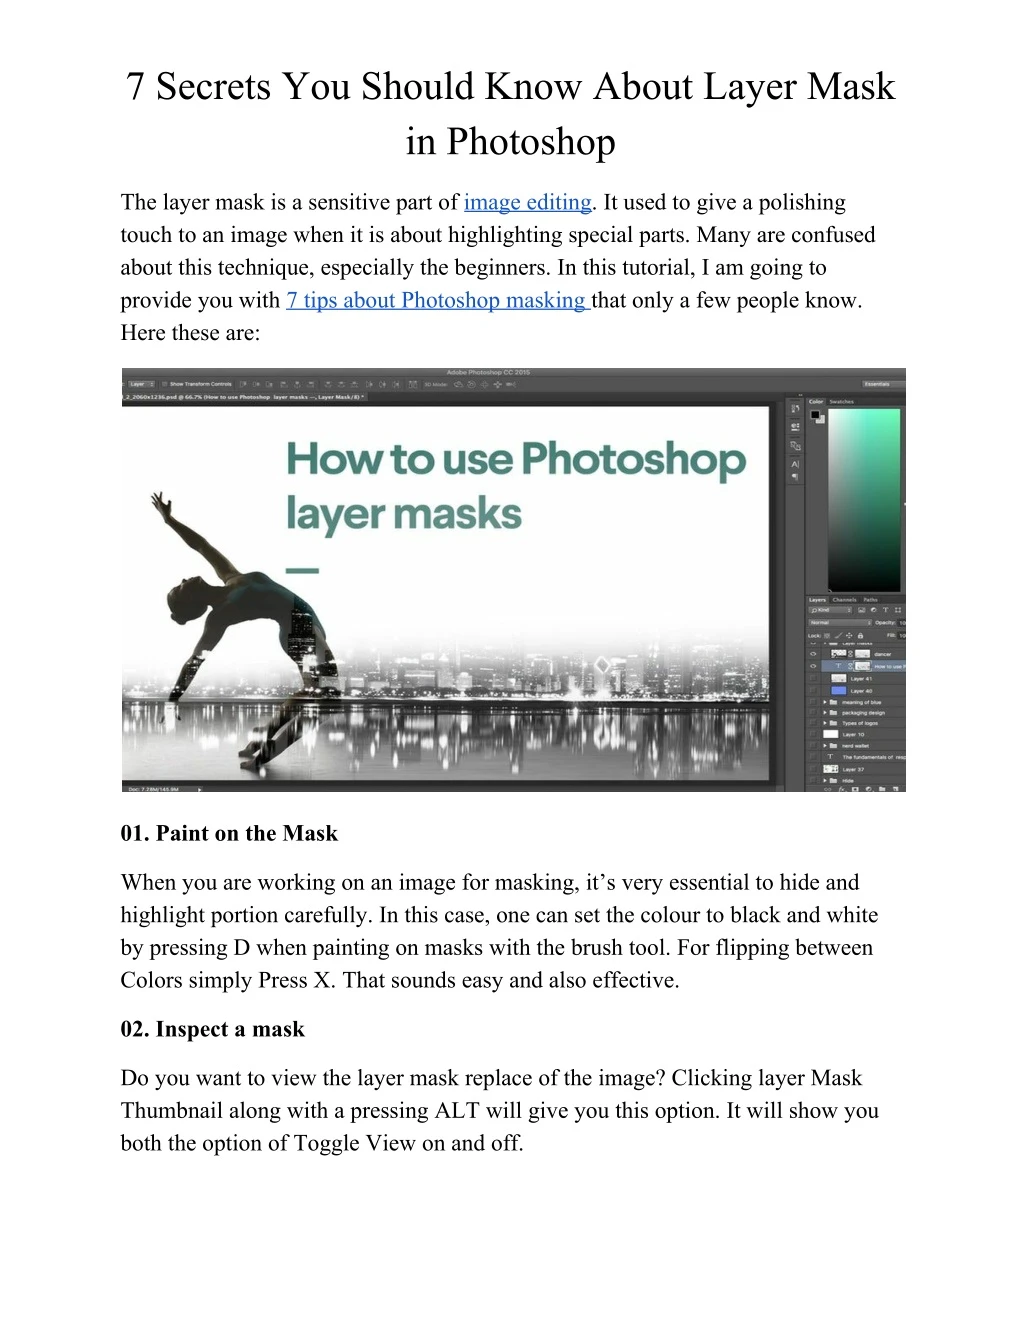
The layer mask is a sensitive part of image editing. It used to give a polishing touch to an image when it is about highlighting special parts. Many are confused about this technique, especially the beginners. In this tutorial, I am going to provide you with 7 tips about Photoshop masking that only a few people know.

E N D
7 Secrets You Should Know About Layer Mask in Photoshop The layer mask is a sensitive part of image editing. It used to give a polishing touch to an image when it is about highlighting special parts. Many are confused about this technique, especially the beginners. In this tutorial, I am going to provide you with 7 tips about Photoshop masking that only a few people know. Here these are: 01. Paint on the Mask When you are working on an image for masking, it’s very essential to hide and highlight portion carefully. In this case, one can set the colour to black and white by pressing D when painting on masks with the brush tool. For flipping between Colors simply Press X. That sounds easy and also effective. 02. Inspect a mask Do you want to view the layer mask replace of the image? Clicking layer Mask Thumbnail along with a pressing ALT will give you this option. It will show you both the option of Toggle View on and off.
03. Painting through Overlay Sometimes, edges become the resistance of working smoothly. To make your working method easy to change the brush blend mode into Overlay at the time of working on a mask in white and black. Then it will be easier for you to cope up with hard edges. 04. Adding a Full Mask Adding a full mask prove to be an effective technique. For this operation, press ALT along with click on the ADD Mask Icon from the Layer Board. Then a black mask will appear which hides the layer completely. To invert it you can also use the shortcut CTRL+I. 05. Refining For the improvement of the mask, refining is always a good option. If you want to gain control on the edge, select refine mask option from the mask thumbnail. Then set your preferred value depending on how much refining you want to do. 06. Unlinking Sometimes we feel the necessity to move the content or mask individually. Unlinking is the feature that can avail this option. To do this, go to layer board and press on the link icon stuck between the mask and the layer. Then one can deal with mask and content self-sufficiently. 07. Copying the Mask For a beginner copying, the mask can be a tough call too. The easiest way to copy the layer mask is dragging the layer mask lengthways with ALT. For loading, any selection hit on the thumbnail along with CTRL.