Download

1 / 10
100 likes | 363 Views
Agar Plates. By: Kristin Canga Matt Hanchey B Nelson Stephanie Slagle. Why Use Agar Plates?. To obtain single isolated colonies of microorganisms. The isolated colonies will allow you to observe specific characteristics such as colony size, shape and color. Types of Media.

E N D
Agar Plates By: Kristin Canga Matt Hanchey B Nelson Stephanie Slagle
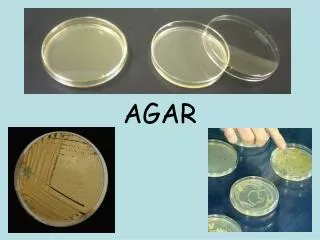
Why Use Agar Plates? • To obtain single isolated colonies of microorganisms. • The isolated colonies will allow you to observe specific characteristics such as colony size, shape and color.
Types of Media • Enriched Media: Are a basic nutrient media with extra nutrient added such as blood serum or egg. The blood agar and chocolate agar are examples of this media. • Selective Media: Contain antibacterial substances such as bio-salt or antimicrobials which inhibit or kill all but a few types of bacteria. MacConkey agar is a type of this media. • Differential Media: Allow bacteria to be differentiated into groups of bio-chemical reactions on the media.. • Enrichment Media: Are liquid media that favor growth of a particular group of organisms. They contain nutrients that either encourage drugs of the desired organisms or contain inhibitory substances that suppress competitors. Selenite Broth is an example of this media.
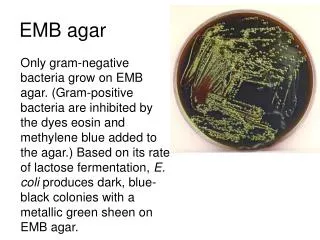
Types of Agar Plates • Types vary depending on what you are trying to culture. • There are many different types of Agar plates • Blood Agar: Contain blood cells from an animal (e.g. sheep). Most bacteria will grow on this medium. • MacConkey Agar: Is an agar that is specific to Gram-negative bacteria growth. • Tryptic Soy Agar: Is a basic medium that is used for culturing many kinds of microorganisms. It is mainly used as an initial growth medium for the purposes of observing colony morphology, and achieving sufficient growth for further biochemical testing; as well as for culture storage.
Materials you will need: • Gloves • Inoculating loop OR sterilized wooden sticks for streaking • Permanent marker or grease pencil to label your plates beforehand • Bunsen burner or sterilizing heater if intending to sterilize the inoculating loop between streaks • Swab for collecting the primary inoculum, if intending to collect bacteria from an environmental source • Agar plate • Incubator, if incubating at a controlled temperature, such as 37。C. However, many common microbial species will grow on plates left at room temperature, through their growth may be slower than if the plates were incubated at 37。C • Antibacterial soap to wash your hands • 5% bleach solution to clean your work area when finished.
Step One: (The Primary Streak) If you are right-handed, hold the plate in your left hand, and the inoculating loop in your right - as through you would a paint brush. If you are left-handed, use the opposite hands. Touch your inoculating loop (sterile swab, or sterile stick as shown in the picture) to the material you want to spread. Go back and forth a number of times in a small area of the Agar plate. The goal is to spread your material completely over this inital area of the plate.
Step Two:(The Secondary Streak)Sterilize your inoculating loop, or use a fresh, sterile inoculating stick or swab. Make sure the loop is cool before your next streak. If you were to use the original loop, you will not be diluting the individual microbes you applied in the first streak. Pick up the plate and rotate it 1/4 of a turn to your left (if right-handed), or to your right (if left handed). Run the loop through the previous streak 2-3 times, then draw it along 1/3 of the remaining plate, as shown by the blue line in the image.
Step Three:(The Tertiary Streak)Rotate the plate another 1/4 turn and sterilize yourinoculating loop or take a fresh, sterile stick or swab. Again, make sure to cool your loop between streaks. Run the loop through the previous, secondary streak 2-3 times, and draw the streak over a remaining 1/3 of the plate, as shown.
Step Four:(The Quarternary Streak)Rotate the plate another 1/4 turn and sterilize the inoculating loop. Again, cool the loop between streaks, or use a new sterile swab. Run the loop through the previous tertiary streak 2 times and draw over the remaining free space in the plate, being careful not to contact the primary streak (yellow).
Incubation • Incubate your plates for 18 - 24 hours to see what you’ve grown! • Sources: www.madsci.org