Download

1 / 33
330 likes | 486 Views
Creating a Class Website Using. Mary Bruce Coleman EDUC 6427 – Advanced Instructional Design. Creating a class website using Weebly. Before starting this tutorial: Planning your website What is the goal/purpose of your class website. Who is the audience?

E N D
Creating a Class Website Using Mary Bruce Coleman EDUC 6427 – Advanced Instructional Design
Creating a class website using Weebly Before starting this tutorial: Planning your website • What is the goal/purpose of your class website. Who is the audience? • What information you would like to share? • Create outline or storyboard for your class website. • More Information on planning your website as well as how-to videos of the course exercises can be found on the Resources page of this tutorial. • Be aware of any privacy policies for your school • Introduction • Planning your website • Organization Tips • Goals/Objectives • Tutorial • Resources • Contact
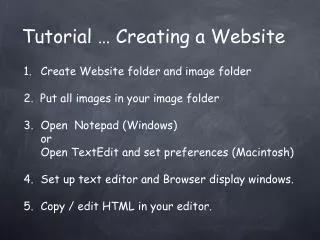
Creating a class website usingWeebly • Introduction • Planning your website • Organization Tips • Goals/Objectives • Tutorial • Resources • Contact Organization Tips: • Create folder on Desktop - name it Class Website. • Within Class Website folder, create images folder and documents folder.
Creating a class website using Weebly • Instructional Goal: At the end of this course, learners will be able to organize class content and use that information to create and publish a basic class website using Weebly (a Web 2.0 site creator). • Students will be able to: • Create a Weebly account by entering their sign up information. • Navigate their Weebly account to add a Free Site entitled Class Website under their profile. • Select a theme and color scheme for their website by viewing Weebly’s available templates. • Navigate to the Pages option within Weebly to add pages to their class website content. • Use the drag and drop features of Weebly to add text and images onto the pages of their class website. • Use the drag and drop features of Weebly to create a photo gallery or slide show and load their images on to their class site. • Use the drag and drop Documents features of Weebly to load documents to their class website. • Use the Publish option within Weebly to publish their completed class site. • Edit, Update, and Republish changes to their class website using Weebly. • Introduction • Planning your website • Organization Tips • Goals/Objectives • Tutorial • Resources • Contact Start Tutorial
Creating a class website using Weebly Tutorial: Lesson Overview Signing up for Weebly account and adding a site to the My Sites section of your profile. Selecting a theme and color scheme using the templates available in Weebly. Adding pages to your site (i.e. About, Homework Assignments, Resources). Adding text and images to your class website. Adding a Photo Gallery to your class website. Adding Files (documents and forms) to your class website. Publishing and Updating your class website. Feedback and Course Evaluation • Introduction • Tutorial • Lesson Overview • Signing Up for Weebly • Theme and color • Adding pages • Adding text and images • Adding Photo Gallery • Adding Files • Publishing • Updating your website • Feedback/Evaluation • Resources • Contact Let’s Begin
Creating a class website using Weebly • Introduction • Tutorial • Lesson Overview • Signing Up for Weebly • Theme and color • Naming sub domain • Adding pages • Adding text and images • Adding Photo Gallery • Adding Files • Publishing • Updating your website • Feedback/Evaluation • Resources • Contact • Signing up for a Weebly Account: • Go to www.weebly.com • Enter name, email, and password
Exercise 1. – Create your Weebly Account Complete the following exercise. Open a new window on your browser Go to www.weebly.com Sign Up for a Weebly Account Back to Tutorial
Creating a class website using Weebly • Introduction • Tutorial • Lesson Overview • Signing Up for Weebly • Theme and color • Naming sub domain • Adding pages • Adding text and images • Adding Photo Gallery • Adding Files • Publishing • Updating your website • Feedback/Evaluation • Resources • Contact Adding a Site to your Profile Click Add Site button. You will be taken to another screen and asked to select a theme. Choose a theme that works best for your class.
Creating a class website using Weebly Choosing a theme Scroll through all template options or use drop down lists at the top of the page to narrow the options based on styles and colors. Select desired theme and colors for your website. • Introduction • Tutorial • Lesson Overview • Signing Up for Weebly • Theme and color • Naming sub domain • Adding pages • Adding text and images • Adding Photo Gallery • Adding Files • Publishing • Updating your site • Feedback/Evaluation • Resources • Contact
Creating a class website using Weebly Weebly Editor screen From here, you can add text, images, and other features to you website. • Introduction • Tutorial • Lesson Overview • Signing Up for Weebly • Theme and color • Naming sub domain • Adding pages • Adding text and images • Adding Photo Gallery • Adding Files • Publishing • Updating your site • Feedback/Evaluation • Resources • Contact
Exercise 2 – Add a Site and Choose a template/Color scheme Complete the following exercise: Click Add a Site on the My Sites screen Choose a template Choose a color scheme for your template Familiarize yourself with the Weebly Editor screen for your class website Back to Tutorial
Creating a class website using Weebly Adding pages to your website Click Pages option, select add standard page, name the page, select page layout. Add all the pages you have planned for your website. • Introduction • Tutorial • Lesson Overview • Signing Up for Weebly • Theme and color • Naming sub domain • Adding pages • Adding text and images • Adding Photo Gallery • Adding Files • Publishing • Updating your site • Feedback/Evaluation • Resources • Contact
Creating a class website using Weebly • Adding images and text • Use the Image & Text Drag and Drop element . • Upload image from your images folder • Type text on screen • Introduction • Tutorial • Lesson Overview • Signing Up for Weebly • Theme and color • Naming sub domain • Adding pages • Adding text and images • Adding Photo Gallery • Adding Files • Publishing • Updating your site • Feedback/Evaluation • Resources • Contact
Exercise 3 – Add a Page with image and text Complete the following exercise: Click the Pages option from the Editor screen. Add a Page to your website underneath the Home page. Select the page layout. Save and Exit On the Editor screen, drag and drop the Image & Text element on to the new page. Upload and image and add text to the new page. Back to Tutorial
Creating a class website using Weebly • Adding a Photo Gallery • Add page – name it Photo Gallery, no header layout, save and exit. • Drag and drop – Gallery option onto Photo Gallery page • Click Upload images to load images from your images folder. • Introduction • Tutorial • Lesson Overview • Signing Up for Weebly • Theme and color • Naming sub domain • Adding pages • Adding text and images • Adding Photo Gallery • Adding Files • Publishing • Updating your site • Feedback/Evaluation • Resources • Contact
Exercise 4 – Add a Photo Gallery to your website Complete the following exercise: Click the Pages option from the Editor screen. Add a Page to your website entitled Photo Gallery. Select the no header page layout. Save and Exit On the Editor screen, drag and drop the Gallery element on to the new page. Upload images from your images folder to the new page. Back to Tutorial
Creating a class website using Weebly • Introduction • Tutorial • Lesson Overview • Signing Up for Weebly • Theme and color • Naming sub domain • Adding pages • Adding text and images • Adding Photo Gallery • Adding Files • Publishing • Updating your site • Feedback/Evaluation • Resources • Contact • Adding Files – Step 1 • Add Page to Website – name it Forms • Click highlighted Icon to take you to Media menu • Drag and drop Document element to your page
Creating a class website using Weebly • Introduction • Tutorial • Lesson Overview • Signing Up for Weebly • Theme and color • Naming sub domain • Adding pages • Adding text and images • Adding Photo Gallery • Adding Files • Publishing • Updating your site • Feedback/Evaluation • Resources • Contact • Adding Files – Step 2 • After drag and drop of Document Element • Click inside blank document to upload your file.
Creating a class website using Weebly • Introduction • Tutorial • Lesson Overview • Signing Up for Weebly • Theme and color • Naming sub domain • Adding pages • Adding text and images • Adding Photo Gallery • Adding Files • Publishing • Updating your site • Feedback/Evaluation • Resources • Contact • Adding Files – Step 3 • Dialogue box will appear to allow you to select the size of the document display. • Click Upload New File button to upload your file.
Creating a class website using Weebly • Adding Files – Step 4 • Navigate to and highlight the document you want to load from the documents folder within your Class Website folder. • Click Open to upload the document to your website • Introduction • Tutorial • Lesson Overview • Signing Up for Weebly • Theme and color • Naming sub domain • Adding pages • Adding text and images • Adding Photo Gallery • Adding Files • Publishing • Updating your site • Feedback/Evaluation • Resources • Contact
Creating a class website using Weebly • Adding Files – Step 5 • You will see this message while document is being converted. This may take a minute to upload depending on the size of your document. • Introduction • Tutorial • Lesson Overview • Signing Up for Weebly • Theme and color • Naming sub domain • Adding pages • Adding text and images • Adding Photo Gallery • Adding Files • Publishing • Updating your site • Feedback/Evaluation • Resources • Contact
Creating a class website using Weebly • Introduction • Tutorial • Lesson Overview • Signing Up for Weebly • Theme and color • Naming sub domain • Adding pages • Adding text and images • Adding Photo Gallery • Adding Files • Publishing • Updating your site • Feedback/Evaluation • Resources • Contact • Adding Files – Step 6 • The final result will look like this. You can change the size of the display by clicking the bottom right corner of the document.
Exercise 5 – Upload a document to your website Complete the following exercise: Add a page entitled Forms or Documents to your website. Select page layout, save and exit. From the editor screen, click the media icon to take you to the media menu. Drag and drop the Documents element on to your page. Click inside the blank document on your page. Select the document size and click Upload Document Locate the document you want to upload from your computer. Click Open Wait for your document to be uploaded to your website. Adjust the size of the document window using the button in the bottom right of the document. Back to Tutorial
Creating a class website using Weebly Publishing your website Publish your class website in one easy step by clicking the big orange Publish button in the top right of the screen. • Introduction • Tutorial • Lesson Overview • Signing Up for Weebly • Theme and color • Naming sub domain • Adding pages • Adding text and images • Adding Photo Gallery • Adding Files • Publishing • Updating your site • Feedback/Evaluation • Resources • Contact
Exercise 6 – Publish your website Complete the following exercise: Finish adding all content on to your website. Click the Publish button in the top right side of your screen. Click on the link to your class website, or copy and paste the link into your browser. Check it Out! Make note of any changes or updates you would like to make to your site. Back to Tutorial
Creating a class website using Weebly • Introduction • Tutorial • Lesson Overview • Signing Up for Weebly • Theme and color • Naming sub domain • Adding pages • Adding text and images • Adding Photo Gallery • Adding Files • Publishing • Updating your site • Feedback/Evaluation • Resources • Contact • Updating your website • Every time you make updates to your class website, you must Publish your changes by clicking the Publish button. • You may also make changes and save them to Publish later.
Exercise 7 – Update your class website Complete the following exercise: Log into Weebly (if you’ve logged out) Click on the site you would like to update from the My Sites screen to return to the editor screen. From the editor screen, you can add more pages, change the design by selecting a new template or color scheme, add video, social media links, and much, much more. Complete your updates. Click the Publish button in the top right side of your screen to publish the changes. Click on the link to your class website, or copy and paste the link into your browser. Check it Out! Make note of any changes or updates you would like to make to your site. Back to Tutorial
Creating a class website using Weebly • Introduction • Tutorial • Lesson Overview • Signing Up for Weebly • Theme and color • Adding pages • Adding text and images • Adding Photo Gallery • Adding Files • Publishing • Updating your site • Feedback/Evaluation • Resources • Contact Please take a moment to complete the Feedback and Evaluation tasks listed below. Performance Evaluation 1. Submit your class website for review Send the link to your class website to the course designer at mcoleman@gwu.edu. The class website will be reviewed to determine completion of course exercises. 2. Complete a brief Course Evaluation This survey will be used to evaluate the effectiveness of the training materials. Your feedback is important. Take the Survey
Creating a class website using Weebly • Resources: • Organizing a Website and Storyboarding • http://teachersol.blogspot.com/2009/01/how-to-create-class-website.html#.Ub_cc5yM8mY • http://www.gamequarium.com/edweb/storyboarding.htm • Introduction • Tutorial • Resources • Website planning • Printable Training Guide • How-to videos • Weebly Support Center • Contact
Creating a class website using Weebly Resources: Printable Training Guide – PDF format of this tutorial • Introduction • Tutorial • Resources • Website planning • Printable Training Guide • How-to videos • Weebly Support Center • Contact
Creating a class website using Weebly • Introduction • Tutorial • Resources • Website planning • Printable Training Guide • How-to videos • Weebly Support Center • Contact Resources: Screencast How-to Videos : Exercise 1: Creating a Weebly Account Exercise 2: Adding a Site Exercise 3: Adding a page with text and images Exercise 4: Adding a Photo Gallery Exercise 5: Adding a document Exercise 6: Publishing your website Exercise 7: Update your website
Creating a class website using Weebly Resources: Weebly Support Center - http://help.weebly.com/ • Introduction • Tutorial • Resources • Website planning • Printable Training Guide • How-to videos • Weebly Support Center • Contact
Creating a class website using Weebly Contact For questions or feedback about this tutorial, please contact. Mary Bruce Coleman mcoleman@gwu.edu Introduction Tutorial Resources Contact