Download
1 / 33
330 likes | 536 Views
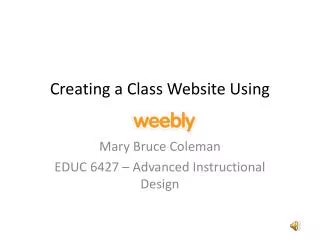
Creating a Classroom Website Using Weebly. Presenter: Suzanne Williamson. Do you ever feel like this?. You just can’t get your computer to do what you want. You don’t have a clue where to start. Suzanne Williamson. Run my own side business – Deline Designs Websites

E N D
Creating a Classroom Website Using Weebly Presenter: Suzanne Williamson
Do you ever feel like this? • You just can’t get your computer to do what you want. • You don’t have a clue where to start.
Suzanne Williamson • Run my own side business – Deline Designs • Websites • Promotional materials • Currently working on my Web Page Designer Diploma • Originally from Red Deer • Teach grade 9 Humanities at École Lacombe Junior High School • Bachelor of Education • UofA/RDC Collaborative Middle Years Program • Petroleum Engineering Technology
My Contact Information • Class Website • www.suzannewilliamson.weebly.com • Password for “Professional” Pages (with this presentation) is williamson • Email • swilliamson@wolfcreek.ab.ca • sueguard@telus.net • Phone • 403-877-1905
Just a Few Benefits Having a Class Website • Kids can print off any missing assignments at school or home • Works great in conjunction with online marks program • Kids who are sick or on holiday can access what we’re doing • Parents get a “view” into what’s being taught • Kids have the information they need at home • Less photocopying • Can put together an assignment at home and post directly to website then print off when I get to school (if necessary)
Why I Like Weebly • FREE • Most people don’t need the advanced features. • Super EASY to Use • If you have basic computer knowledge, you can easily use this program. • Attractive • Your site can look much better than using programs like Google Sites, WordPress, etc.
Pricing This is all most people need.
Today’s Agenda • Where to Begin • Considering What Pages You Want • The “Tools” Available • Other • Adding Editors, Publishing Your Site, Checking Out Statistics • Tool Demonstration • You ask & I’ll Show You
Where do you begin? • Simple – go to www.weebly.com and register!
Choose a Theme • As the website says, this can be changed later! You do not have to stay with this theme. • You can also search for a particular style or color in the top right-hand corner of the webpage.
Choose a domain name. Using a subdomain of weebly is FREE!
Now You are Ready to Build Your Website! • There are two important areas for building your site. The first is the top bar… • The second is the side bar (which scrolls)…
Right now, your website only has one page…the “home” page. • Think about what pages you would like for your class site. • Here’s my home page…
Home Page • Here is a list of the information I’ve chosen for my home page… • School name, address & phone number • Link to the school website • My teaching assignment • Local weather • Background information on myself • My photo
My Other Pages (and Subpages) • Homeroom • Dates & Links • Digital Textbooks** • Online Resources • ELA • ELA 9 • ELA 9 Multimedia • ELA 8 • ELA 8 Multimedia • Social Studies • Social 9 Multimedia • Options • Dene Beadwork • Digital Photography • Professional ** • Executive Functioning • Creating a Classroom Weebly ** password protected
Create Your Home Page • If you want to check out different page layouts, click on “pages” on the top bar. Here are the possible page layouts. Once you’ve selected your layout, make sure you “Save & Edit.”
Basic Tools • Add a title to your page. • You can change the size and color. • Add text to your page. • You can change the size and color. • Add a picture and text. • The picture will be in the top left-hand corner like the image on the button.
Add a picture. • Add multiple pictures either as a gallery or as a slideshow. • Add a contact form so people can contact you. • Add an assignment form. • Students can attach an assignment and email it to you…without needing your email address!
Structure Tools • Add columns to your page. • 2-5 columns • Add a divider to separate sections on your page. • Add a button. • This can help keep your site looking neat and tidy. • Buttons can link to other webpages, websites, a file or an email address.
Media Tools • Add a document. • Note: It is tidier to use a button instead of this tool. • Add a youtube video. • Add a file. • Note: It is tidier to use a button instead of this tool.
Other Tools • Add a block quote. • Embed a code. • This can be handy if you want to add the weather or another “widget” to your site. When you create a widget, you’ll get a long code which is what you would copy and then paste here. • Add a poll to your page.
Add social icons. • Facebook, Twitter, Linkedin, and/or Email • Add a survey. • Add a feed reader. • Let people see the school twitter feed or maybe a news site. • Add a discussion forum. Any item which has a star on it requires a pro account or higher.
The Top Bar To enter a password for the whole site or for particular pages To change your website design. Need to be on this one to edit your pages. • To add or delete pages. • To name or rename pages • To order pages • To choose page layouts • To select which pages to be password protected • To create subpages
To Add Editors to Your Site • Under “settings” (on the top bar) you can choose to add people as editors for your site. • With a basic (free) membership you can add “administrators” – they will be able to edit anything on the site (like yourself).
Publishing Your Site • In order for your site (and any changes) to be viewed, you must click on the publish button. • This button is in the top right-hand corner. • I suggest “publishing” your site every time you make a change.
Checking Out Your Site Statistics • Click on the three lines in the top right-hand corner • Select “Site Stats” from the pull-down menu • You’ll be able to see the following information… • Number of views • How people are finding your site • Blog comments & form entries (if you have put those on your site
Things You Can Put On Your Website Videos Exemplars & rubrics
schedules Textbooks (Password protected)
Widgets (like local weather)