Download
1 / 39
390 likes | 614 Views
Optimized Image Display in GeoMedia ImageStation Raster Utilities. Jeff Hobbs Application Engineer. What’s in This Session?. Where do I get ISRU? What is ISRU? Factors that influence display performance. What does ISRU do for me? Other considerations. Sample scripts and batch routines.

E N D
Optimized Image Display in GeoMedia ImageStation Raster Utilities Jeff Hobbs Application Engineer
What’s in This Session? • Where do I get ISRU? • What is ISRU? • Factors that influence display performance. • What does ISRU do for me? • Other considerations. • Sample scripts and batch routines.
Where Do I Get ISRU? • A self extracting Zip file is delivered in the program folder of GeoMedia 5.2. • ISRU is delivered with most GIS Imaging and Photogrammetry products from Intergraph. • ISRU is also available at http://imgssupport.intergraph.com/Tools.asp.
What Is ISRU? • ISRU is a toolbox of raster image processing utilities. • ISRU is not a GIS application. • ISRU is a product of the Photogrammetry group at Intergraph. • ISRU is a handy way to pre-process your imagery for optimal display performance. • ISRU was the first pure Windows application developed at Intergraph.
What Is ISRU? • ISRU has tools with both graphical user interfaces (GUI) and command line batch utilities. • GUI utilities for: • Viewing image file header information. • File conversion. • Overview creation. • Overview manipulation. • Quick image display. • Photogrammetry specific workflows: • Digital image dodging. • Resolution Calculator. • Image file header editing.
What Is ISRU? • ISRU has tools with both graphical user interfaces (GUI) and command line batch utilities. • Command line utilities for: • File conversion. • Overview creation. • Overview manipulation. • GeoTIFF tag manipulation and editing. • Histogram generation. • TIFF file troubleshooting and editing.
Display Performance Factors that influence GeoMedia raster display performance. • Network speed. • Image Compression. • File Format. • Use overviews. • Data Volume. • ISRU can’t help with all these, but there are other things we can do…
Optimizing Raster Display • Network speed is the most frequent bottleneck to raster display speed. • Keep your image files local to the user’s machine. • Minimizes network traffic. • Requires more disk storage space on the users’ machines. • Use a faster network. • Gigabit networking is now available. • Has a large impact on image display. • Keeping the image server separate from the database server may increase performance.
Optimizing Raster Display • While compressed raster is smaller, remember that decompression takes time. • Uncompressed raster requires more network bandwidth, and disk space. • Network bandwidth is not an issue if the images are local. • Disk drives are extremely cheap. • Less than US$1.00 / GB at Best Buy or Circuit City! • Some compression algorithms are lossy and some are lossless. • Generally, the larger the compression ratios, the larger the data loss. • Also, larger compression ratios can mean more complexity in the algorithm, and more time spent decompressing the data. • Uncompressed data stored local is the fastest option.
Optimizing Raster Display • Use the right raster format. • Use tiled TIFF. • The GeoMedia raster display engine has been designed for this format. • The portability of Tiled TIFF is increasing. • At all costs, avoid JFIF (.jpg) raster! • This format is just not suitable for GIS image data. • Wavelet compressed data are a popular format. • MrSID, ECW, JPEG200. • Both MrSID and ECW have their own display engine in GeoMedia. • Display speeds have been enhanced for 5.2.
Optimizing Raster Display • Use overviews! • Overviews provide HUGE benefits for display performance. • Overviews, can be added to TIFF and INGR format images. • MrSID, ECW, and JPEG2000 have ‘virtual’ overviews. • Sometimes called an Image Pyramid, RRDS, or R-Set. • Averaged overviews are good for continuous tone images. • Subsampled overviews are required for color index images (DRGs).
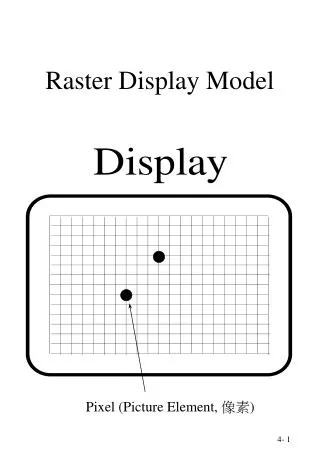
Overviews? • Overviews are reduced resolution copies of your images. • Your monitor has a resolution of 1280 X 1024 (or so). • This is only 1.3 million pixels. • Since your monitor can only show you 1.3 million pixels, the software should only read 1.3 million pixels! • Reading the entire image is time consuming. • Many of the pixels will be ‘thrown away’ prior to the display update. • The same logic applies to plotting! • Why plot 0.25 meter pixels, when the plotter needs 4 meter pixels?
Overviews? • Overviews are part of the image file. • No extra files for the user or IT manager to track. • Each overview typically has half as many rows and half as many columns as the previous overview (or original image). • This means each overview has pixels that are twice as large in each dimension, in ground coverage. • The software manages the overviews for the user. • You always see the smallest possible overview that exceeds the resolution of the monitor. • Tracks zoom in / out – you always see an optimal display.
Optimizing Raster Display • Minimize the number of pixels displayed at one time. • A single, large image requires much more memory than selected smaller images of a specific area. • Make use of the new Image Footprints and Display Selected Images commands to only load the images needed for the work at hand. • Several large scale images will exhibit less misregistration than a single small scale image, when the image coordinate system differs from that of the GeoWorkspace. • Overviews!
ISRU GUI Tools • The Many/Raw File Converter: • Mr.File! • Supports a wide variety of input formats. • Converts to : • TIFF format. • INGR format. • Raw data stream. • Combines single bands into RGB color images. • Adds overviews and tiles your data while doing conversions.
ISRU GUI Tools • The Overview Utility: • This tool will add overviews to existing TIFF or INGR format raster files. • Can process many files in one job. • Job submission can be scheduled for a later time.
ISRU GUI Tools • ISRU’s Display Header tool: • Great for troubleshooting! • Provides access to GeoTIFF information. • Header info can be saved to a text file. • Provides complete header information.
ISRU GUI – Other Tools • Delete Overviews and Extract Overviews
Hands On Exercises • Viewing image file headers. • Command Prompt Basics • Batch converting multiple files to tiled TIFF with overviews. • Extracting / Deleting Overviews.
Viewing Header Information • Navigate to c:\NCIGUC_ISRU>. • Right click on the file “gonzales-noovr.tif.” • Select properties, and verify the file is not read only. Change this property if it is. • Start the “Display Header” application by going to Start > Programs > ImageStation Raster Utilities > Display Header • Drag the image on to the Display Header application. • Examine the header information, especially the GeoTIFF tags.
Viewing Header Information 1 Output from Display Header File Name: C:\NCIGUC\July-2004 Meeting\NCIGUC_ISRU\gonzales-noovr.tif File Information: Standard : : TIFF File Format : : Uncompressed 24 bit RGB data Pixels per Line : 6416 Number of Lines : 7643 Samples per pixel : 3 Untiled file Number of overviews : 0 Scanning device resolution : 0 : None Specified Orientation : 4 : Row major order, origin at top left NO scan line headers : non-scannable file Packet size (16-bit words) : 0 Free vlt space (16-bit words) : 2000000000 Free packet space (16-bit words) : 2000000000
Viewing Header Information 2 Raster to UOR matrix: Unspecified or All Zero Matrix Raster to World Matrix: Units: Unknown or Unspecified amx[ 0]= 1, amx[ 1]= 0, amx[ 2]= 639423.5 amx[ 3]= 0, amx[ 4]= -1, amx[ 5]= 4047874.5 639423.5 , 4047874.5 645839.5 , 4047874.5 645839.5 , 4040231.5 639423.5 , 4040231.5
Viewing Header Information 3a GeoTIFF Tags Geotiff_Information: Version: 1 Key_Revision: 1.0 Tagged_Information: ModelTiepointTag (2,3): 0 0 0 639423.5 4047874.5 0 ModelPixelScaleTag (1,3): 1 1 0 End_Of_Tags. Keyed_Information: GTModelTypeGeoKey (Short,1): ModelTypeProjected GTRasterTypeGeoKey (Short,1): RasterPixelIsArea ProjectedCSTypeGeoKey (Short,1): PCS_NAD83_UTM_zone_10N End_Of_Keys. End_Of_Geotiff.
Viewing Header Information 3b • The information on the previous slide can be pasted into a text file and edited. • GeoTIFF tags can also be captured using the ‘listgeo.exe’ tool from the ISRU\bin folder. • The edited information can be re-inserted into the TIFF file. • The command line tool to insert GeoTIFF tags is ‘geotifcp.exe’, again, in the ISRU\bin folder. • This allows the user to edit GeoTIFF headers to some extent. • Extreme care should be taken when attempting to do this. • The GeoTIFF specification is a must read, if you have any desire to edit or create your own GeoTIFF tag set. • http://www.remotesensing.org/geotiff/geotiff.html • Also see Appendix E of the Working With GeoMedia Professional for a complete list of supported projections and datums for GeoTIFF files
Viewing Header Information 4 PCS = 26910 (NAD83 / UTM zone 10N) Projection = 16010 (UTM zone 10N) Projection Method: CT_TransverseMercator ProjNatOriginLatGeoKey: 0.000000 ( 0d 0' 0.00"N) ProjNatOriginLongGeoKey: -123.000000 (123d 0' 0.00"W) ProjScaleAtNatOriginGeoKey: 0.999600 ProjFalseEastingGeoKey: 500000.000000 m ProjFalseNorthingGeoKey: 0.000000 m GCS: 4269/NAD83 Datum: 6269/North American Datum 1983 Ellipsoid: 7019/GRS 1980 (6378137.00,6356752.31) Prime Meridian: 8901/Greenwich (0.000000/ 0d 0' 0.00"E) Projection Linear Units: 9001/metre (1.000000m) Corner Coordinates: Upper Left ( 639423.500,4047874.500) Lower Left ( 639423.500,4040231.500) Upper Right ( 645839.500,4047874.500) Lower Right ( 645839.500,4040231.500) Center ( 642631.500,4044053.000)
Adding Overviews • We’re going to add overviews to a USGS DOQQ, and then compare its display in GeoMedia Pro to that of the original file. • Select the Overview Utility from the Start Menu. • Start > Programs > ImageStation Raster Utilities > Overview Utility • A snapshot of the completed dialog will be shown on a later slide. • For the ‘File Name’ field, browse for the file : ‘gonzales-noovr.tif’ which is located in C:\NCIGUC_ISRU.
Adding Overviews • In the ‘Output File Information – File Name’ field, check the ‘Create’ checkbox and use the browse button to navigate to the folder with the input image, and then key in ‘gonzales-ovr.tif’ in the file name field. Select ‘Save’ on the Save Raster File dialog. • The remaining items on the dialog are good as they are by default. • Select the ‘Add’ button, under the Job Information command group. Your dialog should look like that on the next slide. • We could easily process more images with one run of this command. • Simply change the input and output file names and then ‘Add’ the new job.
Adding Overviews • Verify that your dialog looks like the one to the right. • Select the ‘OK’ button to start processing. • The Apply button processes the image, but leaves the Overview Utility dialog active. • A set of overviews will be added to a copy of the image. Geometry information is preserved.
Adding Overviews • A set of overviews will be added to a copy of the image. • Geometry information is preserved. • Display Header will verify this. • Note Minimum and Maximum Values. • Note ‘Number of overviews’.
Adding Overviews • Let’s verify the performance gains we get with Overviews. • Start GeoMedia Pro. • Select the USSampleData.gws GeoWorkspace. • You may want to turn off the ‘locatable’ property for both ‘States’ and ‘Counties’. • Let’s insert the original file, ‘gonzales-noovr.tif’. • Insert > Georeferenced Images. • Placement is using the GeoTIFF tagset. • Create a new Image Feature Class. Call it ‘NO_OVR’. • Select ‘OK’. • Wait for the image to display. • Examine the image. It is an image of Gonzales, California, so look just east of the Monterey Bay. • Now repeat these same steps with ‘gonzales-ovr.tif’. Place it in a different feature class – name it ‘OVR’.
Adding Overviews • Command line equivalent: • C:\NCIGUC_ISRU> mkov –R a –c <input file> <output file> • -R a : Create a full set of averaged overviews. • -c : Create a new output file. • To see the complete set of mkov command line options, key in : mkov -? at the command line prompt.
ISRU Command Line Tools • The world is made up of two sorts of people. Those who do batch processing and those who don’t. • Large jobs can require batch processing. • Open a command prompt window: • Start > Programs > Accessories > Command Prompt or • Windows Key + R – Then type cmd • Windows cmd.exe has many available batch tools: • Key in : ‘Help’ at the command prompt. • Windows cmd.exe has its own for loop we can exploit. • Then Key in : ‘help for’ • You will see the command line options for creating a ‘for’ loop. • ISRU makes batch a breeze. • Key in : mr_file –v at the command prompt. • The command line options and flags are printed out.
Batch Conversion • For this exercise, we’re going to convert a MrSID format image to TIFF. The associated .sdw world file will also be converted to .tfw file. • Open a command prompt window. • Start > Programs > Accessories > Command Prompt. • Navigate to the C:\NCIGUC_ISRU folder. • CD c:\nciguc_isru • Key in the following: • MKDIR TIFF • For %j in (*.sid) do start /b /wait mr_file –H 1 –E –C j –Q 25 –K a %j TIFF\%~nj.tif • For %k in (*.sdw) do start /b /wait copy %k TIFF\%~nk.tfw
Batch Conversion • Command Line: • For %j in (*.sid) do start /b /wait mr_file –H 1 –E –C j –Q 25 –K a %j TIFF\%~nj.tif • What did this do? • -H 1 : I want TIFF output . • -E : I want 24 bit color output. • -C j : I want JPEG compressed TIFF. • -Q 25 : Specifies the amount of compression (larger numbers compress more). • -K a : I want a full set of ‘a’veraged overview added to the output. • %j : A variable, in this case input file. • TIFF\%~nj.tif : put the output in the ‘TIFF’ folder, and use the original name, but change the extension to ‘.tif’.
Batch Conversion • Creating a batch file. Batch files are a convenient way to execute the command lines. Batch files can be saved and reused as needed. • Batch files are created by keying in your command line in Notepad or another ASCII text editor. • Use a double ‘%’ (percent sign) in the batch file, instead of a single ‘%’. • Be sure to give the file a unique name, one that helps you remember what it does. • Save the file with a ‘.bat’ extension.
Sample Command Lines • Mister File command line. • DRGs • for creating tiled TIFF with complete set of overviews, with PackBits compression: • mr_file -T -C a -K s <input file> <output file> • for creating tiled TIFF with complete set of overviews, with no compression: • mr_file -T -K s <input file> <output file> • DRGs are color index images. Overviews for this type of image must be subsampled. This is what the ‘-K s’ signifies.
Sample Command Lines • Mister File command line. • DOQQs – Grayscale • for creating tiled TIFF with complete set of overviews, with PackBits compression: • mr_file -T -C a -K a <input file> <output file> • for creating tiled TIFF with complete set of overviews, with JPEG compression: • mr_file -T -C j -Q 30 -K a <input file> <output file>
Sample Command Lines • Mister File command line. • DOQQs – Color • for creating tiled TIFF with complete set of overviews, with PackBits compression: • mr_file -T -E -C a -K a <input file> <output file> • for creating tiled TIFF with complete set of overviews, with JPEG compression: • mr_file -T -E -C j -Q 30 -K a <input file> <output file>
Sample Command Lines • Here's a command line to convert a directory full of 8-bit color TIFF files (DRGs) to 24-bit color TIFF, with the output to a subfolder called 'output'. • c:\>mkdir output • c:\> for %j in (*.tif) do start /b /wait mr_file -H 1 -E %j output\%j • -E says you want 24-bit color output • -H 1 says you want TIFF output • -H 0 says you want INGR output • For untiled output use a -S 0. Untiled output may be more portable. • For compressed (adaptive run length - lossless) use -C a. • For complete set of averaged overviews use -K a. All of these go after the -E.