Download
1 / 72
1.01k likes | 2.12k Views
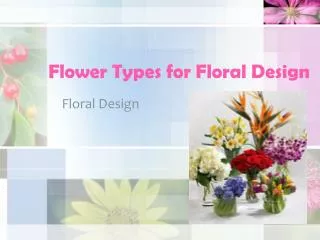
10. Types of Floral Design. Objectives. Create floral designs in various geometric shapes and styles. Evaluate where a floral arrangement falls on the line-mass continuum. Describe traditional floral design styles with Oriental, European, and American origins.

E N D
10 Types of Floral Design
Objectives • Create floral designs in various geometric shapes and styles. • Evaluate where a floral arrangement falls on the line-mass continuum. • Describe traditional floral design styles with Oriental, European, and American origins. • Classify floral design styles developed in the 20th century. • Summarize current trends in floral design styles. AkeSak/shutterstock.com
Geometric Design • Circle • Triangle • Square • Oval • Crescent Viktor1/shutterstock.com; TymonkoGalyna /shutterstock.com
Circular Styles: Round popovich_vl /shutterstock.com mayakova/shutterstock.com
Circular Styles: Crescent Rodionov Oleg/shutterstock.com; Sergey Andrianov/shutterstock.com
Circular Styles: Hogarth Curve Key Points • Sweeping S-shaped curve • Tall vessel • Floral foam higher than the container • Appearance of two crescents placed end to end Beth McCampbell, Bloomtastic Florist, Columbus OH, SAF
Round Arrangement • Foam sits above the container to make side accessible • Place form flowers first • Greens should stay within the framework • Keep flowers equally spaced Goodheart-Willcox Publisher
Round Arrangement (continued) • Place 1/3 of a block of soaked floral foam into the container, secure with anchor tape, and place the dish with the long length side to side Goodheart-Willcox Publisher
Round Arrangement (continued) • Place first carnation directly in middle of floral foam. • Place four carnations around base. Goodheart-Willcox Publisher
Round Arrangement (continued) • Place four carnations on the middle layer, on top of floral foam at 45° angle, halfway between the top flower and the four around the base. • Note: this layer is placed opposite of the bottom layer. Goodheart-Willcox Publisher
Round Arrangement (continued) • Green the arrangement following the same pattern as the carnations. Goodheart-Willcox Publisher
Round Arrangement (continued) • Add the daisy poms halfway in each area where the carnations form a triangle. Goodheart-Willcox Publisher
Round Arrangement (continued) • Add statice for depth in the arrangement. • Finish with adding limonium or another filler, staying within the form of the arrangement. Goodheart-Willcox Publisher
Triangular Styles: Equilateral Triangle • All sides equal Mayovskyy Andrew/shutterstock.com
Triangular Styles: Isosceles Triangle • Two sides equal Oleg Rodionov/shutterstock.com
Triangular Styles: Right Triangle Mayovskyy Andrew/shutterstock.com
Triangular Styles: Double-Ended Triangle Rob Hainer/shutterstock.com
Asymmetrical Triangle Key Points • Design from back corner of floral foam to the front to maintain balance • Use sides of foam for horizontal insertions • Equal spacing for good rhythm Goodheart-Willcox Publisher
Asymmetrical Triangle (continued) • Place 1/3 of a block of soaked floral foam into the container, secure with anchor tape and place the dish with the long length side to side. Goodheart-Willcox Publisher
Asymmetrical Triangle (continued) • Place first snapdragon in back, left-hand corner. • Place next snapdragon directly in front of the first. • Insert third snapdragon on right side of foam so it is horizontal and resting on lip of container. Goodheart-Willcox Publisher
Asymmetrical Triangle (continued) • Place the fourth snapdragon toward back of container, upright and to right of first flower. • Insert fifth snapdragon in front left side so it is horizontal, lower than third flower, and resting on lip of container. • Insert sixth snapdragon horizontally, halfway between the other horizontal flowers, resting on lip of container Goodheart-Willcox Publisher
Asymmetrical Triangle (continued) • The snapdragons now form the skeleton of the asymmetrical triangle. • Using leatherleaf or greenery, mimic the shape of the line flower placements, reinforcing the asymmetrical triangle. Goodheart-Willcox Publisher
Asymmetrical Triangle (continued) • Insert the purple carnations within the framework of the snapdragons so they help define the asymmetrical form. Goodheart-Willcox Publisher
Asymmetrical Triangle (continued) • Add the lime green spray mums within the framework of the snapdragons to enforce the asymmetrical form. • Add the filler within the framework to complete the arrangement. Goodheart-Willcox Publisher
Equilateral Triangle • Place 1/3 of a block of soaked floral foam into the container. • Secure with anchor tape and place the dish with the long length side to side. Goodheart-Willcox Publisher
Equilateral Triangle (continued) • Place tallest carnation in back third of the foam. • Add two carnations in back half of the foam. • Make sure the stems are inserted at least 1″ into the foam. Goodheart-Willcox Publisher
Equilateral Triangle (continued) • Add two carnations on either side of the arrangement. Flowers should rest on the lip of the container • Place a carnation in the front of the arrangement, resting on the lip of the container. Goodheart-Willcox Publisher
Equilateral Triangle (continued) • Add one carnation on top of foam, halfway between tallest carnation and the one in front of container. • Final two carnations are added on two front cornersof the foam. Goodheart-Willcox Publisher
Equilateral Triangle (continued) • Look at the arrangement. • Note the triangle formed by the bottom front, bottom side, and middle carnations. Goodheart-Willcox Publisher
Equilateral Triangle (continued) • Green the arrangement using the same pattern as you did with the carnations. • Begin in the back and add to the sides to form the triangle. • Move to thefront and center. Goodheart-Willcox Publisher
Equilateral Triangle (continued) • Add the daisy mums between each set of carnations, following the same pattern as the carnations Goodheart-Willcox Publisher
Equilateral Triangle (continued) • Add a third texture such as purple statice. • Place the statice in the same pattern as the carnations, but tucked in to add some depth to the composition. Goodheart-Willcox Publisher
Equilateral Triangle (continued) • Finish your arrangement by inserting the limonium or other light filler. Limonium Goodheart-Willcox Publisher
Long and Low Triangle Key Points • Create skeleton in proportionwith greens • Using a variety of greens for more texture • Green the arrangement so the greens cover the utility container Goodheart-Willcox Publisher
Long and Low Triangle (continued) • Place fully-soaked foam in utility bowl and secure with anchor tape. • Pillar candles must be inserted before inserting any greens or flowers. Goodheart-Willcox Publisher
Long and Low Triangle (continued) • Insert the leather leaf into the foam to form an outline. Goodheart-Willcox Publisher
Long and Low Triangle (continued) • The leaf placement will establish the height, width, and length of the double-ended triangle arrangement. Goodheart-Willcox Publisher
Long and Low Triangle (continued) • Staying within the parameters set by the beginning of the greens, complete greening the arrangement with leather leaf and the second greenery. Goodheart-Willcox Publisher
Long and Low Triangle (continued) • Insert the purple larkspur within the same parameters as the greens. Goodheart-Willcox Publisher
Long and Low Triangle (continued) • Insert pinkcarnations following same pattern as the greens, defining height, width, and length once again. • Note: This is a symmetrical arrangement so what you do to one side, you must do the same to the other. Goodheart-Willcox Publisher
SBS Long and Low Triangle (continued) • Add yellow daisies throughout the arrangement • Maintain the shape that was outlined by the greens and the pink carnations. Goodheart-Willcox Publisher
SBS Long and Low Triangle (continued) • Add Monte Cassino asteras a filler. • Notice that darker colors will recede and the lighter colors will advance in this arrangement. Goodheart-Willcox Publisher
Line-Mass Continuum Pure linear design Mostly linear design with some mass elements Equalemphasis on line and mass Mostly mass design with some linear elements Pure mass design Goodheart-Willcox Publisher
Line Designs • Less is more • Negative space Society of American Florists
Mass Design • Form dominates vs. line • Flowers placed in close proximity • Little negative space Luchi_a/shutterstock.com; Grigvovan/shutterstock.com
Mass Design Luchi_a/shutterstock.com; Grigvovan/shutterstock.com
Traditional Design Classification • Prior to 1900 • Different styles become popular over time • Regional origin • Historical time frame • Culture
Square Arrangements: Inverted T • Based on square • Both vertical and horizontal lines • Parallel placements Koehler & Dramm’s Institute of Floristry, Minneapolis; Society of American Florists
Square Arrangements: Hedgerow Dr. Delphinium Designs in Dallas, SAF