Download
1 / 105
1.15k likes | 1.33k Views
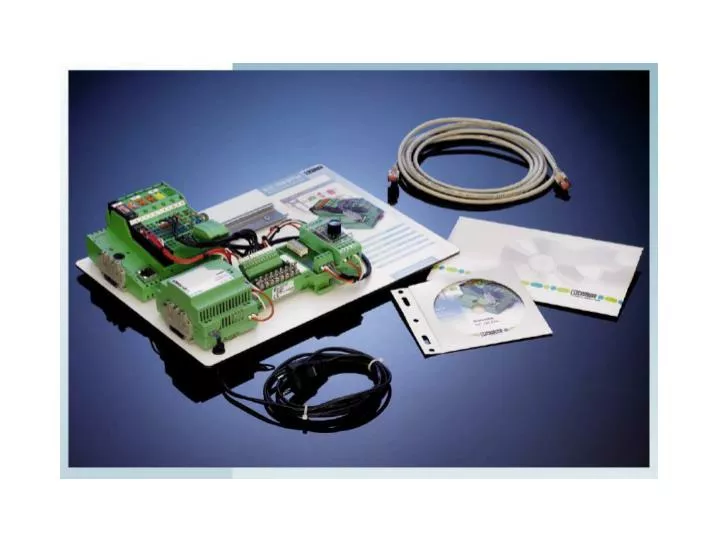
Phoenix Contact. ILC150ETH F. Rubben, Ing. Een applet op het net. Klik op om de software te downloaden: http://www.ilc150.com/AUTOMATIONWORXSoftwareSuite.aspx. http://www.ilc150.com/. 1. Start het programma op. 2. Close all projects. File >>> close all projects. Code invullen en OK.

E N D
Phoenix Contact ILC150ETH F. Rubben, Ing.
Een applet op het net • Klik op om de software te downloaden: • http://www.ilc150.com/AUTOMATIONWORXSoftwareSuite.aspx http://www.ilc150.com/
2. Close all projects. File >>> close all projects
Verschillende data en structuren terug te vinden. Keuze PLC gemaakt. Maar is deze juist gedefinieerd???
DI en DO al aanwezig Op de basismodule !!!!
Bus Configuration Workspace Instellen IP-adressen e.d. van de controllers
Momenteel: IP-adressen van de controllers • IP-adres: 10.0.0.11 of 10.0.0.12 • Subnet: 255.0.0.0 • Gateway: / of 10.0.0.1 indien router aanwezig
Huidig IP-adres ingeven van de controller. Niet gekend??? Zie verder: Boot-IP. Hier wel de toegelaten range invullen!!!
Definiëren van de analoge kaarten? Via Interbus verbonden (INTERne BUS)
Per device moet je nu het correcte type opgeven: Eerst de analoge uitgang: IB IL AO 1/U/SF
Na definiëren project, kan men het project compileren. Klik op ‘Make’.
PLC is nu gedefinieerd. Nu nog programmeren... Kableren ook natuurlijk.
Kableren DI/DO • Dit zijn de IO’s die in de software de volgende naam hebben: • ‘ONBOARD_INPUT_BITX’ (X = cijfer 1 tot 8) • ONBOARD_OUTPUT_BITY’ (Y = cijfer 1 tot 4)
Kableren AI/AO • AI en AO zijn twee extra kaarten die men erin moet steken. (zijn nu al verbonden) • Ze zijn niet verbonden met systeemvariabelen.
Systeemvariabelen in PC Worx In de ILC150ETH zijn er een aantal ingebouwde variabelen; zoals de digitale IO. Er zijn ook een aantal andere parameters.
Systeemvariabelen (5) !!! belangrijke!!! ==> DIO