Download

1 / 38
380 likes | 589 Views
A Guide to Selecting Non-Powered Hand Tools. Ergonomics Design Guidelines to prevent WMSDs. Credits . The technical contents of this slide show come from: “ Easy Ergonomics: A Guide to Selecting Non-Powered Hand Tools” Cal/OSHA and DHHS (NIOSH) Publication 2004-164.

E N D
A Guide to Selecting Non-Powered Hand Tools Ergonomics Design Guidelines to prevent WMSDs
Credits The technical contents of this slide show come from: “Easy Ergonomics: A Guide to Selecting Non-Powered Hand Tools” Cal/OSHA and DHHS (NIOSH) Publication 2004-164. http://www.cdc.gov/niosh/docs/2004-164/default.html
Purpose: To help you find non-powered hand tools that are less likely to cause injury. These tools require less force, less repeated movement and less awkward positioning of the body.
Non-powered hand tools are widely used in many industries including: construction, manufacturing and agriculture.
Problem? Musculoskeletal disorders (MSDs) can be related to using hand tools at work. These injuries can be costly and result in unnecessary suffering and lost workdays.
The best tool is one that… • Fits the job you are doing • Fits the work space available • Reduces the force you need to apply • Fits your hand • Can be used in a comfortable work position • Is safe to use
Be aware of MSD risk factors Awkward postures of the back, shoulders, elbows or wrists. Awkward postures may involve: bending, stooping, twisting and reaching.
Be aware of MSD risk factors Contact pressure Pressure from a hard surface, point, or edge on any part of the body.
Be aware of MSD risk factors Power Grip The hand grip that allows maximum hand power for high force tasks. All the fingers wrap around the handle.
Be aware of MSD risk factors Pinch Grip The hand grip that provides control for precision and accuracy. You can’t exert high forces with a pinch grip. The tool is gripped between the thumb and the fingertips.
Risk factors increase your risk for injury These matter: • Exposure duration time (how long) • Exposure frequency (how often) • Intensity or severity of the exposure
Guidelines to reduce your injury risk : A. • Know your job • Look at your work space • Improve your posture • Tips for Selecting Hand Tools B. C. D.
Know your job A. Pick the right tool for the job: • Use a tool for its intended purpose
Know your job A. Pick the right tool for the job: • Do you need to a tool for power? • Do you need a tool for precision?
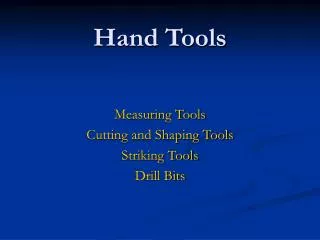
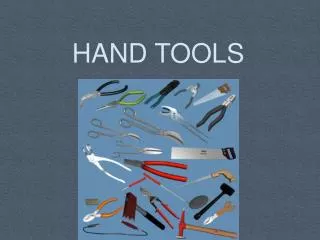
Know your job A. Cutting, pinching gripping tools: • pliers • snips • cutters
Know your job A. Striking tools • Hammers • Mallets
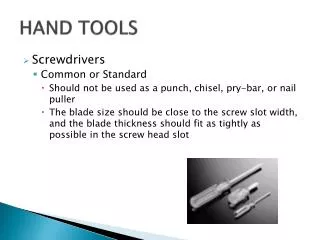
Know your job A. Driving tools • Screwdrivers • Hand wrenches • Nut drivers • T-handle wrenches
Know your job A. Struck or hammered tools • Punches • Chisels • Nail sets
Look at your work space B. Pick a tool that works best with the available space. You can apply more force using a power grip than a pinch. Try to use a power grip when you need more force.
Look at your work space B. Awkward postures may cause you to use more force. If you work in a cramped space it is better to use a shorter tool that fits within the work space.
Improve your posture C. Awkward postures can make your body work harder.
Improve your posture C. By: • Changing the position of the workpiece OR • Changing Your position • Sit down • Stand up Bad posture Better posture
Improve your posture C Choose a tool that doesn’t require high continuous force or awkward postures. The right tool won’t cause pain and fatigue because your body parts will be relaxed.
Design guidelines These guidelines were developed by Cal/OSHA and DHHS-NIOSH. The more guidelines you apply to hand tool selection, the safer and healthier for you and your employees.
D. Select the tool • For single-handle tools using a POWER grip: A comfortable handle diameter is 1¼” - 2”. • You may increase the diameter by adding a sleeve to the handle
D. Select the tool • For single-handle tools used in PRECISION tasks: A comfortable handle diameter is ¼” - ½”..
D. Select the tool • For tools with 2 handles used with a power grip: • OPEN GRIP SPAN no wider than 3½” when fully open • CLOSED GRIP SPAN no smaller than 2” when fully closed When continuous force is required, consider using a clamp, a grip or locking pliers.
D. Select the tool • For tools with 2 handles used for PRECISION tasks: • OPEN GRIP SPAN no wider than 3” • CLOSED GRIP SPAN no smaller than 1”
D. Select the tool • For pinching, gripping or cutting tools with 2 handles: Look for spring-loaded handles that return to the open position.
D. Select the tool • Pick a tool without sharp edges or finger grooves on the handle.
D. Select the tool • Pick a tool that is coated with soft material. Adding a sleeve to the tool handle pads the surface but also increases the diameter of the handle.
D. Select the tool • Pick a tool that allows you to work with a straight wrist. Straight tool? Or bent tool?
D. Select the tool • Pick a tool that allows you to work with a straight wrist. Straight tool? Or bent tool?
D. Select the tool • Pick a tool that can be used with your dominant hand or one that can be used with either hand.
D. Select the tool • For HIGH FORCE tasks: The handle length should be longer than the widest part of your hand. Bad Make sure the end of the handle doesn’t press into your palm. Good
D. Select the tool • Pick a tool with handles that have a non-slip surface for a better grip. Adding a sleeve can improve the surface texture of the handle. Make sure the sleeve fits snugly during use.
The Checklist • You can use a checklist to compare similar tools. http://www.dir.ca.gov/DOSH/dosh_publications/handtools7.html • The more “Yes” answers the tool has, the better the tool.
Be aware of these signs and symptoms: • Continual muscle fatigue • Sore muscles • Numbness • Change in the skin color of your hands and fingertips • Tingling • Swelling in the joints • Decreased ability to move • Decreased grip strength • Pain from movement, pressure or exposure to cold or vibration