Download
1 / 44
570 likes | 1.03k Views
A Guide to Selecting Non-Powered Hand Tools. Ergonomics Design Guidelines to prevent WMSDs. Credits . The technical contents of this slide show are based upon the publication “Easy Ergonomics: A Guide to Selecting Non-Powered Hand Tools” Cal/OSHA and DHHS (NIOSH) Publication 2004-164.

E N D
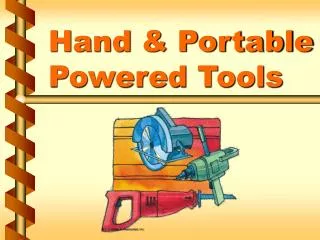
A Guide to Selecting Non-Powered Hand Tools Ergonomics Design Guidelines to prevent WMSDs
Credits The technical contents of this slide show are based upon the publication “Easy Ergonomics: A Guide to Selecting Non-Powered Hand Tools” Cal/OSHA and DHHS (NIOSH) Publication 2004-164. You may click here to download a copy of this publication
What YOU will learn in this slideshow • Select or purchase the best available ergonomically designed non-powered hand tool. • Follow 4 Steps to help you in selecting/purchasing a better hand tool: • Know your job • Look at your work space • Improve your work posture • Review the “Tips for Selecting Hand Tools” and thenSelect the Tool. A. B. C. D.
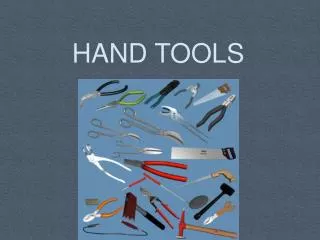
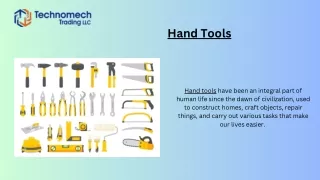
Importance “Non-powered hand tools are widely used in a variety of industries including construction, manufacturing and agriculture.”
Importance “To the untrained eye it may be difficult to evaluate tools from an ergonomics point of view.” “The purpose of this slideshow is to help employers and workers identify non-powered tools that are less likely to cause injury –those that can be used effectively with less force, less repeated movement and less awkward positioning of the body and body parts.”
Problem? “A large number of injuries known as musculoskeletal disorders are attributable to hand tool use in occupational settings, resulting in unnecessary suffering, lost workdays and economic costs.”
The best tool is one that… • Fits the job you are doing • Fits the work space available • Reduces the force you need to apply • Fits your hand • Can be used in a comfortable work position • It is safe in all aspects
WMSD hazardous exposures Awkward postures Postures that strain the neck, shoulders, elbows, wrists or back. Also, bending, stooping, twisting and reaching.
WMSD hazardous exposures Contact pressure Pressure from a hard surface, point, or edge on any part of the body.
WMSD hazardous exposures Power Grip The hand grip that provides maximum hand power for high force tasks. All the fingers wrap around the handle.
WMSD hazardous exposures Pinch Grip The hand grip that provides control for precision and accuracy. The tool is gripped between the thumb and the fingertips.
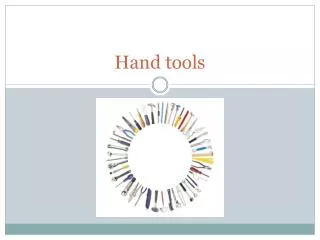
Know your job A. Think about the job you will be doing. Tools are designed for specific purposes
Know your job A. Cutting, pinching gripping tools: • pliers • snips • cutters
Know your job A. Striking tools • Hammers • Mallets
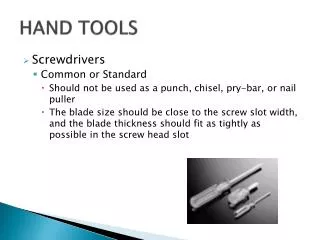
Know your job A. Driving tools • Screwdrivers • Hand wrenches • Nut drivers • T-handle wrenches
Know your job A. Struck or hammered tools • Punches • Chisels • Nail sets
Know your job A. For POWER tasks consider: • Single-handle tools with a handle diameter 1 ¼ inches to 2 inches
Know your job A. For POWER tasks consider: • OPEN GRIP SPAN not more than 3 ½ inches • CLOSED GRIP SPAN not less than 2 inches
Know your job A. For PRECISION tasks consider: • Single-handle tools with handle diameter ¼ to ½ inch.
Know your job A. For PRECISION tasks consider: • OPEN GRIP SPAN not more than 3 inches • CLOSED GRIP SPAN not less than 1 inch
Look at your work space B. Awkward postures may cause you to use more force. Select a tool that can be used within the space available
Look at your work space B. Awkward postures may cause you to use more force. If you work in a cramped space it is better to use a shorter tool that fits within the work space.
Improve your work posture C. Awkward body postures make more demands on your body
Improve your work posture C. The placement of the work piece will affect your postures in the: • Shoulder • Elbow • Wrist • Hand • Back
Improve your work posture C. Choose a tool that requires less continuous force and awkward postures. The right tool will not cause pain and fatigue, because your body parts will be relaxed.
Design guidelines These guidelines were developed by Cal/OSHA and DHHS-NIOSH. The more guidelines you apply to hand tool selection, the safer and healthier for you and your employees.
Select the tool C. Single-handle tools for POWER tasks: • Tool must feel comfortable with a handle diameter 1 ¼ inches to 2 inches. • You may increase the diameter by adding a sleeve to the handle
Select the tool C. Single-handle tools for PRECISION tasks: • Tool must feel comfortable with a handle diameter ¼ inch to ½ inch.
Select the tool C. Double-handle tools (pliers-like) for POWER tasks: • Tool with a grip span at least 2 inches when fully closed and no more than 3 ½ inches when fully open. When continuous force is required, consider using a clamp, a grip or locking
Select the tool C. Double-handle tools (pliers-like) for PRECISION tasks: • Tool with a grip span that is not less than 1 inch when fully closed and no more than 3 inches when fully open.
Select the tool C. Double-handled pinching, gripping or cutting tools: • Handles spring-loaded to return the handles to the open position.
Select the tool C. • Select a tool without sharp edges or finger grooves on the handle.
Select the tool C. • Select a tool that is coated with soft material. Adding a sleeve to the tool handle pads the surface but also increases the diameter of the grip span of the handle.
Select the tool C. • Select a tool with an angle that allows you to work with a straight wrist. Tools with bent handles are better when the force is applied horizontally (same direction as your straight forearm and wrist)
Select the tool C. • Select a tool with an angle that allows you to work with a straight wrist. Tools with straight handles are better when the force is applied vertically.
Select the tool C. • Select a tool that can be used with your dominant hand or with either hand.
Select the tool C. For HIGH FORCE tasks: • Select a tool with a handle length longer than the widest part of your hand – usually 4 inches to 6 inches Make sure the end of the handle does not press on the palm of your hand.
Select the tool C. • Select a tool with handles that have a non-slip surface for a better grip. Adding a sleeve improves the surface texture of the handle. Make the sleeve fit snugly during use.
The Checklist • Use BOTH sides of the checklist to compare similar tools. For example if you have two pliers and want to select the best of the two, compare each tool against the features on the checklist. The more “Yes” answers the tool has, the better the tool.
Not following these guidelines may result in one or more of these symptoms: • Tingling • Swelling in the joints • Decreased ability to move • Decreased grip strength • Pain from movement, pressure or exposure to cold or vibration • Continual muscle fatigue • Sore muscles • Numbness • Change in the skin color of your hands and fingertips
The ergonomics cycle provides with an organized way to start YOUR ergonomics effort at a store. The Ergonomics Cycle
More resources Easy Ergonomics: A Guide to Selecting Non-Powered Hand Tools Easy Ergonomics. A practical approach for improving the workplace www.cbs.state.or.us/osha/pdf/pubs/3347.pdf On WMSD hazardous exposures visit the WISHA webpage at:www.lni.wa.gov/Safety/Topics/Ergonomics Example accident prevention program : www.lni.wa.gov/Safety/Basics/Programs/Accident Ideas to reduce hazardous exposures can be found at the Ergonomics Ideas Bank You may also write us at: ergonomics@LNI.WA.GOV