Download
1 / 27
270 likes | 437 Views
Logic Analyzers. EECS150 Spring 2008 – Lab Lecture #5 Ke Xu. Today. Lab #3 Solution Synplify Warnings Debugging Hardware Administrative Info Logic Analyzer ChipScope ChipScope Demo – Not on webcast!. Lab #3 Solution (1). Simple Solution Use the standard 2 (or 3) block FSM format

E N D
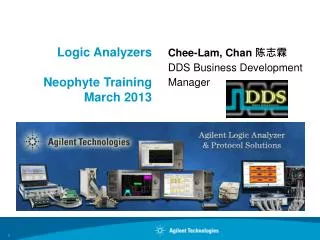
Logic Analyzers EECS150 Spring 2008 – Lab Lecture #5 Ke Xu EECS150 Lab Lecture #5
Today • Lab #3 Solution • Synplify Warnings • Debugging Hardware • Administrative Info • Logic Analyzer • ChipScope • ChipScope Demo – Not on webcast! EECS150 Lab Lecture #5
Lab #3 Solution (1) • Simple Solution • Use the standard 2 (or 3) block FSM format • Always @ (posedge Clock) block that instantiates the register that contains state. • Combinational logic block that responds to inputs and state changes by updating nextState wire and outputs. • Optionally, block that updates outputs. EECS150 Lab Lecture #5
Lab #3 Solution (2) • Cleaning Up Your Verilog FSM Code • always @ (ps) begin • case (ps) • STATE_Init: begin • Open = 1’b0; • Prog1 = 1’b0; • Prog2 = 1’b0; • Error = 1’b0; • if (Decode1 & Enter) • ns = STATE_Ok1; • else if (~Decode1 & Enter) • ns = STATE_Bad1; • end • ... • STATE_Ok2: begin • Open = 1’b1; • Prog1 = 1’b0; • Prog2 = 1’b0; • Error = 1’b0; • ... EECS150 Lab Lecture #5
Lab #3 Solution (3) always @ (ps) begin Open = 1’b0; Prog1 = 1’b0; Prog2 = 1’b0; Error = 1’b0; case (ps) STATE_Init: begin if (Decode1 & Enter) ns = STATE_Ok1; else if (~Decode1 & Enter) ns = STATE_Bad1; end ... STATE_Ok2: begin Open = 1’b1; ... EECS150 Lab Lecture #5
Lab #3 Solution (4) • How about using assign statements for outputs? • always @ (ps) begin • case (ps) • STATE_Init: begin • if (Decode1 & Enter) • ns = STATE_Ok1; • else if (~Decode1 & Enter) • ns = STATE_Bad1; • end • ... • STATE_Ok2: begin • ... • endcase • end • assign Open = (ps == STATE_Ok2); • assign Error = (ps == STATE_Bad2); • ... • We can exploit the fact that outputs are strictly state-dependent (Moore) EECS150 Lab Lecture #5
Synplify Warnings (1) • Why Bother? • “@W” in the Synthesis Report (Errors are “@E”) • Part of your project grade • Major warnings will cost points • Knowing these will make your life easier • Saves debugging • Always run synthesis before simulating in ModelSim! Incomplete Sensitivity List • ModelSim will use the sensitivity list • Synplify pretty much ignores it EECS150 Lab Lecture #5
Synplify Warnings (2) input Clock; reg [31:0] Count; // Counter always @ (posedge Clock) Count <= Count + 1; OK! input [15:0] A, B; output [31:0] Sum; output COut; // Adder always @ (A) {COut, Sum} = A + B; input [15:0] A, B; output [31:0] Sum; output COut; // Adder always @ (A or B) {COut, Sum} = A + B; Incomplete Sensitivity OK! EECS150 Lab Lecture #5
Synplify Warnings (3) • Latch Generated input [1:0] select; input A, B, C; output Out; reg Out; // Mux always @ (select or A or B or C) begin case (select) 2’b00: Out = A; 2’b01: Out = B; 2’b10: Out = C; endcase end input [1:0] select; input A, B, C; output Out; reg Out; // Mux always @ (select or A or B or C) begin case (select) 2’b00: Out = A; 2’b01: Out = B; 2’b10: Out = C; default: Out = 1’bx; endcase end EECS150 Lab Lecture #5
Synplify Warnings (4) • Combinational Loop • Must remove the loop or add a register • Multiple assignments to wire/reg • Nothing should be assigned to in more than one place! 0 1 0 1 2 3 ∞?? ∞?? 0 1 2 EECS150 Lab Lecture #5
Synplify Warnings (5) • FPGA_TOP2 always has warnings • Un-driven Input • Unconnected Output • These are truly unneeded pins • Things like the audio chips… • Your modules should not have warnings EECS150 Lab Lecture #5
Synplify Errors • Your design violates timing constraints • Right click on the Synthesize step • Go to properties • Uncheck Auto-constrain • Set frequency to 27 (MHz) • By default the software uses a 50% duty cycle and excessively restricts the delay of combinational logic. • In the future you might still get errors, in which case you might need to pipeline or redesign logic. EECS150 Lab Lecture #5
Debugging Hardware (1) • Debugging Algorithm • Hypothesis: What’s broken? • Control: Give it controlled test inputs • Expected Output: What SHOULD it do? • Observe: Did it work right? • If it broke: THAT’S GREAT! • If we can’t break anything like this then the project must be working… EECS150 Lab Lecture #5
Debugging Hardware (2) • Using the logic analyzer / ChipScope • The most reliable tool you have • When used properly • Use the triggers effectively • Trigger on recurring sequences • Trigger on errors • An unstable display is useless • Compare synthesis to simulation • ChipScope is almost as good as simulation EECS150 Lab Lecture #5
Debugging Hardware (3) • Before you change anything • Understand exactly what the problem is • Find an efficient solution • Evaluate alternative solutions • After the change • Fixes may make things worse sometimes • May uncover a second bug • May be an incorrect fix • Repeat the debugging process EECS150 Lab Lecture #5
Administrative Info • Lab/Project Partners • If you don’t have a partner, stay after lab lecture and we’ll help you get partnered up. • Remote access to Xilinx tools • Use Remote Desktop Connection to access kramnik.eecs.berkeley.edu. • A link to the kramnik set-up guide is on the documents page. • Also useful for transferring files to and from your U:\ drive. EECS150 Lab Lecture #5
Lab #5: Logic Analysis (1) • Exhaustive FSM Testing • Very similar to Part3 of Lab #4 • You’ll be mapping the whole FSM • No bubble-and-arc to start from • No single step • Takes an input every cycle at 27MHz • Much too fast to see on the LEDs • Logic Analyzer! EECS150 Lab Lecture #5
Lab #5: Logic Analysis (2) • Logic Analyzer • HP54645D Mixed Signal Oscilloscope • Analog Oscilloscope • Digital Logic Analyzer • Graphs Signals vs. Time • Like a timing diagram • Invaluable for Debugging • This is your only tool for examining your clocks • Easy to see trends in signals… EECS150 Lab Lecture #5
Lab #5: Logic Analysis (3) EECS150 Lab Lecture #5
Lab #5: Logic Analysis (4) • Procedure • Set up the Logic Analyzer • Synthesize the design • Write a test pattern and set SW10 • Press Single on the logic analyzer • Press Reset to start the test • Examine the waveforms • Build a bubble-and-arc diagram EECS150 Lab Lecture #5
The Logic Analyzer (1) • Graphs Voltage vs Time • Takes real signals from a CUT • Can show both analog and digital signals • Great for signal quality, delay, timing EECS150 Lab Lecture #5
Trigger Controls Digital Controls The Logic Analyzer (2) • 16 Digital Inputs • Excellent Debugging Tool • Not very many input signals EECS150 Lab Lecture #5
ChipScope (1) • Software based logic analyzer • Get results on the computer • Put a logic analyzer right into the FPGA • ICON – Connects FPGA to software • ILA – Does the actual analysis • More flexible than the bench analyzers • Can create busses • Advanced triggering support EECS150 Lab Lecture #5
ChipScope (2) • Steps to use ChipScope • Generate an ICON • Generate an ILA • Connect the ILA to the ICON • Synthesize, and implement your design • With the ILA and ICON • Program the CaLinx board • Run the ChipScope Pro Analyzer • Runs over the JTAG, not Slave Serial connection! EECS150 Lab Lecture #5
ChipScope (3) • Logic Analyzer Similarities/Differences • Triggering is similar • Can be set to show waves before trigger • Can trigger on repeated or combined events • Data/Trigger can be MUCH bigger • Up to 256bits wide • As many samples as Block RAM on the FPGA • Data is captured synchronously • Can’t look at clocks • Much easier to view waveforms EECS150 Lab Lecture #5
ChipScope (4) • ChipScope is useful to verify • In this lab we’re using it just to make absolutely sure • You will NEED ChipScope • You cannot debug a large design (i.e. your project) without it • Bench analyzers won’t show enough signals • It helps to master use of HP Logic Analyzer and ChipScope early on. • You want to have ready knowledge of both tools for when you’re working on the project. EECS150 Lab Lecture #5
ChipScope (4) • Detailed ChipScope Tutorial • http://inst.eecs.berkeley.edu/~cs150/sp06/Documents.php#Tutorials • Get used to reading technical documents and tutorials. • It’s a useful and necessary job skill for engineers. EECS150 Lab Lecture #5