Download
1 / 62
630 likes | 687 Views
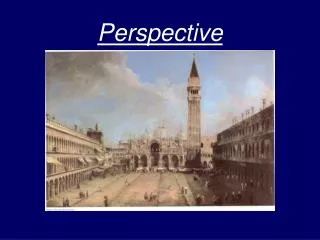
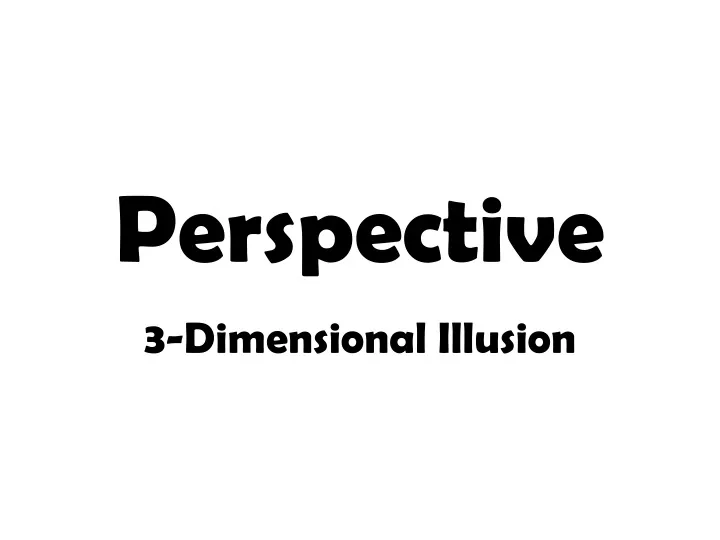
Perspective. 3-Dimensional Illusion. Objectives. Define and identify horizon line, converging lines, and vanishing point in works of art. Use a ruler properly to draw shapes in one-point perspective through various class activities. Copy the Definition Below.

E N D
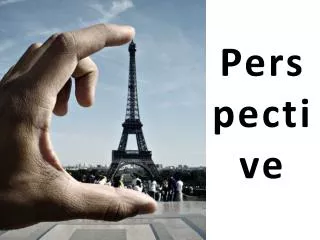
Perspective 3-Dimensional Illusion
Objectives • Define and identify horizon line, converging lines, and vanishing point in works of art. • Use a ruler properly to draw shapes in one-point perspective through various class activities.
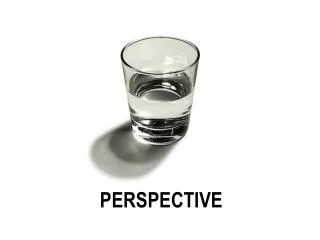
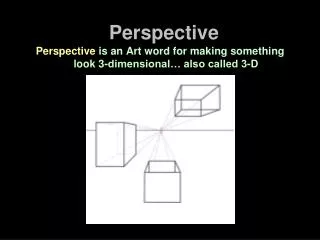
Copy the Definition Below Perspective - a technique artists use to project the illusion of 3-dimensional space onto a flat, 2D surface.
Early Egyptian Art Skewed perspective can be seen in early Egyptian wall paintings: • The figures appear twisted, and their eyes seem to face forward although they are in profile. • The background is extremely flat, no sense of deep space.
The Renaissance Brings New “Perspective” • There are now areas behind the subject matter. • Foreground – Area in the picture plane closest to viewer. • Middle Ground – Area in the picture plane between FG and BG. • Background – Area in the picture plane farthest from viewer. BG MG FG
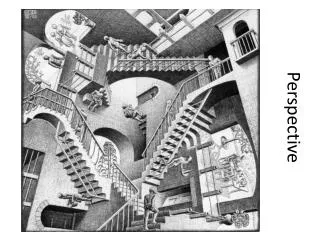
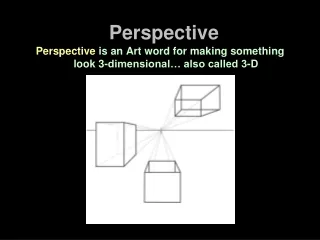
A One Point Perspective Vocabulary (1 Pt) Horizon Line (HL) is eye level. It’s the place where your eye falls on the opposite side OR where the sky meets the earth. Vanishing Point (VP) is the place on the HL where receding lines converge, or come together.
In one point perspective, lines seem to converge (come together) on the Horizon Line (HL) at a single point called the Vanishing Point (VP), which is where they disappear. In 1 Pt. Per., you FACE a surface and the sides recede to a single VP. 1 Point Perspective VP HL Converging lines in red, HL in yellow, and VP in blue
One Point Perspective at Worm’s Eye View, Street View, and Bird’s Eye View
One-Point Perspective Project Copy the expectations for your one-point perspective project: • Use 1 pt. perspective with a ruler to draw 4 shapes going to one VP. You can choose the types of shapes. Organic shapes are harder to do than geometric! • Create a HL and a VP. At least one shape must be bird’s eye, worm’s view, and street level. • On a separate piece of paper, put the HL and VP in the same exact spot. Draw a BG filled with a variety of lines. • Use a 4-color plan for the shapes and the BG. • Glue the perspective shapes onto the paper securely.
Linear Perspective Rules As things get farther away: • Things in front overlap things in back. • They get smaller. • Lines become lighter, thinner. • Value / color gets lighter.
Musacchio, an Italian painter, was one of the first artists to use atmospheric perspective. “Tribute Money”
One Point Perspective Project – Flying above a city • First you will follow the instructions and sketch out a city seen from overhead in your sketchbooks first. • You are required to have: • At least 8 buildings. • At least one street and street-level things drawn with atmospheric perspective. • Draw something in the foreground, above the buildings. • Create the city’s name using 1-point perspective in the bottom right corner. • Recreate the city on a larger piece of paper. Complete using pencil and lines for the buildings and color or shading for the other elements.
COPY Rubric for the Name in Perspective project. • Draw the letters of your name centered and balanced in terms of the height and width of the letters on the paper. • The letters must take up 50% - 75% of the paper. • Use 1 pt. perspective properly, including the cut areas on the back of your letters. • Use a ruler to achieve good craftsmanship and straight lines where necessary. • Color ALL areas of the paper neatly, leaving no uncolored areas. • Use color to show aerial / atmospheric perspective.
A B Two Point Perspective has the viewer looking at an object so that the viewer sees 2 sides, both of which recede, or converge, to two DIFFERENT vanishing points.
In 2 point perspective the viewer is looking at the corner. To VP A To VP B
2 Pt Perspective VP #2 lines in blue VP #1 lines in red
Predict and explain how this set of buildings would look if the VPs were closer together.
VPs farther away from the castle VPs close to the castle
Follow the directions below: • Draw a horizon line and a vanishing point wherever you choose across your paper. • Draw two cubes above and below the HL. • Trade papers with someone next to you and use a ruler to draw their shapes in perspective using the VP and HL.
Overlap is useful when depicting something in the foreground versus the background.
Two-Point Dreamhouse Project Expectations Copy down these expectations for your project. • Must be more than a simple rectangular shape (porches, extended rooms, curved corners, etc) • “A” work – Two stories …. “B” work – One story • For full credit, must include: • A roof • At least four windows and one door • Some sort of a front porch area • A driveway • Brick and one other “texture” (siding, roof shingles, etc.) • At least a few inches of fence • Landscaping (garden, trees,… don’t forget atmospheric perspective!) • As you’d guess, lines must all accurately follow your two vanishing points. You must also do VALUE SHADING on the entire picture!
Today’s Goals 1. Draw examples of the game board pieces depicting the proper size and overlap required in the foreground, middle ground, and background. 2. Continue developing the layout of the game board using the VPs properly. Include more details and the game pieces as you progress.
Nov. 20 and 21, 2014 (Art I) • Continue working on your Two-Point Perspective Board Game projects. • Outline your drawing in black marker when finished. • Begin coloring the letters and the board game using the colored pencils. Leave the background! Sketches will be graded today for completion!
Dec. 3, 4, and 5, 2014 (Art I) • Continue working on your Two-Point Perspective Board Game. • Be sure aerial perspective is done LAST with the oil pastels before turning it in. • Make sure your LABEL is on the back, too! Pick up an early finisher from my desk which is to be done in your sketchbooks and will be checked for progress. Let me know if you need paper for this activity!
1 Pt. Perspective in a Movie Scene Oct. 14 and 15, 2015 Q: How does the use of perspective in these movie scenes create a tense situation for the viewer?
Oct. 16 & 20, 2015 Answer the following questions. Q1: Comic books are known for their use of perspective. How does perspective convey action in a scene such as this one? Q2: Where is the vanishing point?
Oct. 21 and 22, 2015 Answer the following. Q1: Why is it important to understand perspective as an artist? Q2: What has been the easiest part of this perspective project? Q3: What has been the most difficult?
Early Finishers • Label your work using the heading on the overhead projector. • Turn in your work to the proper container. 3. Pick up a new worksheet on perspective from my desk and complete it.
Oct. 23 and 26, 2015 • Pick up a study guide from my desk. • Pick up the orange textbook “The Visual Experience” from the book shelf. • Take out a loose-leaf sheet of paper and a writing utensil. • Wait for further directions. **If you need to turn in your project from yesterday, please do so now.**
Directions • Turn in your textbook and study guide sheet, but hold onto your answers. • Take out your sketchbook. (Get a piece of sketch paper from my desk if you need.) • Pick up a ruler from my desk. • Draw a name (your own or someone else’s) in block letters using one-point perspective—this will now include cutting off the backs of the letters / shapes.