Download
1 / 35
480 likes | 1.01k Views
Learn the basics of Arduino programming for beginners and professionals. Explore its features, advantages, and practical applications. Discover resources and tutorials to kickstart your Arduino journey.

E N D
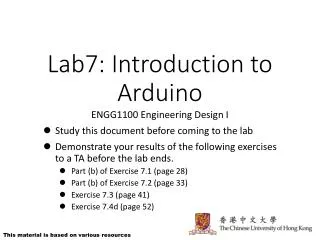
University of Donja Gorica Faculty for Information Systems and Technologies Faculty of Applied Science Introduction to Arduino programming Marko Simeunović, PhD
Introduction • Arduino – today most popular platform for rapid prototyping. • Consists of: • microcontroller board (hardware) and • IDE - integrated development environment (software). • Excellent for starting to learn electronics. • Its popularity comes from: • built in programmer, • microcontroller functions are organized in accessible packages and • programming is done using high level C++ language.
Introduction • Suitable for both beginners and professionals. • Advantages: • Inexpensive, • Cross-platform-based, • Simple and clear programming environment, • Open source and extensible software, • Open source and extensible hardware. • Large community.
How to start? • Arduino official page – https://www.arduino.cc/ • https://playground.arduino.cc/ • https://www.instructables.com/howto/Arduino/ • https://itp.nyu.edu/physcomp/ • https://makezine.com/category/technology/arduino/
Arduino boards ATmega328P AT91SAM3X8E ATmega32U4 1.5€ 12€ 3€ ATmega168V ATmega2560 ATmega328 2€ 2€ 6€
Arduino shields 3€ Ethernet shield WiFi shield Xbee shield
Arduino Uno • Pins: • GND • 5V and 3.3V • Analog • Digital • PWM • AREF • Communication: • UART • I2C • SPI
Setup Arduino IDE http://arduino.esp8266.com/stable/package_esp8266com_index.json
Setup Arduino IDE Tools/Board/Board Manager
Program structure void setup() { // Put code that runs at the begining } void loop() { // Infinite loop }
Reading and writing from Serial • Serial.begin(baud) - sets the data rate in bits per second (baud) for serial data transmission. • Data rates: 300, 600, 1200, 2400, 4800, 9600, 14400, 19200, 28800, 38400, 57600, or 115200. • Serial.read() – reads the first byte of incoming serial data available. It returns -1 if there is no data. • Serial.readString() – reads string. • Serial.write(data) – writes data to the serial port. • Serial.available()- returns the number of bytes (characters) available for reading from the serial port.
Reading and writing from Serial char input; void setup() { Serial.begin(9600); delay(2000); Serial.println("Type something!"); } void loop() { if(Serial.available()){ input = Serial.read(); Serial.print("You typed: " ); Serial.println(input); } }
Software Serial • Enables using several Serial ports on Arduino based board. • In order to use it, a library has to be included: #include <SoftwareSerial.h> • Creating SofrwareSerial object on D1 and D2 pins: SoftwareSerialEEBlue(D1, D2); // RX | TX • Limitations: • If using multiple software serial ports, only one can receive data at a time. • Not supported by some pins on some boards. • Limitations on maximum speed on RX pin.
NodeMCU and HC-05 #include <SoftwareSerial.h> SoftwareSerialEEBlue(D1, D2); // RX | TX void setup() { Serial.begin(9600); EEBlue.begin(9600); Serial.println("We have started..."); } void loop() { // Feed any data from bluetooth to Terminal. if (EEBlue.available()) Serial.write(EEBlue.read()); // Feed all data from termial to bluetooth if (Serial.available()) EEBlue.write(Serial.read()); }
String manipulation • String can be represented by: • array of chars or • String object. • Declaration of char arrays: char s1[30], s2[]=“First”; • Creation of String objects: String ss1, ss2=“First”; • Converting object to array and vice versa: ss2.toCharArray(s1, 20); ss1 = String(s2);
Useful functions • myString.concat(parameter) • myString.charAt(n) • myString.compareTo(myString2) • myString.endsWith(myString2) • myString.equals(myString2) • myString.equalsIgnoreCase(myString2) • myString.indexOf(val) • myString.length() • myString.toDouble()
Manipulating with I/O pins • pinMode(pin, mode) – setting pin to act as input or output. • modes - INPUT, OUTPUT, or INPUT_PULLUP. • digitalRead(pin) - reads the value from a specified digital pin. • output – LOW or HIGH. • digitalWrite(pin, value)- write a HIGH or a LOW value to a digital pin. • analogRead(analogPin) - reads the value from the specified analog pin. Possible values 0-1023. • analogWrite(pin, value) - writes an analog value (PWM wave) to a pin.
I/O pins – Example void setup() { pinMode(LED_BUILTIN, OUTPUT); } void loop() { digitalWrite(LED_BUILTIN, HIGH); // turn the LED on delay(1000); // wait for a second digitalWrite(LED_BUILTIN, LOW); // turn the LED off delay(1000); // wait for a second }
EEPROM read and write • EEPROM.begin(size) – EEPROM initialization. • size – number of bytes used for reading and writing (4 to 4096). • Writing to EEPROM: EEPROM.write(addr, data); // store one byte EEPROM.commit(); // after commit function • Reading from EEPROM: char Data; // why char? Data = EEPROM.read(addr);
EEPROM write example #include <EEPROM.h> intaddr = 0; // Starting address void setup() { EEPROM.begin(512); EEPROM.write(addr, 'A'); addr++; EEPROM.write(addr, 'B'); addr++; EEPROM.write(addr, 'C'); addr++; String www = "www.udg.edu.me"; writeString(addr, www); EEPROM.commit(); //Store data to EEPROM }
EEPROM write example void writeString(intaddr, String s) { for(inti=0;i<s.length();i++) { EEPROM.write(addr+i,s[i]); } } void loop() { delay(10); }
EEPROM read example #include <EEPROM.h> intaddr = 0; void setup() { EEPROM.begin(512); Serial.begin(9600); Serial.println(""); Serial.print(char(EEPROM.read(addr))); addr++; Serial.print(char(EEPROM.read(addr))); addr++; Serial.println(char(EEPROM.read(addr))); addr++; String www = readStringEEPROM(addr, 14); Serial.println(www); }
EEPROM read example String readStringEEPROM(intaddr, intnumByte) { String s = ""; for(inti=0;i<numByte;i++) { s = s + char(EEPROM.read(addr+i)); } return s; } void loop() { delay(10); }
NodeMCU and WiFi • Connecting to a network: WiFi.begin(ssid, password); • Retrieve network status: WiFi.status() – returns WL_CONNECTED if is connected • Getting device IP: WiFi.localIP(); • Setting static IP: IPAddressip(192,168,1,200); IPAddressgateway(192,168,1,254); IPAddresssubnet(255,255,255,0); WiFi.config(ip, gateway, subnet);
NodeMCU and WiFi • Setting WiFi mode: WiFi.mode(mode); • mode can be: WIFI_STA and WIFI_AP.
Sending HTTP GET request #include <ESP8266WiFi.h> #include <ESP8266HTTPClient.h> const char* ssid = "Telia-9E09DD"; const char* password = "JOHE45SF3C"; void setup () { Serial.begin(115200); WiFi.begin(ssid, password); while (WiFi.status() != WL_CONNECTED) { delay(1000); Serial.print("Connecting.."); } }
Sending HTTP GET request void loop() { if (WiFi.status() == WL_CONNECTED) { HTTPClient http; http.begin("http://jsonplaceholder.typicode.com/users/1"); inthttpCode = http.GET(); if (httpCode > 0) { String payload = http.getString(); Serial.println(payload); } http.end(); //Close connection } delay(30000); //Send a request every 30 seconds }
HTTP WiFi server on AP #include <EEPROM.h> #include <ESP8266WiFi.h> #include <DNSServer.h> #include <ESP8266WebServer.h> #include "DHT.h" #define DHTPIN 2 const byte DNS_PORT = 53; IPAddressapIP(192, 168, 1, 1); DNSServerdnsServer; ESP8266WebServer webServer(80); DHT dht(DHTPIN, DHT11);
HTTP WiFi server on AP void setup(void){ WiFi.mode(WIFI_AP); WiFi.softAPConfig(apIP, apIP, IPAddress(255, 255, 255, 0)); WiFi.softAP("WiFi test"); dnsServer.start(DNS_PORT, "*", apIP); webServer.onNotFound([]() { webServer.send(200, "text/html", webPage("")); }); webServer.on("/Temp", [](){ webServer.send(200, "text/html", webPage("Temp: " + String(dht.readTemperature()))); delay(100); }); webServer.begin(); dht.begin(); Serial.begin(9600); Serial.println("Started..."); }
HTTP WiFi server on AP void loop(void){ dnsServer.processNextRequest(); webServer.handleClient(); delay(2000); }
Conclusion • A short overview of Arduino programming is given. • We covered the following: • Serial communication, • I/O pin manipulations, • EEPROM manipulation, • Sending HTTP requests, • Setting HTTP server on AP. • This lecture covered only a small part of functionalities.