Download
1 / 25
260 likes | 349 Views
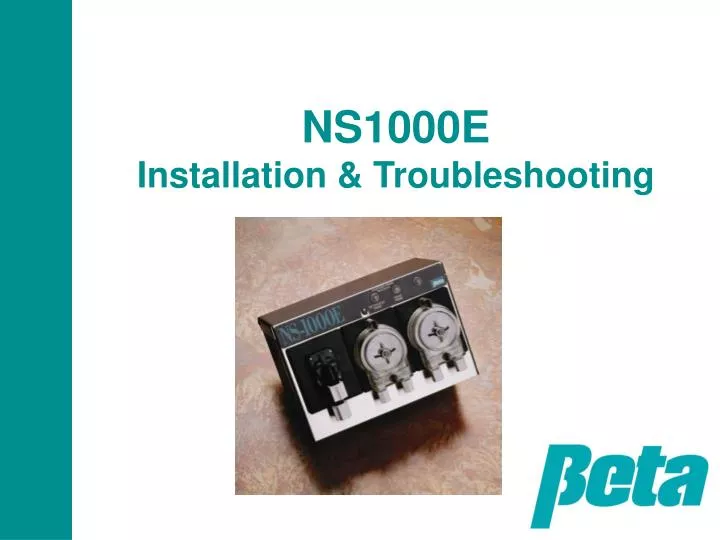
NS1000E Installation & Troubleshooting. Presentation Objectives .

E N D
Presentation Objectives • This presentation is intended for both experienced field personnel familiar with warewashing installations, as well as new field service personnel who have only a rudimentary knowledge of accessing triggers and conductivity control. • The objective is to train the installer to be able to install NS1000E on either a door or conveyor dishwashing machine, and troubleshoot any unusual conditions they may encounter. To train new installers, we recommend using this presentation in conjunction with an actual installation or at least a lab installation followed by a site visits to see typical conveyor and door machine installations. • Excluded from this presentation is detailed training on electrical safety, which should always be performed prior to attempting any high voltage installations. In brief, however, power to the dishwasher and dispenser should be shut off at the source prior to opening them, and a voltmeter should be used to verify the power’s off prior to doing wiring.
This presentation is comprised of the following sections • Physical installation: mounting, tubing, solenoid water supply • Wiring: power connection, trigger/signal wiring • Programming • Troubleshooting
NS1000E Mounting Location • Pick a spot to the pumpbox(s) on the wall over the dish tray counter or behind the washer; the former is preferred so it’s easy for the dishwashers to see and react to alarms. • Hold the NS1000E up with a level on it and mark the screw holes on the wall; drill, put in screws, and then slide the unit on the screws • For solid or powder detergent capsule bowls, be sure to install in a location where it’s easy for the dishwashers to check and replace the capsule. NS1000E can be mounted onto the top of the washer using metal bracket kit 018224
TUBING: Chemical Pickup Lance Connection • Connect tubes to standpipes as shown at left. The standpipes come with nut fittings to connect to standard 1/4” ID detergent and 1/8” ID rinse polyflow transport tubing • ¼” red and ¼” blue tubing is also available for customers who prefer to use color tubing (be sure to use a ¼” T rinse nut fitting if you use ¼” rinse tubing) 035623 Detergent 1/4” ID 18” long CPVC standpipe 050572 Rinse 1/8” ID 18” long CPVC standpipe
TUBING:Pump Connection • The left side of the pump is the suction side which should be connected to the chemical supply • The right side of the pump is the chemical discharge side which will be connected to injection fittings on the washer • Loosen tube nuts, insert tubes, and tighten nuts as shown
TUBING:Injection Fittings • Mount the detergent bulkhead fitting in a 7/8” hole above the water line, just above where the probe will be located. Make sure the area has plenty of water circulation, such as an area near the wash pump strainer inlet so the detergent will get circulated immediately • Add rinse injector to rinse line, in a location away from large amounts of steam or moving parts which can induce thermal or physical fatigue on injector plastic over time. If using a pressure switch or a sanitizer, an injector with two connections is required, one for the rinse and one for the sanitizer or copper tubing line to the pressure switch. We recommend using a stainless steel injection fitting if installing in a remote location, since they are impervious to thermal and physical fatigue • Tubes connect to the detergent bulkhead fitting and rinse injection fitting just like they do to the pump nuts. Don’t use an old hole if it’s in the wrong spot! Making a new hole during installation always takes less time than getting a trouble call and making a new hole on a separate trip
Solenoid & Bowl • Connect water supply tube to water inlet on bottom of solenoid. Be sure to verify which way the arrows point on the solenoid, since standard warewash solenoids have the water inlet on the bottom whereas OPL solenoids have it on the top. • Connect outlet to bowl • Mount bowl in a location where it will be easy for the dishwashers to replace the detergent capsule
WIRING:Main Power • NS1000E uses triggers as its power source, typically using a separate power/signal for detergent and rinse. • Crimp a 10-12 GA (4mm2) ground wire to the ground connection next to the terminal block. • Run power and ground wires through a strain relief such as 090369 or conduit connection on bottom of unit. Replace cover so it supports the surface around the knockouts prior to knocking them out • Never run the probe wire next to the power or trigger wires; the electrical noise they emit can interfere with getting a correct probe reading
WIRING: Probe Connection • Mount conductivity probe 3-4 inches (8-10 cm) from the bottom of the wash tank, about 3”-5”/7-12 cm over the detergent injection point and as close to the wash pump intake strainer as possible. The terminals should be vertically oriented as shown. • Ensure the probe location is not close to heater elements, corners, or in the path of moving mechanical components. Ensure the probe location is in an area with plenty of circulation • Connect probe wires to conductivity input on the PCB. If using a temperature compensated probe, use a four wire cable and run the thermistor/temperature wires to the temp input Be sure you do not mount the probe in an old hole that’s a bad location, since that can produce bad probe readings or subject the probe to too much thermal shock
PROGRAMMING: Button Functions • To enter programming mode, hold down the Program/Run button for 5 seconds. • The left digit on the display is the setup menu number and the two right digits are the setup menu value. • Use the Program/Run button to change to the next menu and the prime buttons to change the menu values. • The detergent prime button increases the value and the rinse prime button decreases the value. (Feed times are set by pumping the desired amount into a graduated cylinder) • The alarm volume adjustment potentiometer adjusts the alarm volume from 0 – 93 decibels If you don’t do any programming for 60 seconds, the NS-1000E will automatically return to the run mode.
PROGRAMMING: Menu Guide NS1000E contains this chart in the manual, and in a reference card you can leave in the dispenser, so you’re sure to always have this info handy!
PROGRAMMING: Menu 2 • After picking probe mode (01) or probeless mode (02) on menu #1, you’d proceed to menu #2. • Probe mode: As shown in the reference chart, menu #2 is alarm delay in probe mode. I.e. it’s the amount of time the detergent will be on before triggering an alarm to indicate out of product or drain open. • The example on the left shows a value of 15 for menu #2; in probe mode this would cause the alarm to start beeping after 150 seconds of detergent on time. • Probeless mode: This menu is rack time in probeless conveyor mode. It isn’t used on probeless door machines. The example on the left shows a value of 15 seconds, which in probeless mode on a conveyor would cause the recharge to come on every 15 seconds.
PROGRAMMING: Menu 4 • Probe Mode: In probe mode, menu 4 is the setpoint. Setpoint controls detergent concentration, and varies with the chemical being used and water hardness. In the example shown on the right, a setpoint of 35 Beta Units has been programmed. • Probeless Mode: In probeless mode, you’ll push the detergent prime button to pump the amount of chemical required for recharge, and the screen will show the number of seconds of pump time. (Note you push once to start and again to stop)
PROGRAMMING: Menu 5 • Probe mode: Menu 5 is the overfeed stop, or amount of time the alarm is on before the detergent is shut off. • Remember total detergent alarm time before stopping is low detergent alarm delay (menu 2, beeping alarm) + overfeed stop (menu 5, steady on alarm) • Probeless mode: Menu 5 is detergent initial charge time. Use the detergent prime button to dispense the requisite amount of product into a graduated cylinder, pressing the button once to start and once to stop. The rough number of seconds will be displayed on the screen in 10 second increments. • Don’t worry that the unit shows “02” for either 22 or 28 seconds; the dispenser keeps the precise time in memory even though it can’t display it on the 3 digit screen.
PROGRAMMING: Menu 6 • Probe Mode & Probeless Mode: Menu 6 is rinse pump delay time. For most installs it will be 0, as shown on the right.
PROGRAMMING: Menu 7 • Probe & Probeless Modes: Menu 7 is the rinse speed
PROGRAMMING: Menu 8 • Probe Mode & Probeless Mode: Rinse runtime limit, set to 20 seconds in the example on the right
PROGRAMMING: Menu “d” • Probe Mode: Menu d reduces detergent overusage by cycling the pump on and off. • 01=1 second on, 9 seconds off • 05=5 seconds on, 5 seconds off (as shown in the example, a rather typical setting) • 09=9 seconds on, 1 second off • 10=on continuously • Probeless Mode: Menu d dictates what triggers initial charge. Initial charge is the dose of chemical when the tank is filling. • 00=Machine power triggers initial charge once on for 20 seconds. Use this setting with all door machines, and with conveyors where a special separate signal for tank fill can’t be found. When the detergent signal’s received, recharge will begin immediately and then initial charge will come on after 20 seconds.) • 01=Conveyor with disparate initial fill signal only (dry contact through probe or temp connection)
PROGRAMMING: Menu E • Probe Mode & Probeless Mode: Menu E determines whether the sanitizer pump will turn on with the rinse or detergent. • 00=Feed sanitizer with rinse • 01=Feed sanitizer with detergent
PROGRAMMING: Menu F • Probe Mode & Probeless Mode: Menu F determines sanitizer pump speed, 0-99% • In the example shown, the speed has been set to 20%
TROUBLESHOOTING: Solenoid Not Activating • If the solenoid doesn’t make a clicking sound when turned on/off, verify wires are attached and supplying voltage with voltmeter. • If there’s no voltage from the PCB, try supplying voltage by priming. If priming doesn’t supply voltage to the solenoid replace the PCB; if it does, correct programming and troubleshoot probe • If the dispenser is turning on voltage to the solenoid, but it isn’t feeding or isn’t making a click sound, it’s likely clogged. • If it’s a metal solenoid, remove the strainer cap shown at top left, clean the cylinder filter, and reassemble • If it’s a plastic solenoid, disassemble and clean the round rubber diaphragm shown at left; if diaphragm is damaged replace it or the solenoid